- REVIEWS
Camera Reviews 
More Reviews Mobile Reviews Photography Reviews - GALLERIES
- VIDEOS
- BUYER'S GUIDES
Master Class
A Shared Experience; Photo & Digital Arts Go Hand In Hand Page 2
 |
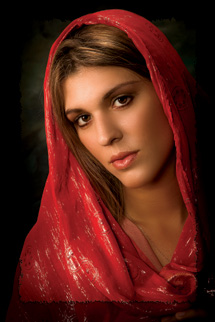 |
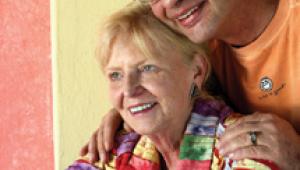
Distinct Look
Alexis, another of our models, posed for us wearing some of her own clothing
and then posed for us draped in a fabric supplied by Vered. Vered is Canon's
representative, who came to the class to lend cameras and lenses to those who
wanted to try the latest equipment available. She is also a photographer/stylist
on her own, so she brought all kinds of portrait props.
I explained to the class that both of these last two portraits were a 2/3 view
of the faces, yet they both have their own distinct "look." As one
can see, my 1, 2, 3 approach to portraiture actually unlocks many doors, rather
than being restrictive.
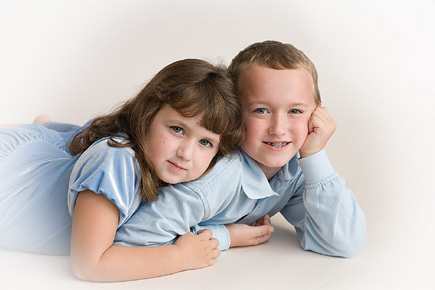
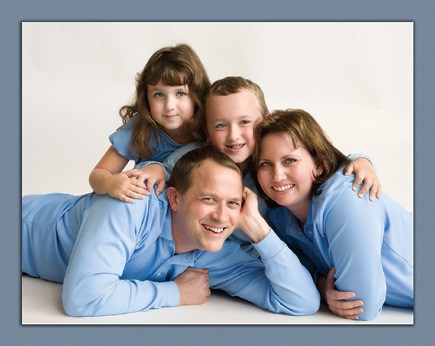
High-Key Natural Light
Dave and Cathie Barron, photographers in the class, brought their children in
one afternoon for some family pictures. They dressed appropriately by having
everyone in pastel blues. The matching clothing allowed me to blend their bodies
together in the portrait, so that their faces would jump out.
I wanted to photograph them outdoors. On the way out I noticed that just inside
the large glass doors of the hotel the light was beautiful. I decided to use
a roll of seamless white paper for a high-key portrait of them there. I positioned
them at an angle to the light to create the same light pattern on their faces
that I would have used with studio lighting. Remember? One light pattern for
just about everything that I do!
I laid them down on the paper and shot away. No one could believe how easy it
was. Eddie retouched their pictures afterward, affixing his miraculous "glow"
to both of these images and printed them out 24x36" on Canon's W6400
printer.
 |
 |
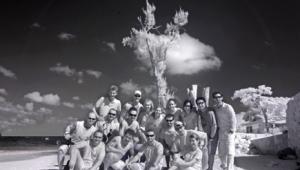
Group Shots
This began as a project to show how to put together groups using simple, stacking
plastic outdoor armchairs. There were basically four people to each chair. One
seated in the chair, itself. Women's legs are crossed at the ankles with
the leg that's closest to camera crossed over the other. Men sit with
their legs not crossed and their front leg pointed toward the camera. Then,
there was a person seated on each arm of the chair facing in toward the center
of the picture. Those seated on the arms sit behind the person seated in the
chair. The fourth person stands behind the seated person.
This allows no two heads next to each other at the same level, unless there
is a person between them above or below. We added a few more people kneeling
or sitting on the ground between the chairs and a few more in the very back,
standing on other chairs.
If you look carefully at the class picture you will see that Eddie and I are
on both sides. Eddie did this by taking two pictures, moving the camera only
slightly. Then, in Photoshop he "stitched" the two images together.
His incredible finishing touch was done by applying a third party software (LucisArt,
www.lucisart.com) that
made the photograph take on an artistic appearance that I had never before experienced.
This was the first joint venture between Eddie and I, but certainly not our
last as the five-day class was a huge success. A sell-out far in advance! We
will repeat the joint venture again in Hollywood, Florida, in November--hopefully,
though, not right after another huge hurricane!
 |
You can see where Eddie is teaching next by visiting his website at: www.eddietapp.com.
See my teaching schedule by going to www.montezucker.com.
|
| |||||||||
- Log in or register to post comments


![]()
Get the Latest Photo Tips, News & Reviews from Shutterbug!
| Camera Reviews Other Reviews | Mobile Reviews Photography Reviews Columns | News | Features | How-To | Resources |
 © 2025 Shutterbug
AVTech Media Americas Inc., USA
All rights reserved