- REVIEWS
Camera Reviews 
More Reviews Mobile Reviews Photography Reviews - GALLERIES
- VIDEOS
- BUYER'S GUIDES
On The Road With Monte; The Yucatan Experience: Seeing The Light—Part 2
One light pattern for everything--that's what I teach. Boring, you
say? I don't think so. It simply makes life easy. With one light pattern,
two poses (Feminine and Basic), and three camera positions (you place the lens
where it sees either full face, 2/3, or profile) you're free to express
your creativity.
The light pattern you see in most of my photographs is simply light in both
eyes, a shadow on the side of the nose that goes from the bridge of the nose
down to the base of the nose. There is a similar amount of light on both cheeks.
Photograph from the shadowed side of the face, shooting out toward the light.
Follow The Light
You see the light pattern on this first profile picture of the ballerina at
the open window. I positioned the camera to place her profile against a simple,
dark area of the background.
While preparing this photograph for publication I eliminated a lot of distractions
on the wall in the background using the Patch tool in Photoshop. I then blurred
the background with Gaussian Blur.
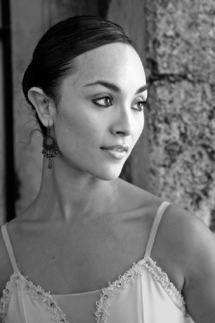
A few moments later I photographed the same young woman close-up in the same
location. Camera position for this portrait was the 2/3 view of her face. It's
the same light pattern, of course, in both pictures. I changed this portrait
from color to black and white by selecting the red channel in Photoshop and
adjusting the levels for the contrast I wanted.
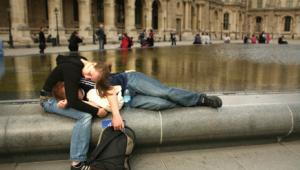
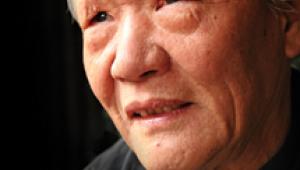
Another model was posed similarly by an opening to an inner courtyard. Notice
that the light pattern is the same on all of these portraits. For these last
two portraits their bodies are facing directly toward the lens. I always leave
extra space in front of the faces when the subjects are facing to the right
or left. Notice how I used the leaves of the plant to complete the horizontal
composition.
 |
|
|
 |
Inclusive Posing
Late in the day we posed one of the ballerinas on the ledge of one of the openings
in the wall surrounding the church. I brought her to the near edge of the seat
after noticing that her leg and feet seemed to be cut off when she sat more
in the center of the ledge. All natural light again. I carefully positioned
my camera to place her within the blue area of the photograph.
 |
You see the light pattern on this first profile picture of the ballerina at
the open window. I positioned the camera to place her profile against a simple,
dark area of the background.
While preparing this photograph for publication I eliminated a lot of distractions
on the wall in the background using the Patch tool in Photoshop. I then blurred
the background with Gaussian Blur.
A few moments later I photographed the same young woman close-up in the same
location. Camera position for this portrait was the 2/3 view of her face. It's
the same light pattern, of course, in both pictures. I changed this portrait
from color to black and white by selecting the red channel in Photoshop and
adjusting the levels for the contrast I wanted.
Another model was posed similarly by an opening to an inner courtyard. Notice
that the light pattern is the same on all of these portraits. For these last
two portraits their bodies are facing directly toward the lens. I always leave
extra space in front of the faces when the subjects are facing to the right
or left. Notice how I used the leaves of the plant to complete the horizontal
composition.
 |
|
| |||||||||


![]()
Get the Latest Photo Tips, News & Reviews from Shutterbug!
| Camera Reviews Other Reviews | Mobile Reviews Photography Reviews Columns | News | Features | How-To | Resources |
 © 2026 Shutterbug
AVTech Media Americas Inc., USA
All rights reserved