- REVIEWS
Camera Reviews 
More Reviews Mobile Reviews Photography Reviews - GALLERIES
- VIDEOS
- BUYER'S GUIDES
On The Road With Monte; The Yucatan Experience: Seeing The Light—Part 1
My classes out of the country offer possibilities that keep my life and my
photography exciting. For the past three years Merida, Mexico, has been an adventure
in teaching. Sights and sounds...color and composition...all available
just for looking and seeing. The challenge for me is always to teach photographers
to see how the light is playing on their subjects and to show them how to take
advantage of it. By the end of the class it's my goal to make certain
that each photographer has become aware of the light surrounding them. They
also need to know what to do with it once they've found it.
My first day of classes began with the need to first analyze faces. I stressed
that camera position is chosen very carefully to photograph either full face,
2/3, or a profile. Bodies are always angled at an approximate 45Þ to the
camera, except for the 2/3 view in what I dub the "Feminine Pose."
For that camera position alone the body faces directly toward the lens.
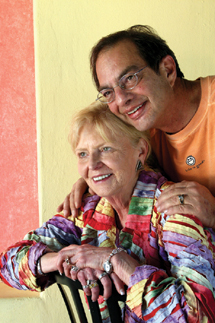
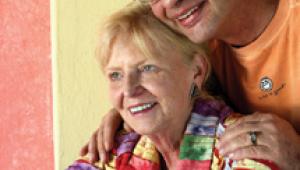
Colorful Images...And Custom White Balance
I stressed the need for simple clothing: solids with no patterns and colors
that don't take attention away from the face. But one of the married couples
in my class appeared in clothing that would ordinarily have definitely been
"out of the question" for a portrait. Yet, here in Mexico, their
outfits seemed to go with the territory. When someone pointed out one of the
more colorful walls in our hotel I knew that this was a marriage made in heaven.
 |
|
|
I was shooting strictly by window light with a silver reflector being used
to open up the shadow detail. The first exposure (before custom white balancing)
found their faces reflecting the colors bouncing off the wall. In just a few
seconds I did a custom white balance with an ExpoDisc. The skin tones were perfect.
At that point the class immediately saw the need for custom white balancing.
Gear For The Trip
Almost all of my images that week were created with Canon's EOS 5D camera
using Canon's 24-105mm f/4L Image Stabilized lens. I hadn't yet
gotten my EOS 30D. If I'd had both cameras for the trip I could have used
either one of them. The EOS 5D, of course, gave me larger files, so I'm
happy about that. My 2GB memory card is by Delkin. The only other camera that
I used was my EOS D60 that was adapted to shoot infrared.
Open The Shadows
We were all looking for daylight under cover and close to something that would
keep the light coming from a single direction. The area outside, next to the
main lobby, was ideal. Light was coming from our right. The entrance to the
hotel was just to the left of this group. All we needed was a silver reflector,
camera left, to open up the shadows.
 |
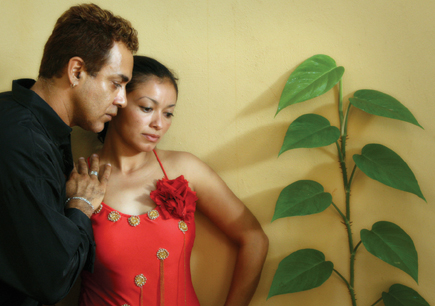
Finding Locations
We were able to get two of the hotel's entertainers to pose for us within
the hotel's environment. When I asked the photographers to scout a suitable
location no one saw the possibility that this simple wall between two of the
condos offered. I, however, kept walking by this wall each time I went to my
room. I saw the plant growing on this solid colored wall and saw it as an ideal
setting for a shot. When I posed the two of them all it took was a small silver
reflector to pick up some sunlight and bounce it into what would otherwise have
been a completely flat-lit situation. The results astounded everyone. They had
passed by this location many times without even noticing it. They were looking
for something much more elaborate. Lesson learned!
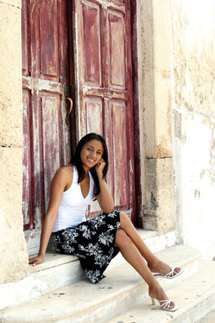
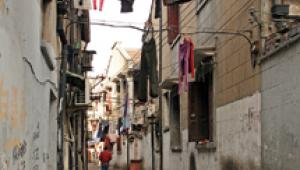
One of our outings took us to a neighboring small town where I had once before
photographed a model in front of doors leading to a police station. That same
location again provided us with an ideal location for a portrait. The light
steps and walls surrounding the doorway helped to create a framework for our
subject. For this picture I used all available light. No reflectors needed.
 |
 |
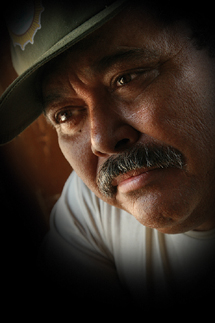
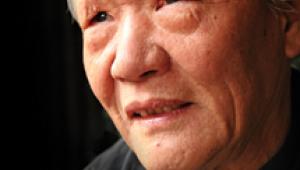
Using Contrast
The police chief was standing outside the doors when we shut the entranceway.
Remembering that we had done the same thing the year before, he was so cooperative
that I just had to do a portrait of him as well. His dark skin needed contrasty
lighting to capture his complexion. To create the lighting I brought him just
inside the doorway, lit the right side of his face with daylight and used my
silver reflector for the main light. That meant positioning the reflector camera
left, turning it toward the open door to pick up the light and bouncing it onto
the left side of his face. I tipped the top of the camera to the right to create
the angular positioning of his face within the composition. In Photoshop I darkened
his hat and shirt to keep them from distracting from his face.
 |
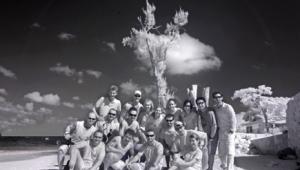
Group Lighting
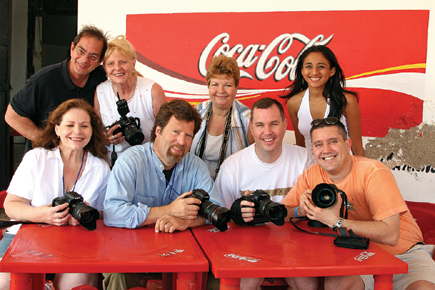
We stopped for a little refreshment in a local restaurant and photographed the
group during a break. The tables were under cover, of course, facing out toward
the open daylight. Each time I photographed in low light under cover I did a
custom white balance by placing the ExpoDisc over my lens and making an exposure
while pointing the camera toward the light source.
 |
Foreground And Background
On another outing close to our base hotel we visited ancient pyramids. It was
as if we went off the road and stepped into antiquity. These structures were
still standing after thousands of years. Unbelievable! For this picture we posed
our model dressed completely in black, so that he would stand out from the busy
stonework. Outdoors in direct sunlight I simply set the white balance to sunlight.
|
| |||||||||


![]()
Get the Latest Photo Tips, News & Reviews from Shutterbug!
| Camera Reviews Other Reviews | Mobile Reviews Photography Reviews Columns | News | Features | How-To | Resources |
 © 2026 Shutterbug
AVTech Media Americas Inc., USA
All rights reserved