- REVIEWS
Camera Reviews 
More Reviews Mobile Reviews Photography Reviews - GALLERIES
- VIDEOS
- BUYER'S GUIDES
Harman Direct Positive Paper: Pinhole, Photograms & A Large Format DPP In One
You can use Harman Direct Positive Paper (hereafter HDPP) in a whole spectrum of ways. At one end of the spectrum is the “Wow! Lookit!” of a school science project. At the other is a creative tool that will probably prove useful and profitable for some fine art photographers, and even some advertising photographers. We keep thinking of new ways to use it, but then again, you have to. It is a classic example of “creative limitation,”
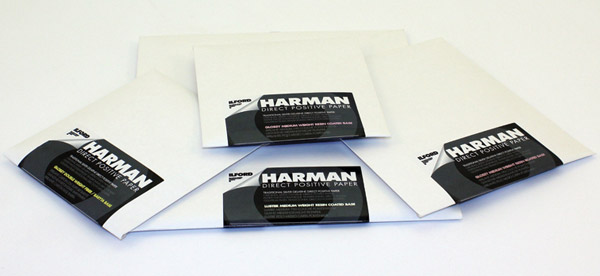
Courtesy of Ilford Photo
because you have to think quite hard about the best ways to exploit a material that’s deadly slow, contrasty, non-red-sensitive, fairly critical when it comes to exposure, and gives a laterally reversed (mirror) image.
Basically, HDPP does exactly what it says on the packet. It comes from Harman (H), the parent company of Ilford. It’s Direct (D), in the sense that it is not reversal processed, but goes through exactly the same chemicals as any other photographic paper: develop, short stop, fix, wash. It gives a Positive (P) image, not negative. Finally, it’s Paper (P), in a choice of resin coated and fiber based.
After that, though, it starts getting complicated…
Ilford/Harman market it as the ideal product for pinhole photography, particularly in schools and colleges. Because it’s non-red-sensitive, it can be loaded, cut, and processed under a red safelight; because it’s paper, it can be cut to size far more easily than film; and because it’s a direct positive, there’s no need for contact printing.

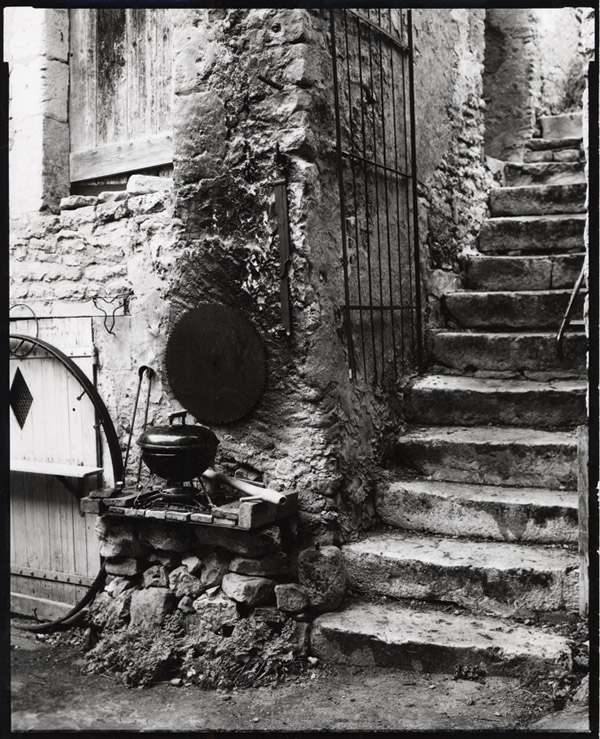
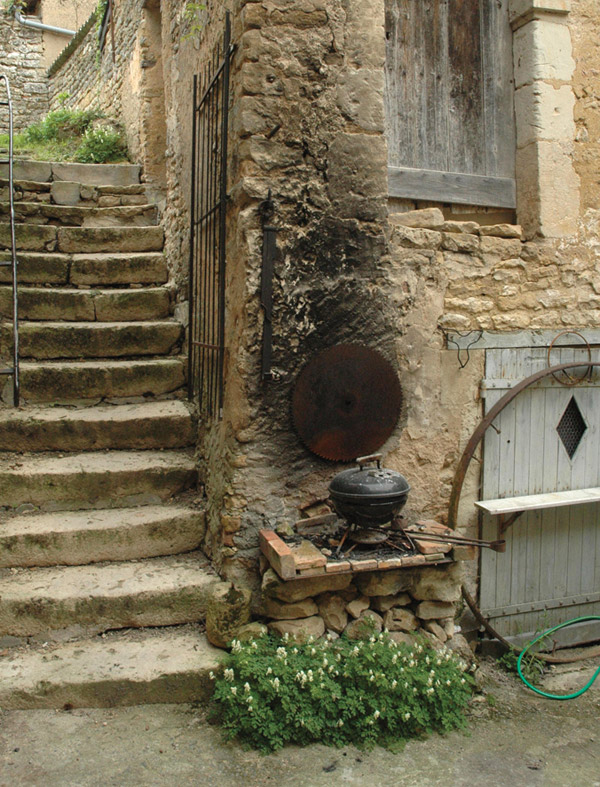
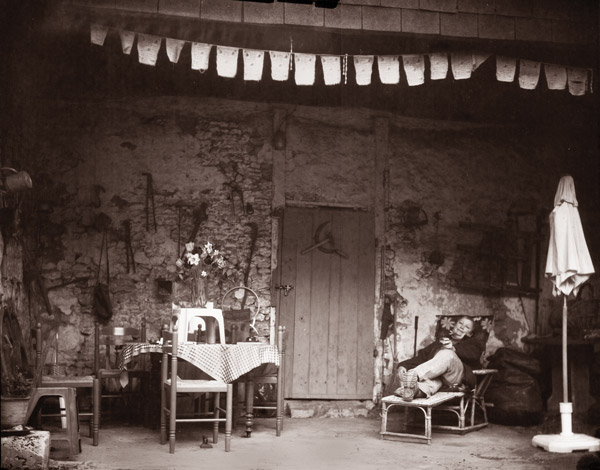
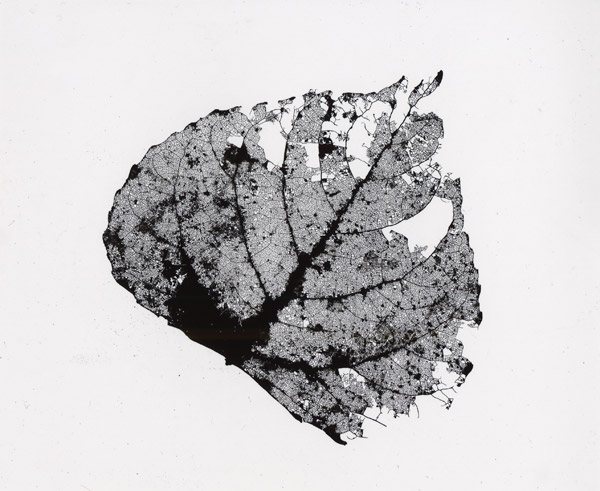
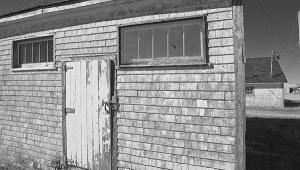
All Photos © Roger Hicks Ltd.
They are right about pinholes. It’s brilliant. It’s a lot easier to handle than film, especially in large formats: big wet sheets of film sometimes seem to leap and slither like live fish. Exposure is more critical than for film, but you can still get good results across a wide range of exposures. And, of course it saves a lot of time and money: it’s a lot cheaper (and easier) than buying both film and paper. It comes in the usual cut sizes (4x5”, 5x7”, 8x10”, 11x14”, 16x20”), and in rolls of 61.5cm x 20m (24.2 inches x 66 feet) or 127cm x 15m (50 inches x 49 feet). A packet of 25 sheets of 8x10” direct from the factory in the UK (via www.ilfordphoto.com) is just under £25 (a bit under $40), but that doesn’t include shipping and taxes. In the shops in the UK, it’s around £30 ($45 to $50, depending on the exchange rate) but that includes a 20 percent Value Added Tax.
Great though it is for pinholes, to be honest, we’ve never been great ones for this type of photography. Our immediate reaction was that it would be even more fun exposed in big, old plate cameras from 4x5” upward, including our 12x15” Gandolfi Universal, which was probably built between 1895 and 1914. Oh boy, were we in for a voyage of discovery.

There’s no room here for the full saga of adapting lenses, rebuilding Thornton-Pickard roller-blind shutters, making lens panels, and repairing (and adapting) 100-year-old glass plate holders, but with any luck, this will be on our website, www.rogerandfrances.com, by the time you read this. You’ll also find quite a bit there about handling and loading large format cut-film holders, which are the easiest way to use this stuff.
The first thing to say for present purposes, therefore, is that the Resin Coated (RC) and Fiber-Based (FB) materials are very different indeed. The RC is faster and contrastier—and given that contrast is high, even with pre-flashed FB paper, this is important.
Pre-Flashing
If you give the paper a very weak pre-exposure to non-image-forming (diffuse) light, you make it about a stop faster (film ISO equivalent 4-6 instead of 2-4) and rather less contrasty. The reason we give a range of speeds is that we found a great deal depended on the lens, lighting, and subject matter. For example, at a given aperture with our 300mm f/9 Nikkor, we found we needed to give more than twice as much exposure as with our 300mm f/3.5 Tessar. HDPP is a material you are going to have to test for yourself to establish a “film” speed.
The pre-flash process is described in the Ilford HDPP PDF file on www.ilfordphoto.com, but it is worth giving a brief summary here. You make a test strip, ideally using an enlarger with no film in the negative carrier; develop it; and the pre-flash time is the last that does not show the slightest differentiation from maximum black. Work under the recommended red safelight, of course, and make sure the rest of the paper is protected (in the original packet) when making the pre-flash exposure. Make a note of the pre-flash data (column height, lens aperture, time) in a notebook or on the paper packet: you need to establish it only once. You can also pre-flash with a light bulb, or even in camera with a diffuser over the lens.
You need to shoot the pre-flashed paper within an hour or two because sooner or later all the electrons excited by the pre-flash will fall back into their ground state. Otherwise Ilford would sell it pre-flashed. We pre-flash almost all our HDPP shots, except for the ones of very low-contrast subjects; the pinhole pictures, which are inherently of low contrast; and the photograms (see below). You need to process fairly soon after the exposure, too: again, an hour or two.


Exposure In Camera
For pinhole images, you’ll typically need an exposure of 1-2 minutes in summer sun; 2-3 minutes in “cloudy bright” or hazy sunlight; 4-5 minutes on a day when there is a mixture of clouds and blue sky; 6-10 minutes on a dull or cloudy day; and maybe an hour in a normally lit interior. Use the shorter times for the pre-flashed paper.
With large format cameras, use a meter, and remember that when you are determining “film” speeds, you can actually do a “test strip” in camera. Let’s say the meter recommends 1 second at f/16. Set the lens to f/16 and the shutter to 1/2 sec. Expose the whole sheet. Push the dark slide in so that it covers about one-third of the paper. Give another 1/2 sec. Push it in still further so that it covers two-thirds of the paper, and give a whole second. You have now given 1/2 sec; 1/2 + 1/2 = 1 second; and 1/2 + 1/2 + 1 = 2 seconds.
HDPP should always be developed to completion, i.e., until no more density comes up. This means at least a couple of minutes in most developers, and possibly as much as five in some, to get a maximum black. “Snatching” the print out of the developer too soon will result in a muddy print with poor tonality and weak blacks. Exposure therefore needs to be fairly accurate for optimum tonality. On the other hand, you are likely to get acceptable results for many purposes across quite a range of exposures, and many people relish the element of chance that is involved in processes such as this. Some even go so far as to chop up sheets of DPP for exposure in old box cameras, toy cameras, etc. Remember to tape a bit of aluminum foil over the film-counter window if you do this.

After development, you need a quick rinse (10 seconds or so) in a stop bath and then 30-60 seconds in a rapid non-hardening fixer such as Ilford Hypam at film strength (1+4). Next, wash the print for 2 minutes (RC) or one hour (FB) in running water at over 5˚C/41˚F, and then dry it. Forced air drying (RC only) and glazing (FB only) are options. We use photographic blotting paper for FB but the print MUST be fully washed or it will contaminate the blotting paper. (Use hypo-clear in the wash cycle to help prevent this.)
For the very best results, develop and fix a test exposure (no need to wash it properly), then remake the image if necessary. Remember that a wet print looks slightly more contrasty than a dry one, and a little lighter: increase the exposure fractionally (about 10 percent) to get a dry print with about the same density as a wet one. It’s a direct positive paper, so more exposure makes it lighter. If you’re used to neg/pos processing, it can be easy to forget this.

Test shots are comparatively easy if you are shooting still lifes, and not too bad with portraits, but you have to expose quite carefully on location, or bracket. Of course, with standardized studio lighting, you can have a standardized exposure. HDPP may have quite a future in “old-time” portrait studios, because with the RC paper you can have an archivally permanent print in about a quarter of an hour, assuming forced drying.
HDPP can be toned using any conventional toner, as well as handcolored and of course scanned.
Why would anyone want to scan an HDPP print? Well, this brings us on to the bottom line:
Limited Only By Your Imagination
It is an old, old cliché to say that the uses of a particular product are limited only by your imagination, but with HDPP, this is both more true than usual, and less true. It is less true for the reasons given in the first paragraph: you will often find yourself struggling with the speed, the contrast, the orthochromatic sensitivity, the exposure, and the mirror image. If you don’t think that the mirror image is potentially a significant problem, try photographing anything with writing on it.
But precisely because it is less true, it is also more true. The “dawn of photography” effects obtainable with HDPP invite its use in truly creative advertising: of course, once you’ve scanned an HDPP print, you can flip it to get rid of the mirror image problem. Take another tack entirely, the concept of an artwork as a “precious object,” and each and every original HDPP print is unique, a limited edition of one. This should appeal to fine artists.
We kept surprising ourselves, too. We had imagined that HDPP would work best as big prints, but in order to keep paper usage down, we used a 4x5” interchangeable back on our De Vere 8x10” monorail to make test shots for exposure, after the fashion of Polaroids. Some were surprisingly attractive in their own right, but they also gave us the idea of making “disjointed joiners,” a series of 4x5” images with a good deal of white space in between, providing glimpses of a subject with only a hint of the way the different images are related.
In another realm, we’ve never been great fans of photograms—pictures produced by placing objects directly on the paper, and shining a light through them—but the ease of making them with HDPP, and the instant white backgrounds, changed our thinking completely. In fact, if you have ever had any tendencies at all toward obsessive-compulsive behavior, steer clear of HDPP photograms, as they may tip you over the edge.

We even tried making prints from negatives, where the reversed tones of the negative are preserved in the print, as well as printing from color slides, where the lack of red sensitivity and the high contrast again give a “dawn of photography” look.
Will it work for you? It’s impossible to say. For straightforward pinhole photography, yes, it’s quick, easy, and fun. It’s even better for photograms: as we say, dangerously addictive. If you want more tonal subtlety, though, you may decide that it is too much like hard work. This was our initial reaction: that despite our initial excitement, it really was suitable only for simple pinhole photography and photograms.
But then, as we used it, and fought with it, and started winning some of the fights, it started to insinuate its way into our affections. We are absolutely confident that many will find it to be the finest and most useful material they have ever tried, and that they will produce truly superb work with it. Others will hate it, and never even finish the first packet they buy.
As a packet of 4x5” (or even 8x10”) isn’t all that expensive, it is well worth trying if you have even the slightest suspicion that you might get along with it. Or to turn it around: if you have even the slightest suspicion that you might get hooked, don’t try it, because there’s a serious risk that you might indeed find it addictive.
For more information, visit Ilford Photo’s website at: www.ilfordphoto.com.


![]()
Get the Latest Photo Tips, News & Reviews from Shutterbug!
| Camera Reviews Other Reviews | Mobile Reviews Photography Reviews Columns | News | Features | How-To | Resources |
 © 2026 Shutterbug
AVTech Media Americas Inc., USA
All rights reserved