No Strings Attached With
Wireless TTL Flash
|
Multiple-flash lighting is easier than ever with today's dedicated flash technology. When in Madeira, while working on my Kodak Electronic Flash book (Silver Pixel Press), I found myself photographing a spider and its elaborately fashioned web. The problem was that my subject was several feet away, amid the shrubbery. I had one hand gripping the SLR, the other grasping the dedicated flash, being hampered by the length of the TTL cable connecting the two. Another situation found me uncomfortably ensnared in a mess of cables when using multiple shoe-mount strobes outdoors. Other problems with cable connections are that they can come loose or become frayed, and cables that extend any reasonable distance add bulk and weight to a camera bag. Wired multiple flash also involves various adapters and time-consuming setup. Moreover, this combination may limit TTL auto operation to some degree (depending on the system). And we haven't even mentioned dealing with dangling cables that get in other people's or your own way. Enter a practical solution: wireless TTL flash. Wireless flash is not new. It's been around for a long time, employing any of various devices to trigger remote electronic flash units. However, these devices are designed around the use of non-TTL strobes, often relying on manual operation and handheld flash meters to determine and control output. That's well and good for studio flash equipment or whenever you take a more measured approach with portable flash units. Dedicated TTL shoe-mount strobes for today's electronic SLR cameras, on the other hand, now benefit from something simpler, sans wires, to make the process of shooting with multiple off-camera flash flow almost effortlessly. Wireless TTL Auto Flash |
|||
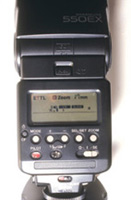
The Wireless Connection Select wireless-enabled TTL flash units can act as both "transmitter," which sends out an activation signal, and "receiver," which, upon sensing that signal, fires the flash. For this to happen, we obviously need at least two such units employed together, with one serving to transmit the signal, as the "master" unit, the other receiving the signal, as the remote, off-camera "slave" unit. The remote strobe may be said to be "slave-synched" to the first, or simply "slaved." Within the same family of strobes we may find wireless-TTL flash units designed without the ability to act as the master unit, simply serving as the slave flash. This option reduces the cost, and makes sense, since we don't need more than one master strobe, except perhaps as backup. The Signal |
|||
Master & Fill The master unit transmitting the signal does not even have to be another strobe. Sitting in the hot shoe, it can simply be a device that sends out the signal that triggers the slaved strobes, without adding any visible light. In that case it is simply called a "transmitter" or "controller." (Note: the term "controller" may also apply to a device attached to a slaved flash.) Each system operates according to its own parameters. The system may offer fully automatic TTL flash exposure control, or certain combinations of camera and flash may limit you to manual wireless operation only, or limit you in other respects. There may be other limitations to overall functionality, all varying with the camera and flash. For instance, wireless TTL flash may support such functions as flash exposure compensation, flash bracketing, high-speed sync, and stroboscopic sequential bursts, provided these functions are there to begin with. One of my favorites is the ability to trigger all the strobes simultaneously to emit a modeling light, helping me picture the combined effect of all the lights on a set. You'll have to check the instruction manual for your photo gear to learn the full extent of your system's capabilities. |
|||
Maintaining The Proper Balance Another alternative is this: Provided this function is built-in and supported by all the "connected" gear, simply use the on-camera master unit to define a ratio of relative brightness levels that places greater emphasis on one or more lights compared with the other supporting lights. For example, the off-camera key light that provides the defining illumination should produce the defining shadows. So we set the ratio to ensure this result. Unfortunately, this may not be enough to guarantee that the secondary lights won't be so strong that they cast even a faint shadow. Using the modeling light function helps you visualize the results with your setup, but even then, there are no guarantees--nothing beats a true (incandescent/tungsten) modeling light. Given that, I've found it was still necessary to physically reduce the light output further (using a combination of the methods just outlined), to totally obliterate the uninvited shadows. It may also help to work with flash units of unequal output (higher and lower guide numbers) to begin with. Where applicable, the degree of ratio control varies with the camera/ flash system, from simply 2:1 to 8:1, controllable within the master unit. This option may extend to a ring flash, albeit on-camera, with a ratio adjustment available between the two flash tubes. The ring flash may further function as the master unit, triggering an off-camera strobe, which may be used to shed some light on the background, for instance, when you want to add an environmental feel to your close-ups. The system may also be designed to automatically reduce flash output of the on-camera flash when it encounters backlighting (from available light), to produce a more natural rendering with fill flash. That may even extend to the use of an external TTL flash in the hot shoe, with another dedicated flash positioned off-camera and backlighting the subject. |
|||
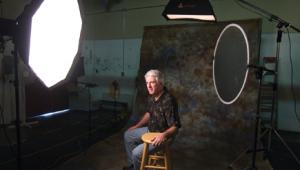
Quiet--I'm Channeling Why do you need separate channels? You may find that someone else is working with a similar system that is triggering your own--meaning they're set to transmit on the same frequency as your lights. If this happens, you may have to select a different channel for all your flash equipment. Or you yourself may have multiple cameras and strobes set up, and to avoid popping all the lights at the same time, set one (or a group) of flash units on one channel, a second light (or group of lights) on a different channel, and so on, for the remaining available channels and lights. On the face of it, it may be no big deal to pop the strobes at the wrong time, until you realize that the flash you need at the moment is still recycling, or that the batteries have worn down from unnecessary use. Or you may be using a long exposure on a moving subject, and you want a different strobe popping at different intervals to catch different stages of movement. Also, depending on the system employed, it may be possible to not only set channels, but to assign different strobes to different groups, all firing under the same channel at the same time. For instance, Group A (which could consist of only one light) might be the on-camera strobe serving as fill, with reduced output set on the ratio scale; Group B (again possibly only one light) serves as the off-camera main light. It might also be feasible to position another light or group of lights (Group C) to illuminate the background. You can get more creative and, with the appropriate accessories, set the main light up as an umbrella light to produce a flattering portrait against a painted (Group C illuminated) backdrop. In this case, the fill light will have to be toned down considerably to avoid casting objectionable shadows, since the umbrella light is significantly weakened, as is true of all bounce lighting. |
|||
Signal Blockers? Armed with that information, I ventured out to the zoo, only to learn that additional restrictions on flash placement made triggering the off-camera flash (by the on-camera strobe) a tricky proposition. Holding the flash aloft and out of sight in my left hand, I found that a twist of my hand or arm could make the difference between success and failure, since my entire attention was focused not on the flash but on a subject that was often moving. Other situations found me placing the flash on a tabletop tripod on a level shelf outside a glassed-in exhibit. Moving a little too far from the off-camera flash resulted in a loss of triggering signal, apparently resulting from an increased angle. Moving the flash closer to my position made a world of difference. Moreover, indoors, such things as fluorescent lights and cell phones could interfere with the signal, according to one manufacturer. Outdoors, bright light hitting the sensor could be the culprit. In more open environments, both at the zoo and in a large botanical conservatory, placement of the off-camera light proved even more critical. I had to keep reminding myself to swivel the flash head to ensure the sensor was aimed correctly to read the on-camera flash. With flash recycling often coming so fast, it wasn't possible to check to see that the remote flash fired before it had already recycled. There were times when I simply turned to someone standing nearby and asked if that person wouldn't mind observing and telling me if the off-camera flash had fired. I was relieved to learn that it had. Alternatives To Wireless
TTL Flash The simplest is a photo-optical slave, which attaches to the off-camera flash. These devices come in various sizes--some extremely small. A photo slave is sensitive to visible light, responding to the short bursts emanating from a flash, so that a separate transmitter is not needed. It ordinarily attaches to the X-sync contact on the off-camera flash, in place of the PC sync cord, for non-dedicated operation. Size, cost, and sensitivity generally go hand in hand. Optical slaves are reliable so long as they are in line of sight from the triggering burst of light. Indoors, light bouncing off nearby walls may be enough to trigger the remote flash. Some flash units come with a built-in optical slave sensor, so they can be triggered remotely without additional accessories. The basic drawback to an optical slave is that any strobe, or possibly other blips of light, can trigger it. In contrast, coded infrared slave systems are not triggered willy-nilly by any flash unit or light sources. They may provide such options as channel selection, and are not hampered by obstacles as easily as optical slave sensors. A radio slave is another alternative, very often used in place of a cable release, to remotely trigger the camera itself along with off-camera flash units, or simply to trigger one or more remote strobes alone. This triggering system comes in handy when the slave unit may be hidden behind obstacles that would otherwise interfere with other wireless options, or where other bursts of light may inadvertently trigger the system. These systems are often the first choice among professionals, for use indoors and out. Strong electrical or electromagnetic fields, however, may disrupt transmission/reception, thereby interfering with overall functionality (which is why pros sometimes need to hardwire their lights). Of these radio remotes, we even found a model with a digital LCD readout and high tech features to match. As with infrared devices, both a transmitter and receiver are required for radio remote operation. Why Won't My Wireless
TTL Slave Flashes Fire?
WIRELESS TTL FLASH COMPATIBILITY Manufacturers/Distributors |


