Lesson Of The Month
Modifying Light For Portraits At Sunset

1.

Creating portraits outdoors can present a number of challenges, particularly on clear, sunny days. Because direct sunlight is one of the most "high contrast" light sources there is, it is often too harsh for natural-looking portraits. Add to the fact that cameras cannot compensate for contrast as well as the human eye, and this issue becomes even more pronounced.

Therefore, it is often imperative to modify the light from the sun to achieve better, more natural-looking results. This lesson illustrates some basic approaches to shooting outside portraits with light modification.

Topics Covered
· Problems with contrast
· Modifying sunlight to create a "main light"
· Creating a fill light outdoors

For this lesson, we went on location just before sunset to a nearby park to photograph our model in a natural setting. As we considered a backdrop, we saw a dark cluster of trees would help create a sense of depth and allow the model to "come forward" in the frame. After we framed up the shot, we set the White Balance to 5500 (sun icon), set the shooting mode to Program (automatic) and took our first shot (#1).

2.

The result had both favorable and unfavorable results. Because the color temperature at sunset was much warmer than it would be at noontime, our White Balance setting rendered a nice warm tone to the overall image. (For a more in-depth look at how White Balance works, check out the Lesson Of The Month in the August, 2002 issue of Shutterbug.)

But while the background was nice and dark, there was not enough separation between the model's hair and the background.

Since the sun happened to be positioned at a side angle to our subject, its light raked across our model's face and created long, unflattering shadows along the left side of her face.

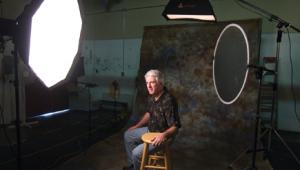
So, we attached a Photoflex 42" Translucent LiteDisc to a LiteDisc Holder, secured it to a LiteStand, and positioned it between the sun and the model to diffuse the light. Finally, we shifted the camera angle slightly to gain more contrast in the background and took #2 and #3.

3.

The result was much improved. The shadows across her face have softened greatly and there is now separation between her hair and the background. This one light modifier alone has created a professional-looking result.

To illustrate further light modification, we added another LiteDisc setup to the other side. But instead of using another Translucent LiteDisc, we used a White/Soft Gold LiteDisc with the white side showing to bounce the sunlight into the shadow side of the model's face. Without any changes to the camera, we took another shot #4.

Notice now that the model's face is evenly lit and that her eyes are nicely illuminated due to the broad reflection of the LiteDiscs (Final Image).

4.

Remember, it's good to experiment with variations to these setups. Each situation will dictate a different approach. But having the ability to modify sunlight allows you a much greater flexibility for outside portraits.

This lesson will be posted in the free public section of the Web Photo School at: www.webphotoschool.com. You will be able to enlarge the photos from thumbnails. If you would like to continue your digital step by step education lessons on editing, printing, and e-mailing your photos it will be on the private section of the Web Photo School. To enroll for WPS just go to www.shutterbug.net and click on WPS Free Lessons.

Final Image .

Technical Equipment

Camera/Media: Olympus E-10 digital camera; Olympus 64MB SmartMedia card; Olympus USB Dual Slot SmartMedia/CompactFlash Reader; sturdy tripod

Lighting: Photoflex 42" White/Translucent LiteDisc; Photoflex 42" White/Soft Gold LiteDisc; 2 Photoflex LiteDisc Holders; 2 Photoflex LS-2322 LiteStands


X