- REVIEWS
Camera Reviews 
More Reviews Mobile Reviews Photography Reviews - GALLERIES
- VIDEOS
- BUYER'S GUIDES
Diagnosing Flash Problems
A failed flash photograph has an exposure in which the subject is too light or too dark. In addition, the foreground is too light—in fact, it’s lighter than the subject—and therefore distracting. In some circumstances, very dark or black backgrounds behind a subject are not desirable, and this can be considered a failure as well.
Shadows that are distracting, unattractive, and that hurt a composition constitute a failed image. Also, if the entire area of the composition isn’t illuminated evenly, this can be problematic. I believe that the old adage about “learning from your mistakes” is true, so let’s look at some of mine.
Overexposed Foregrounds
The distance from the subject to the flash is critical when figuring out flash settings. It doesn’t matter where the camera is in relation to the subject. It’s the flash-to-subject distance that is the determining factor. If the correct exposure happens to be obtained at 10 feet that means that an object 8-9 feet away will be lighter than the subject, and anything beyond 10 feet could be darker, a sort of “tunnel” effect.
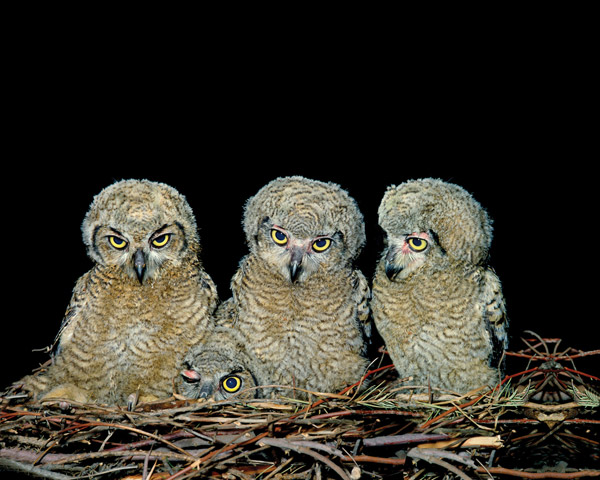
You can see this clearly in the picture of the leopard gecko (#1), that I photographed during one of my semi-annual frog and reptile workshops held in St. Louis. Notice how the gecko is exposed correctly while the sand in the foreground is light and the background gets darker the further away it is from the flash. The costumed Carnival participants I shot in Venice, Italy (#2), show the same thing. Notice the how the light diminishes from the model in yellow to the model in blue. Compare this image to (#3) where all three models were equidistant to the camera and flash. They are evenly illuminated. When shooting a group of people (or animals), this is important to remember. Notice in the shot of the great horned owls (#4), they are equidistant to the camera and therefore the exposure is correct on all the birds.
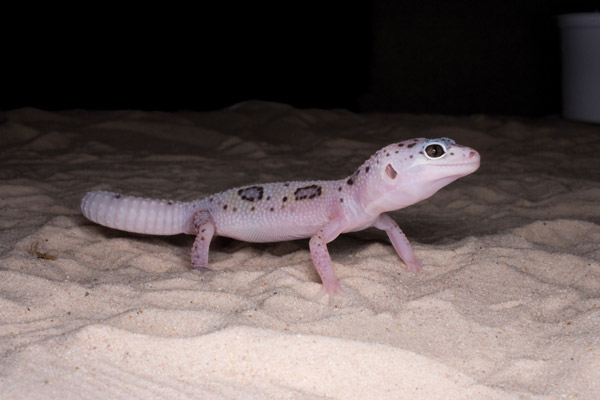
All Photos © Jim Zuckerman


There are a few ways around this problem. One is to spread the light more evenly into the scene by bouncing it off a light ceiling (more about that later), if available. You can also, in some instances, slow the shutter to allow in more ambient light. And, as a final resort, you can always use image-editing software to help fix the problem.
Even though a light foreground isn’t a desirable effect, if the difference in exposure between the foreground and the background is fairly subtle, we can either live with it or tweak it later in post-processing. For example, I find the light sand in front of the gecko much more problematic than the exposure discrepancy in the Venice shot.
In other situations, an overexposed foreground is terribly distracting and it makes the picture a failure. Such was the case in the photo of a wrought iron bicycle used as planter in front of my house (#5). I purposely shot from ground level to demonstrate how the grass close to the flash—it was only a foot or two away—received so much light relative to the subject that it was significantly overexposed. Our eyes are always drawn to the lightest part of the picture first, and they return again and again. In other words, highlights and other areas of the image that are very bright have a very strong pull. Our eyes are diverted from the subject and that’s not how a successful picture is supposed to work.

Underexposed Backgrounds
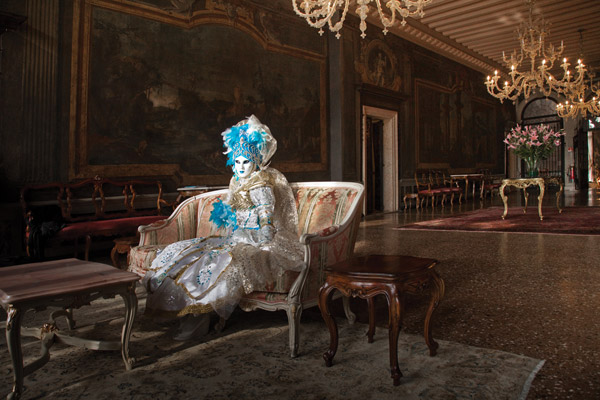
Flash exposures can be said to fail if the background is “unnaturally” underexposed. If the background is an important part of the image, then you want to see detail in it. If that detail is virtually eliminated due to underexposure, then your pictures will be disappointing. For example, the portrait of a model in a 17th century palace in Venice was taken in a beautiful room (#6) and it would be disappointing to not see it. By contrast, when I used a flash placed off-camera, I exposed this so the model was correct (#7) but the background was completely lost in shadow. I like the image but the entire ambience of the environment was lost.

Dark backgrounds can be addressed in three ways. First, you can slow the shutter down so it can expose the ambient light in the room correctly. This can be done on Manual Exposure mode or Shutter Priority. You must be using a tripod, though, and at the same time you have to tell your subject to hold perfectly still. The longer shutter requires everything in the scene to be motionless or else the picture won’t be sharp.
Second, you can bounce the flash off the ceiling, assuming that the ceiling isn’t too high and it’s white or very bright. That washes the room with a softer light, and it also penetrates the background giving you a much more balanced exposure than direct on-camera flash.
Third, you could add a second (or even a third) light on the background. This could be another flash or tungsten lighting. If the light behind the subject is bright enough, you can get a perfectly exposed picture from the foreground to the background.
The panther chameleon I photographed outdoors with a flash also resulted in a black background (#8). This isn’t appropriate because the reptile is diurnal. It’s active during the day and this picture implies it was taken at night. Therefore, I would say this picture is a failure—at least in terms of capturing what I saw and what I wanted.

The reason this happens is because of the very fast light fall off and the fact that the chameleon was so far away from the background foliage. Had the reptile been just 2-3 feet in front of the bushes, they would be darker than the subject but we would see the natural environment. Such was the case with the caterpillar I found in my garden (#9). The insect was only about 8” from the background leaves.

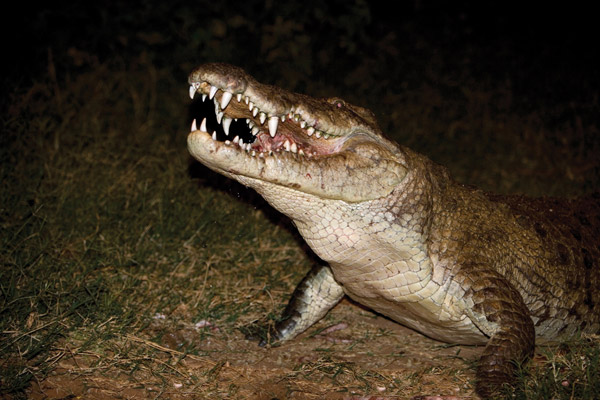
When shooting outdoors at night with flash, black backgrounds are unavoidable, assuming there is no other artificial lighting. When I photographed the Nile crocodile in Kenya (#10) it would have been very nice to have a friend standing off to one side holding a second flash, but no one volunteered!
Bad Shadows
When you use on-camera flash and the camera is turned 90˚ to take a vertical picture (also called portrait orientation), the flash, which sits atop the lens on the hot shoe, is off to the side of the lens axis (#11). This creates a shadow behind the subject and on the opposite side from the flash. The picture of the Balinese dancers (#12) is a good example. You can see the shadow on the left of the performers, which tells you that as I angled the camera, the flash was on the right side of the lens. If the background is anywhere near the subject this will pose a problem.


The way to eliminate the shadow is to place the flash directly above the lens. There are brackets available that will center the flash above the lens no matter how you orient the camera. The one I recommend is made by reallyrightstuff.com (http://reallyrightstuff.com/flash/index.html).
When you shoot horizontal compositions (also called landscape orientation), the flash sits above the lens and that’s why shadows behind the subject are absent.
Glare
On-camera flash reflects off shiny surfaces and creates a very distracting hot spot in the picture. The materials where this always happens are glass, chrome, metal, varnished wood, glazed tiles, etc. The portrait I took in Morocco (#13) is a good example. The reflection in the mosaic tiles ruins the picture. To eliminate it, I had to take the flash off the camera and use it to the side (#14). However, look at the shadow on the wall. I don’t like that.
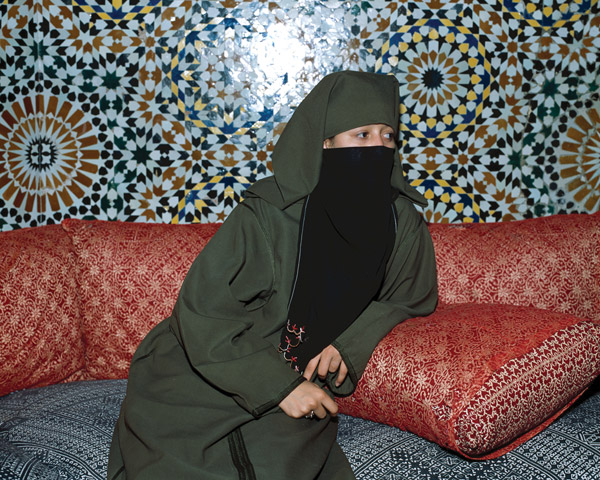
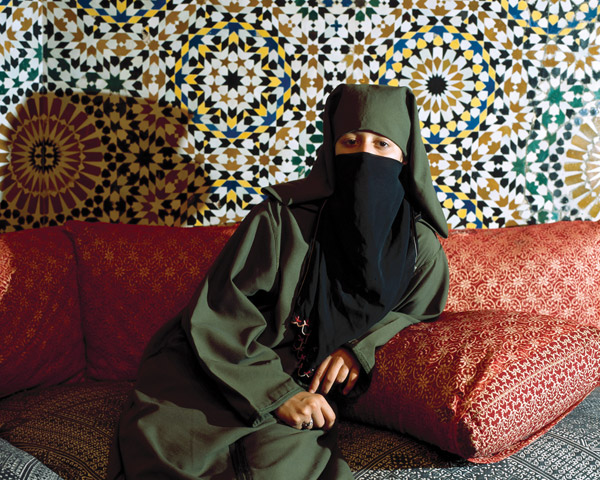
This was taken with a medium format film camera eight years ago, and I didn’t have the advantage of instant feedback on an LCD monitor like we do now. Therefore, I didn’t notice it. In retrospect, the flash needed to be held at the same angle but about 3 feet higher. The shadow would then have fallen down and away from the background.
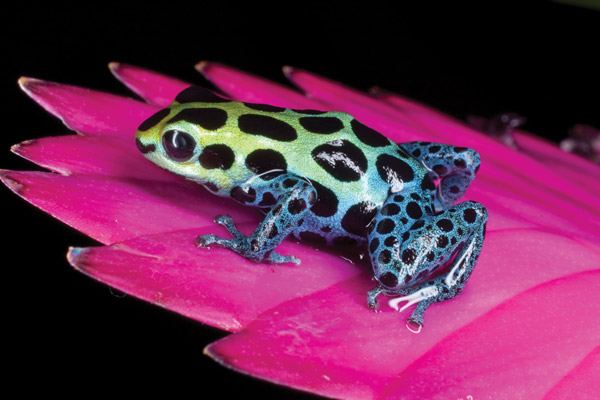
Another example of glare is the photo of the poison dart frog (#15). The waxy leaves and the moist surface of the frog’s skin made for terrible reflections. Even if the flash unit were taken off-camera, the glare still would have been a problem. In this case, the best way to minimize the reflections is to change the angle of the camera. You can see what a huge difference it made in (#16). Instead of the light from the flash bouncing back into the lens, it bounces away from the camera with this oblique angle. Another approach would be to use two polarizers: one placed over the lens and a piece of polarizing material placed over the flash.

Uneven Illumination
One of the problems of using on-camera flash for close-up work is that the head of the portable flash unit sits 7” above the lens axis. This means that as you get closer and closer to a small subject, the light will illuminate the top of the composition while the bottom portion will be much darker. You can see an example of this in (#17). In this particular case, I happen to like the effect. Usually, it’s not appealing at all. In the picture of a rose from my garden (#18) I stood about 2 feet away and used an on-camera flash. Notice how the top portion is lit well but the bottom part is dark. This is a common problem when doing macro photography with a single on-camera flash.

Most of the more expensive flash units allow you to angle the head of the flash downward past the 90˚ mark. This is intended to spill some additional light onto the bottom portion of a macro shot. There is an indicator in the LCD window that tells you the flash head is at a negative angle. This is somewhat effective, but it’s not as good as having a ring flash.
A ring flash is a specialized unit where the flash head encircles the lens (#19). It provides a soft light that illuminates the top, bottom, and both sides of the macro subject and solves the problem of uneven lighting. Some ring flashes enable you to create a lighting ratio between one side of the ring flash to the other, thus showing some depth and dimension in the subject. Read more about this in the macro flash discussion later in this issue.

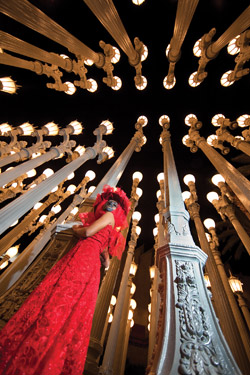
Another situation that causes problems is when you use a wide angle lens with flash. The extreme wide angle lenses have such a vast coverage that unless your flash unit has the ability to spread the light out (such as with the wide panel I mentioned earlier), the center of the picture will be illuminated but the periphery will be underexposed. As with all art, however, sometimes you can turn a negative into a positive. The picture I took of my wife (#20) dressed in a Venetian Carnival costume at the Los Angeles County Art Museum in California was done with an on-camera flash. I used a 14mm lens without the wide panel, and the flash illuminated my wife plus the lower portions of the posts. The rest of the light came from the artificial lighting of the 1920s-style lamps. You can see the color differential. The flash produced the bluish color light while the rest of the composition is more golden.


![]()
Get the Latest Photo Tips, News & Reviews from Shutterbug!
| Camera Reviews Other Reviews | Mobile Reviews Photography Reviews Columns | News | Features | How-To | Resources |
 © 2026 Shutterbug
AVTech Media Americas Inc., USA
All rights reserved