- REVIEWS
Camera Reviews 
More Reviews Mobile Reviews Photography Reviews - GALLERIES
- VIDEOS
- BUYER'S GUIDES
Shooting Festivals: Light, Lenses And Point Of View
One of the most wonderful aspects of travel photography is shooting festivals. The color is outrageous, the costuming is visually exciting, and there are a million things to shoot all at the same time. It’s frustrating that we can’t be in more than one place at a time (those darn laws of the Universe get in the way all the time!). If you can plan your trip to include some kind of festival or celebration, it will be a highlight of the trip. Virtually everywhere you travel where there are people, you’ll find some kind of festival. It’s just a matter of doing some research on-line to find out when they occur.
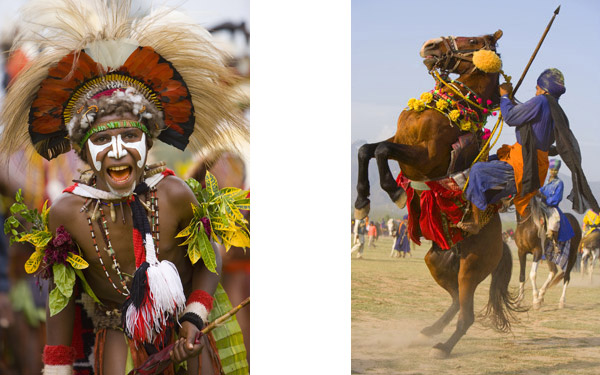
The challenges you face in getting great pictures, though, are many. There is usually lots of movement and, if you face low light conditions, it’s hard to get sharp pictures. Tripods are usually not an option because they are often a liability. If the crowd is too dense or if there are animals or vehicles racing past you at breakneck speeds, like what goes on at the Sikh festival in Punjab, India (#1), a tripod that would normally be required in low light conditions gets in the way. At the opposite end of the spectrum is bright light. If the festival takes place in the middle of the day under direct sunlight, the lighting is harsh and unattractive. I consider this the most daunting challenge of all.

All Photos © Jim Zuckerman
Another major problem is that there is often so much activity, it’s hard to shoot subjects with a clean and unobtrusive background. Backgrounds are often very busy and distracting. You usually don’t have time to compose a picture thoughtfully because there is so much going on, so grab shots are sometimes the only option.
Finally, security is always an issue. With all of the distractions, it’s easy to leave a piece of equipment somewhere or you can lose expensive items from your photo backpack or photo vest due to theft.
Muted Lighting
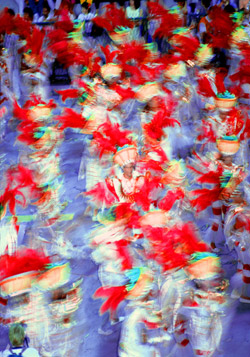
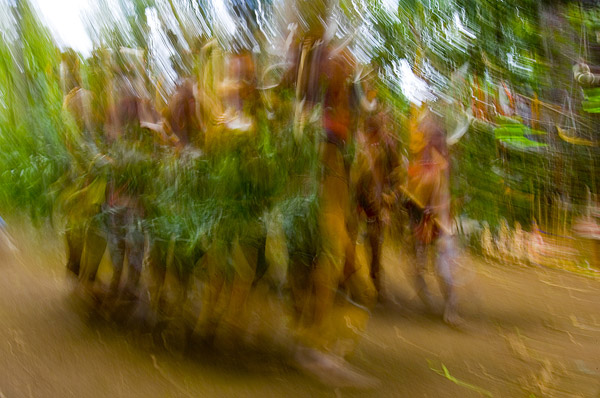
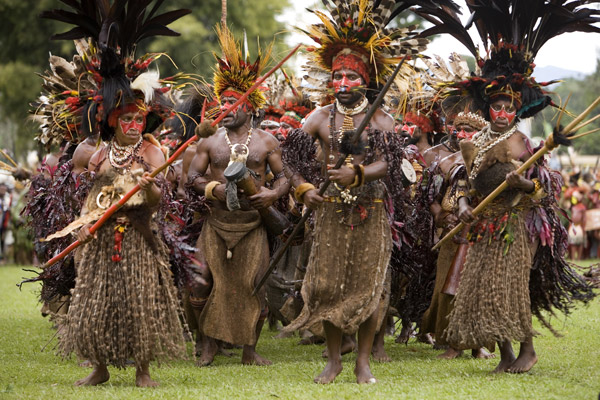
In muted light when there is thick cloud cover or when you are shooting in the evening, you have three choices. First, you can use the available light without raising your ISO setting, and this enables you to capture blurred images of the festivities. Hopefully, the pictures you take fall into the category of “creative blurs” as opposed to what could be interpreted as an out of focus mistake. The dancers I photographed during Carnival in Rio de Janeiro are a good example (#2). My shutter speed was 1⁄15th of a second, and I had to hand hold the camera simply because the crush of spectators didn’t allow me to set up a tripod. To me, the blur of color and the graphics of this image work well. I did the same thing in Papua New Guinea (#3). Under the canopy of the jungle the village dancers were moving too fast to freeze their movements. The 1⁄8th shutter speed abstracted the men and created a very unique and artistic image.
The second option is to raise the ISO until the shutter speed becomes fast enough to get sharp pictures. As I have said elsewhere in this issue, high ISO numbers mean more digital noise and that’s not a desirable side effect. To mitigate the increase in noise, you can use Noise Ninja (www.picturecode.com) or other noise-reducing software programs. These are very effective, although if the noise becomes too great it’s impossible to make the picture look good. In the picture of the summer solstice celebration near Vilnius, Lithuania (#4), I used ISO 2000. Noise Ninja was effective in reducing the noise in this picture because it was taken with the Canon 5D Mark II, one of the newer generation cameras that handle digital noise quite well. With lower end cameras, once you go beyond ISO 800, the noise gets to be so significant that even with Noise Ninja you can’t make the image look great. It will be better, but the noise will degrade the photograph too much.

The third option is to use flash. On-camera flash is usually not very attractive, but at times it can work quite well. Besides, if you have a choice between using flash and getting a decent shot or not using flash and losing a picture it’s obvious that you have to use flash. You can see in the Carnival shot in Rio (#5) that the on-camera flash is flat and offers no dimension or depth, and that the light fall-off made the background go dark. However, I didn’t want a high ISO here, and the parade took place at night giving me little choice but to use flash.

If possible, shoot an overview of a festival to give people a sense of the size of the event. Some festivals are small and perhaps a long shot doesn’t make sense. Other events are huge, and from an elevated or distant point of view they look awesome. I thought the Pushkar camel fair in India looked amazing as it was spread out over the desert, so I shot it from two different angles from the top of a dune (#6 and #7). This helps tell a story about the experience and provides a visually compelling image. It also gets you away from much of the crowd where a tripod can be used. Both of these pictures were taken when the sun was practically touching the horizon, and with the decreased intensity of the light a longer shutter speed was needed to help get more depth of field. This, in turn, meant that a tripod became very important. I walked up the slope of the dune because most of the people at the fair were camped on the flat areas of the desert floor, and the small lens aperture I used was only possible because of the ability to set up my tripod.


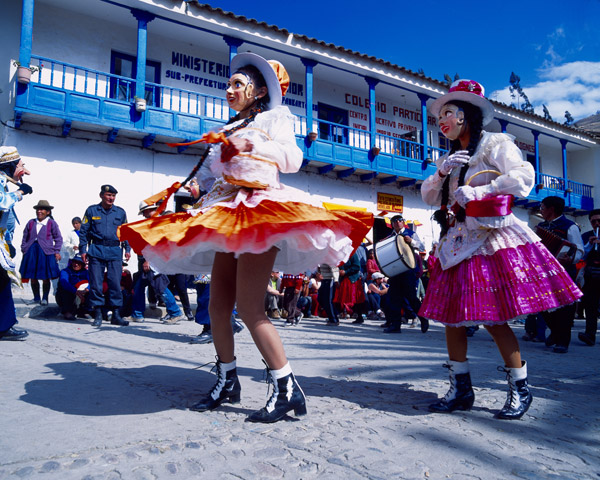
At the Inti Raimi festival in Cuzco, Peru, I also photographed an overview, but this time I was looking up at the ancient architecture (#8). I wanted to show the scope of the event, and I thought the graphic design of the participants was especially attractive. This is a re-creation of an Inca festival, and although I took tight shots of the individuals involved in the performance, the overview shots were the best.

Cluttered Backgrounds
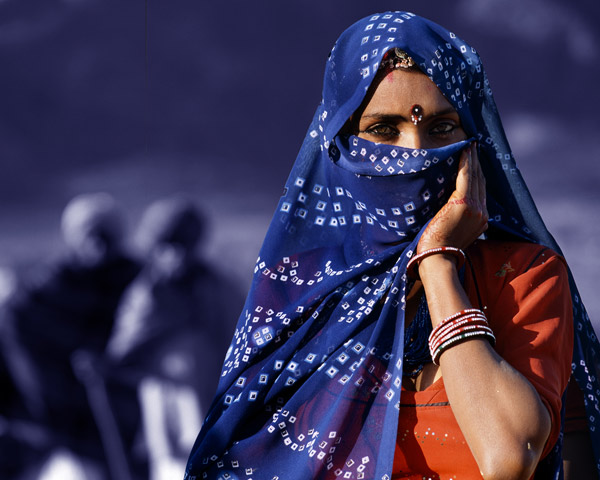
If you have the opportunity to make individual portraits of festival participants, take the time to do so. It adds a wonderful dimension to the experience and usually if you have a nice exchange with one person you can end up photographing a lot of willing people. Use the images on the LCD monitor to show people their pictures, that ice-breaker will open the flood gates. Suddenly everyone will want their picture taken. This will then give you the opportunity to have a little control over the situation and you can choose a background that is less busy and/or that helps tell the story of the festival. I did this with a portrait of a musician (#9) and also with a beautiful young woman at the Pushkar fair (#10).

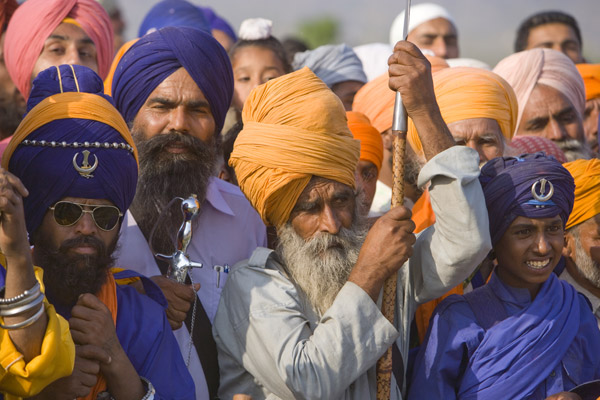
Another way to eliminate cluttered backgrounds is to fill the frame with a tight group of people, like I did with Sikhs at the Hollamohalla festival in Anandpursahib, Punjab, India (#11). The only thing you have to watch very carefully is your depth of field. If you use a medium telephoto lens, the depth of field is fairly shallow; if the subjects are different distances to the camera, you may not be able to get them all sharp. You can see that the people in the background are soft, although in this case it’s not that bad. The most important subjects are in the foreground and they are all sharp. Either step back to increase the depth of field or ask the people to move in tighter so they are approximately on the same plane. In the group shot of Sikhs in (#12) I was far enough away from the advancing phalanx that depth of field wasn’t an issue here. The entire throng would have been sharp at any lens aperture.

If a background is hopelessly busy and distracting, one solution to prevent it from ruining the picture is to manipulate it digitally. You can add a zoom blur like I did in the picture of the dancer in Rio de Janeiro (#13), and you can also throw a background out of focus using Filter>Blur>Gaussian Blur in Photoshop. You would have to carefully select the background so the zoom or blur effect is applied only to the background and not the subject, but this is quite effective in solving a problem that otherwise would be impossible to correct.

Backgrounds can be full of people and other things and not be distracting. What you don’t want are graphic elements like poles, trees, overexposed highlights and various types of objects that take our attention away from the subject. The background behind the young tribal boy (#14) is complementary, for example. It shows that the entire environment is full of action and excitement. On the other hand, the horse and rider in the background in (#15) is distracting because our eyes keep drifting toward him. The fact that his horse is partially truncated is a problem, and his face is so compelling and graphic that it pulls our attention away from the foreground subject.
Midday Sunlight
Festival organizers never think of photographers when they plan the event. Too bad. Either they don’t know or don’t care about what kind of lighting makes the best pictures. Too often you are stuck with midday sunlight, and this is the worst-case scenario. It makes good picture taking very difficult.
There are two ways to mitigate the effect of harsh, direct light on your subjects. First you can use fill flash to open up some of the dark shadows on the faces, the costuming, and other parts of your compositions, and although this works to a certain extent, it’s a look that I’ve never liked. If there are no other choices, then this is certainly one possibility you can use.
The second option is to use the Fill Light slider in Adobe Camera Raw or Lightroom to bring back some of the detail in those underexposed shadows. This is the technique I use most often. This assumes, of course, that you are shooting in Raw mode, as you should be doing. This gives you the maximum ability to manipulate the photos.
If there are some clouds in the sky, you can wait for them to drift across the sun to give you open shade, and that will make all the difference. Compare the two pictures taken at the annual Sing Sing in Papua, New Guinea. The pictures were taken at about 11am, and the one with the harsh contrast (#16) was taken in direct sunlight. It shows very dark shadows on the faces of the dancers, and you can see how unattractive black eye sockets are. In the comparison photo (#17) there are no offending shadows on the faces of the dancers, and the lighting is much more flattering. These pictures were taken moments apart. A large cloud covered the sun for about 20 minutes, giving me the opportunity to photograph with the much-improved light. The festival I photographed in a small village in Peru (#18) was also taken in midday sunlight, and in this case I had no cloud cover at all. I hated the harsh lighting, but there was simply no choice. The best I could do was lighten the shadows a little in Adobe Camera Raw.

Security
You carry a lot of expensive gear when you travel, and it’s important to protect it at all times. This is especially true in crowds, where equipment can disappear and you’ll never feel or see anything wrong until it’s too late. The best-case scenario is to have someone watch your back in a festival. Most of the time I hire a car and driver in foreign countries and one of the driver’s responsibilities is to protect my camera gear and me. He stays close to me, and when I need to hand him a piece of equipment while I change lenses or flash cards, the extra pair of hands comes in very handy. The sense of security that someone is paying attention to people around me while I’m concentrating on picture taking is a good feeling.
If you don’t have someone to watch your back, keep your equipment on your back or around your waist. I don’t use a camera strap around my neck for three reasons. First, the strap is always getting in the way of my shooting. Second, I don’t like the weight on my neck. And third, in a crowd situation when people are in very close proximity to you, someone can easily cut the strap and grab the camera. Instead, I use a leather strap that goes around my hand and makes the camera seem like it is part of my body. For me, this is a secure feeling and it works very well (see figure A).

A photo vest is a good thing to wear because you don’t have to take a backpack off to change lenses. You can also use holster-type lens pouches that hang on a belt. If I know I will be only carrying a couple of lenses, either of these things works very well. However, if you end up carrying a lot of gear, then the backpack is the only solution. When I lay my backpack on the ground to change gear, I try to do so where most people can’t see the contents. This isn’t always possible, but it’s a good idea to hide the expensive equipment as much as possible from prying eyes.


![]()
Get the Latest Photo Tips, News & Reviews from Shutterbug!
| Camera Reviews Other Reviews | Mobile Reviews Photography Reviews Columns | News | Features | How-To | Resources |
 © 2025 Shutterbug
AVTech Media Americas Inc., USA
All rights reserved