- REVIEWS
Camera Reviews 
More Reviews Mobile Reviews Photography Reviews - GALLERIES
- VIDEOS
- BUYER'S GUIDES
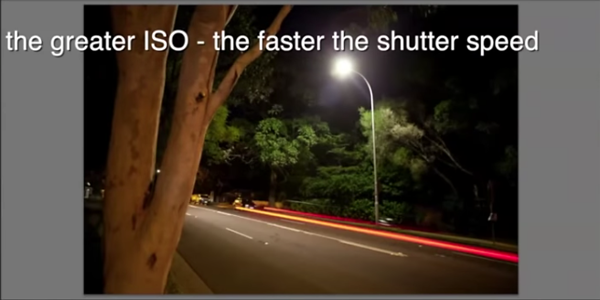
Photo Basics: Understanding ISO and How to Use It for Shooting Better Photographs (VIDEO)

The camera primer below is the final episode in a series we’ve been featuring, designed to help photographers fully understand exposure settings and thereby capture better images. In this tutorial, you’ll learn how to choose the most appropriate ISO for the scene you are shooting.
Earlier videos in the series covered the concepts of Aperture Priority, and Shutter Priority exposure modes, two cornerstones of the so-called “Exposure Triangle” we discussed in an another article. In this tutorial, the triangle is completed as photographer Christian Tudor provides an understanding of ISO settings and how they impact the look of your photos.
As with aperture and shutter speed settings, the ISO you choose not only contributes to making properly exposed photos, but also has a lot to do with how a photograph appears. The type of scene you are photographing helps define what exposure mode to use, and which ISO setting to select.

Unlike with Shutter Priority and Aperture Priority exposure modes, where you choose one variable to set and the camera handles the other, you won’t find ISO on a camera’s mode dial. Instead you’ll choose an ISO setting from among several sensitivity options, either with a dedicated button on the camera or by digging into the menu.

Tudor explains that with digital cameras, ISO refers to a sensor’s sensitivity and how fast it captures light. He then discusses the interaction between ISO, aperture and shutter speed, when ISO should be the first setting you make, and how your choice impacts the look and quality of an image.
There are more shooting tips on the Academy of Photography YouTube channel. And be sure to watch the earlier episode in this series on Shutter Priority mode, and another on using Aperture Priority.


![]()
Get the Latest Photo Tips, News & Reviews from Shutterbug!
| Camera Reviews Other Reviews | Mobile Reviews Photography Reviews Columns | News | Features | How-To | Resources |
 © 2026 Shutterbug
AVTech Media Americas Inc., USA
All rights reserved