- REVIEWS
Camera Reviews 
More Reviews Mobile Reviews Photography Reviews - GALLERIES
- VIDEOS
- BUYER'S GUIDES
Camera Settings For Black And White: Shoot Raw And Do It Later, Or Shot JPEG And Lock It In
When you set up your camera you are given a choice of file formats, image quality, picture styles and white balance. In fact, you need not set quality, or size or any other parameter—proceed directly to file format and choose Raw. This will produce the largest files your camera is capable of producing with the largest bit depth—10 or 12 is common, with 14-bit available in pro models, most of which open as 16-bit files in your computer.
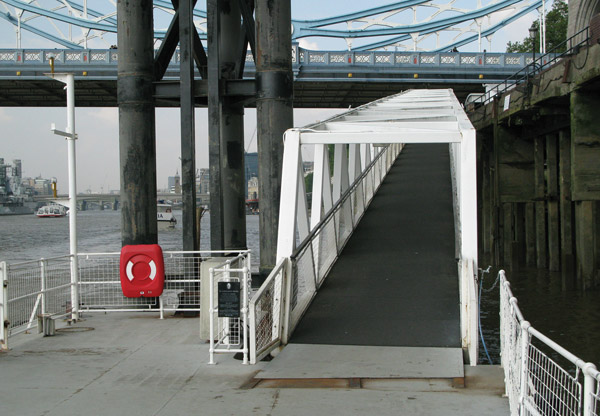
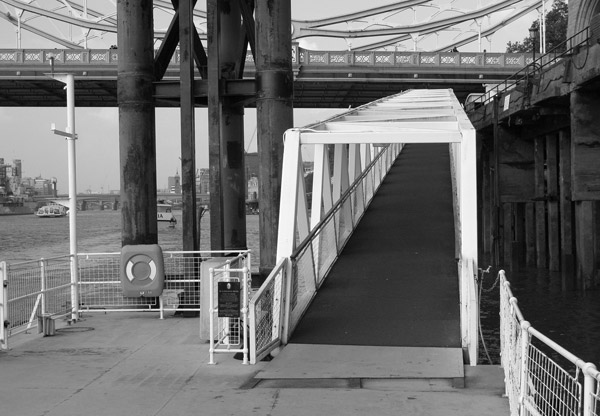
A newfound tool is the ability to see a scene in black and white prior to making the exposure. This was obviously unavailable to film photographers, who used all sorts of viewing filters and lots of practice to visualize what a scene would look like in black and white. With LiveView cameras you can now even see in black and white prior to pressing the shutter release. I knew this dockside scene (#1 and #2) would be a good choice for a black and white rendition; with LiveView I could see it right in the LCD as I worked, and that helped me set contrast, filtration and even influenced my composition.
All Photos © George Schaub
Greater bit depth yields more image information, always a good thing, and in general will offer more image fidelity and tonal variety, given proper exposure, a good lens etc. Raw also offers so much more in terms of image processing flexibility.
There is one scenario where you should work with JPEG and that’s if you are shooting for direct printing from the camera, or when you want to take the memory card to a kiosk or lab and have them do it for you. That’s great when you use the camera for family shots or personal travel photos and such. But my assumption is that you want to produce the best image quality and that you plan on doing work on the image prior to printing, web posting etc. That’s why the first setting I make is file format and why, to me, there is only one choice you should make: Raw format.
Many cameras offer Raw+JPEG file format settings, which I recommend, as it makes two images, one in both file formats. You can always use the JPEG for direct printing and still have the superior quality Raw file. And if you shoot in black and white you can use the JPEG for proofing and the Raw for processing.
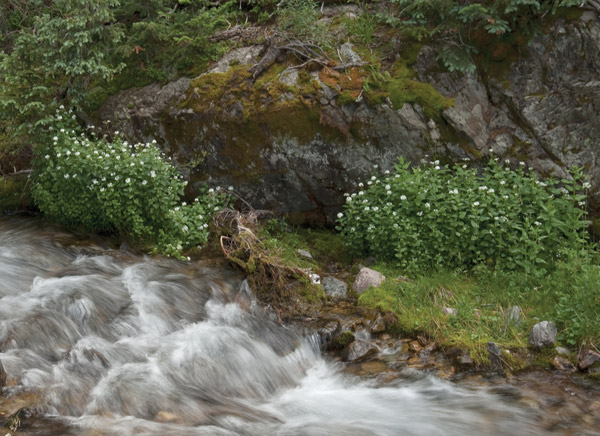
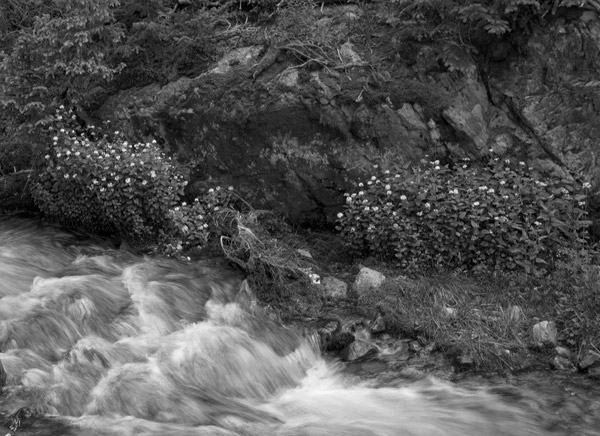
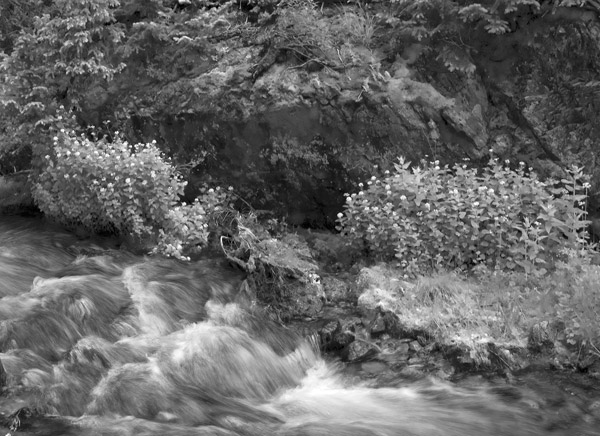
This stream bank sat in shadow (#3, color shot; #4 monochrome without filtration setting) and I knew I’d need more contrast to bring it out. However, if I went too high in my contrast settings in camera or later in processing I also knew I might have a harsh rendition of the flowing water. The solution was to set the camera’s monochrome picture style with a green filter, which changed the tonal brightness of the green in the image (#5).
Camera makers have gone to great lengths to offer a host of “image optimization” or “picture style” options, including changing the color saturation, contrast, sharpness, color space and tone curve compensation of every frame. One option you might want to set, if only to help you visualize in black and white, is the monochrome setting. This does not make images recorded in grayscale (they remain RGB composites) but it does allow you to view your images in black and white right after exposure or with cameras that offer LiveView, before exposure. Never before have photographers had the chance to do this, and it’s a real change agent.
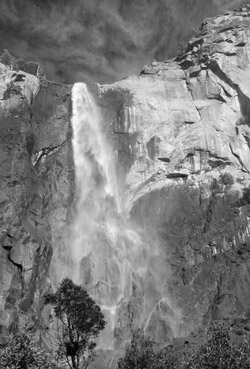
This magnificent waterfall offers a range of possibilities in black and white (#6). Image (#7) shows the image in Monochrome mode with no filtration; (#8) is the same image with a slight raise in contrast—to enhance the filter effect further—and use of a red filter effect. You can see the result of choosing various options right away after you shoot, or even prior to exposure using LiveView.

The other monochrome option, such as filter effects and “toning” effects can all be done in camera as well. (Shoot Raw when you do this as these settings are easily changed later if you wish.) As discussed, with film a color contrast filter alters the way certain colors are recorded as tones. They block, to an extent, colors complementary to the filter and pass like colors. The advantage of doing this within the processor is that you do not have a filter factor (loss of stops) created when using glass over-the-lens filters. You can use these “filters” (actually, in-camera processing instructions) to deepen or lighten blue sky, lighten green foliage, remove blemishes and even raise or lower scene contrast. Many cameras also allow you to apply degrees of the filter effect. I find that if I raise the contrast settings in the picture style customization menu I enhance the filter effect further. Practice with these variations to learn how tones record with and without their application and you will go a long way toward understanding how to visualize color in black and white.
Along with “filtration” for color conversion effects you can add an instant “toning” effect to images, such as this “classic” or sepia tone here (#9). You can do this in-camera or later in processing with similar ease.
The other monochrome setting you have is color tone, which differs from the contrast filter effect in that it delivers a version of the image with a color cast. While doing this in image processing later will probably yield a more subtle effect, it offers yet another monochrome option in-camera.


![]()
Get the Latest Photo Tips, News & Reviews from Shutterbug!
| Camera Reviews Other Reviews | Mobile Reviews Photography Reviews Columns | News | Features | How-To | Resources |
 © 2025 Shutterbug
AVTech Media Americas Inc., USA
All rights reserved