- REVIEWS
Camera Reviews 
More Reviews Mobile Reviews Photography Reviews - GALLERIES
- VIDEOS
- BUYER'S GUIDES
Amusement Parks At Night: Lights At Night Are Fantastic!

All Photos © Jim Zuckerman


Where To Go
There are many local county and state fairs across the country. Most of my recent shots were done at a local country fair in Tennessee, but if you happen to live near (or will visit) Disneyland, Disney World, Universal Studios, Busch Gardens, Kings Dominion, Knott’s Berry Farm, SeaWorld, or one of the Six Flags theme parks, their illuminated rides always yield amazing images. However, the artistry of the images is not dependent on the size of the theme park. Each ride no matter where it is can produce amazing images.
The Exposure
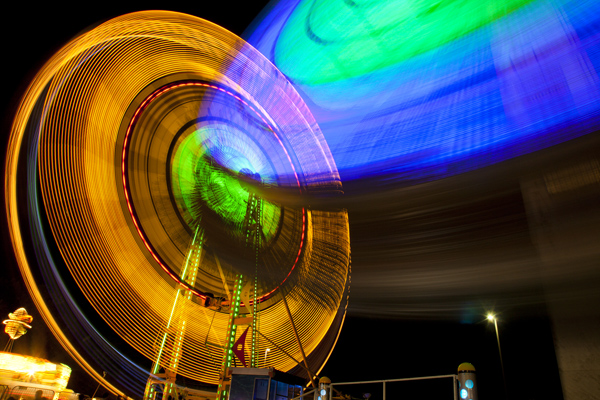
When a composition has a lot of black in it, like the night sky, the meter in your camera is no longer reliable. It might give you an accurate light reading and it might not. It depends on the ratio of light to dark since there are really no middle tones at all. Therefore, in a unique situation with brilliant neon lights against a dark background the only way to determine the exposure is to make an educated guess as to the shutter speed and f/stop and then study the results on the LCD monitor. I recommend using Manual Exposure mode, and as a starting exposure try 2.5 seconds, f/22 and ISO 100. These are the settings I used for (#6).
Depth of field is not an important issue in shooting abstracts like the images I’m showing here. More important is the shutter speed because that defines how complex the abstractions are. The longer the shutter is open, the more lines, colors and movement you can capture.
This kind of photography is really trial and error. Depending on what you want, vary the camera settings accordingly. I do recommend, though, sticking with a low ISO such as 100. There is no need to go higher, and this will help to give you the best quality images with little noise.
The Technique
My technique is basically to try everything. I shoot from a tripod, I handhold the camera, I use a zoom lens and change the focal length during the long exposure, I twirl the camera around—whatever strikes my fancy. I am always checking the LCD monitor to see what I’m getting, and if I don’t like it, I switch gears and do something else. I try different angles, different lenses, and most of all different exposure times. Sometimes I pan with the ride and sometimes I let the neon lights move past the stationary camera on a tripod.
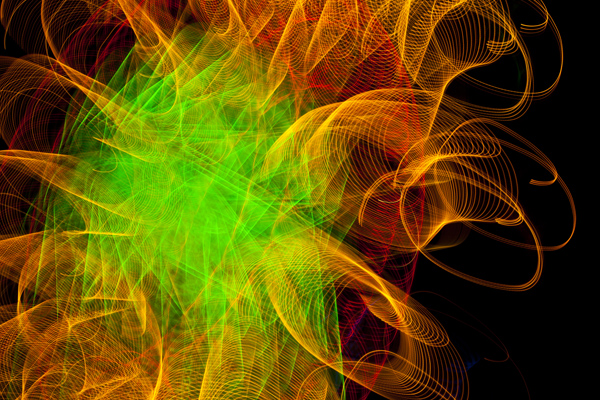
The ride I photographed in (#7), for example, was done from a tripod and I let the ride move past the lens. During the four-second exposure, I also zoomed the lens. It doesn’t matter if you zoom from wide to telephoto or vice versa, but you should focus the lens in the telephoto position. If you focus at the wide angle position, by the time you zoom to telephoto the image won’t be in focus. Depending on what you like, this could be a good thing!
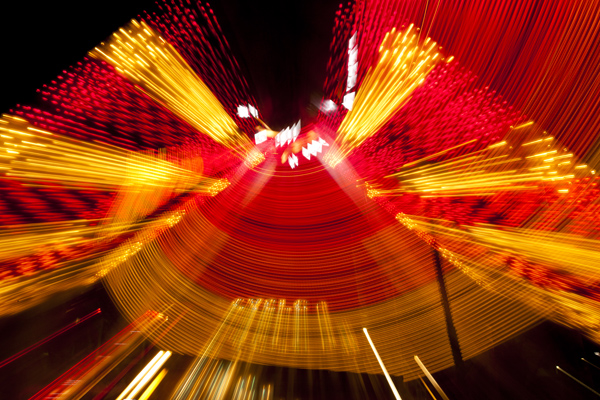
For the spinning ride captured in (#8) I used only 1/2 second at f/7.1. How did I know what exposure to use? I did a test image and adjusted the shutter speed and f/stop from there. I wanted a fairly brief exposure for this shot because I wanted some definition in the spinning lights. The lens in this case was 24mm. I changed the shutter speed to one full second and photographed the same ride in different colors (the rides often change color) and got something quite different (#9).


![]()
Get the Latest Photo Tips, News & Reviews from Shutterbug!
| Camera Reviews Other Reviews | Mobile Reviews Photography Reviews Columns | News | Features | How-To | Resources |
 © 2026 Shutterbug
AVTech Media Americas Inc., USA
All rights reserved