- REVIEWS
Camera Reviews 
More Reviews Mobile Reviews Photography Reviews - GALLERIES
- VIDEOS
- BUYER'S GUIDES
Tree Bark: Finding Patterns Everywhere
All Photos © Jim Zuckerman
Depth Of Field Issues
The challenge that trees present is that their trunks and branches are sharply curved. Smaller trees obviously have curved surfaces that are more severe than larger trees, and this makes depth of field an important consideration. If you shoot with a relatively large lens aperture, the center of the image will be sharp but the sides will be soft. For example, notice the right side of (#3) and you can see that it is a little out of focus. This is not ideal. I took this picture with an aperture of f/5.6 and consequently lost the depth of field required for a tack sharp picture from edge to edge. Revealing the beauty of the texture and the pattern of bark is the reason why we shoot this subject matter, and therefore I recommend using the smallest aperture possible. This is usually f/22 or f/32.

Using a low ISO is ideal for any type of photography, and if you shoot with your camera set to 100 or 200, the shutter speed you have to use in conjunction with a small lens aperture will be slow. That means a tripod is necessary to ensure sharp pictures. If you get lazy and shoot tree bark while hand holding the camera (like I did in photo #3), in almost every case you’ll be disappointed with the lack of depth of field if you examine the images closely.
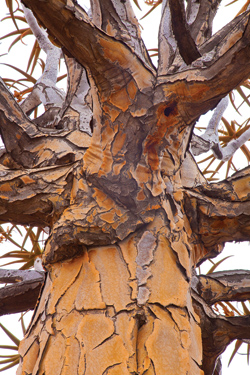
If you compose the pictures so the back of the camera is as parallel as possible to the plane of the tree, this will help you capture the detail in the image by increasing depth of field. Even if the tree is very large, and therefore fairly flat to the camera, it may have several planes of focus, like (#4). In instances like this, you will want to use a small lens aperture as well as making the back of the camera parallel to the trunk’s surface. If you are shooting upward, as is sometimes the case when photographing trees, you won’t be able to do this. I photographed the quiver tree in Namibia (#5) at a severe angle, and with this composition it was obviously impossible to make the camera parallel with the tree trunk. In this case, the only way to obtain complete depth of field was to use f/32.

Lighting
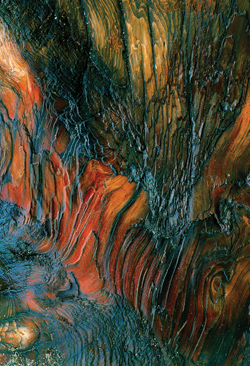
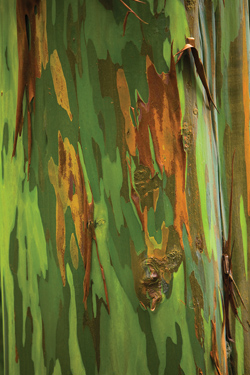
The color and texture of bark looks much better in soft and diffused light. Even sunrise and sunset lighting, which most photographers recognize as being ideal for landscape work, isn’t as good as the light from an overcast sky. It creates too much contrast, too many shadows and the golden light changes the color of the bark. Look how rich the color is in (#6); this was taken in shade. In fact, late afternoon sun was hitting the tree and I used my body to shade the bark. Otherwise the image would have had too many dark shadows.

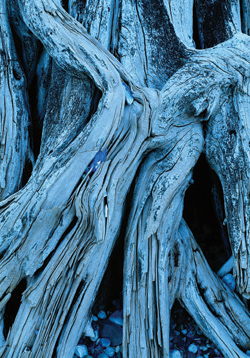
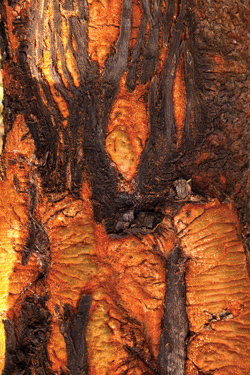
If you shoot in deep shade, the diffused light may become too bluish for your taste. An exaggerated example is (#7) a picture I took in Alaska on film in the 90’s. The sky had a thick cloud cover, and as a consequence the ancient tree stump that had been buried by a glacier turned blue. In the digital realm, you have the ability to tweak any kind of color temperature discrepancy very easily in the camera or later in processing. If you shoot in Raw mode rather than JPEG that correction will be so much easier. In the camera set the white balance to adjust for, to enhance the color cast of the scene.
Composition
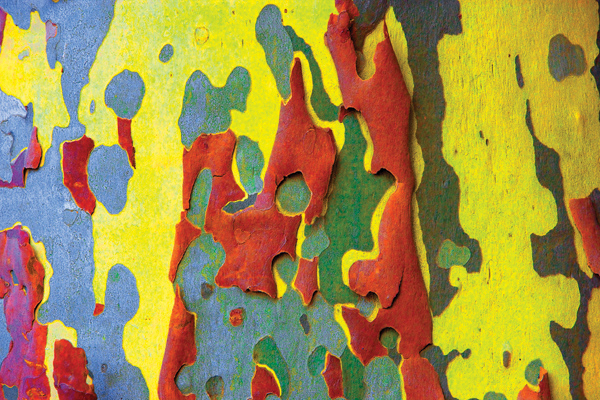
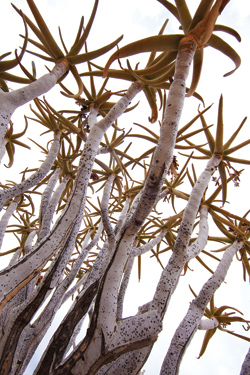
Most of the pictures in this section were taken where I moved in close to fill the frame with color and texture, such as (#8) and (#9). In the case of the large fig tree I found in Ethiopia (#10) I was able to move back and include more than a tiny section of bark. This picture encompasses about 6 ft of the unique pattern and the defined contours. However, sometimes I will include the sky in the picture as well. In (#11) I used the white sky from an overcast day as a clean backdrop behind the branches of a quiver tree. Not only did the texture of the bark intrigue me, but I also found the unique branches to be fascinating. They were almost alien-like.

Another approach I use is to include a group of trees whose bark make a unique pattern, such as (#12). I took this in a swamp in South Carolina, and it is one of my favorite pictures of trees. The mass of trees present what seems like a solid panel of textures and design.


![]()
Get the Latest Photo Tips, News & Reviews from Shutterbug!
| Camera Reviews Other Reviews | Mobile Reviews Photography Reviews Columns | News | Features | How-To | Resources |
 © 2026 Shutterbug
AVTech Media Americas Inc., USA
All rights reserved