- REVIEWS
Camera Reviews 
More Reviews Mobile Reviews Photography Reviews - GALLERIES
- VIDEOS
- BUYER'S GUIDES
Auto FX Software’s Mystical Focus 1.0; A Dual Platform Effects “Stand-Alone,” Or Plug-In
 Mystical Focus builds on the success of the Auto FX “Mystical” series of plug-ins, which includes Mystical Lighting and Mystical Tint, Tone, and Color. As with the rest of the Mystical series, Mystical Focus is available for Windows and Mac, and can be run as both a Photoshop plug-in and as a stand-alone application.
Auto FX has spent a good deal of time reworking the Mystical installer routine to create a smoother, faster install. The changes are noticeable, and the program installed on my Mac quickly, and without any errors. The only real inconvenience is that separate installs are required if you plan to use the software as both a Photoshop plug-in and as a stand-alone program. The stand-alone installation placed both the program shortcut and the program folder on my desktop, which is somewhat unusual for a Mac installer, but I was able to move both items to the Applications folder (where I felt they belonged) without any issues.
 |
|
|
Focus filters are, of course, nothing new to Photoshop. However, Photoshop’s tools can be somewhat difficult to work with. For example, when using the Photoshop Radial Blur filter (Filter Menu>Blur>Radial Blur), you can’t work directly with your photo. Instead, you work from within a small Photoshop dialog box, and you must approximate where you would like the filter applied.
Mystical Focus addresses this issue quite nicely. The interface for all of the Mystical Focus filters enables working directly on the image, with a variety of tools. This is not only convenient, it enhances productivity, since you don’t have to use the trial-and-error approach.
The Mystical Focus interface opens in full-screen mode, covering Photoshop or the desktop, and hiding the Dock in OS X. The Dock is revealed by clicking in the screen area where it normally displays. A minor issue exists in that the minimize button is grayed out. This is not a problem in Photoshop, since minimizing would only reveal the Photoshop interface, which is locked anyway because a plug-in is running. However, it is an inconvenience in the stand-alone application, particularly for users like myself who are constantly switching windows. Note that you can still switch to another window by using Command + Tab (or Alt + Tab in Windows).
 |
|
|
The Layer palette records each filter’s results in its own layer. If you decide while working that you liked your image better without a particular effect, you can simply click the check mark next to the layer’s name to hide the layer. Any effects you applied before or after turning off an effect remain untouched. This is a powerful feature, particularly if you appreciate trying multiple filters before settling on a final edit.
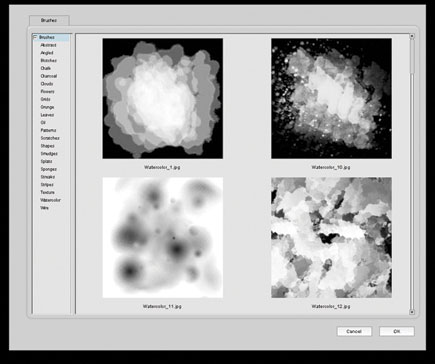
Auto FX Mystical Focus ships with 15 unique filters: Focal Brush, Focal Mask, Focal Plane, Focal Zoom, Glamour Glow, Panning Focus, Radial Focus, Soft Focus, Tilt-Shift Focus, Grain and Noise, Highlight Smear, Highlight Streak, Specular Highlights, Specular Shapes, and Vignette. Let’s take a closer look at some of these filters.
Auto FX Software’s Mystical Focus 1.0 is available for $149 from the company’s website at: www.autofx.com/products/mf/detail.html. Demo versions are available for both Windows and Mac, and package deals are frequently offered for those interested in purchasing the entire Mystical series of plug-ins.
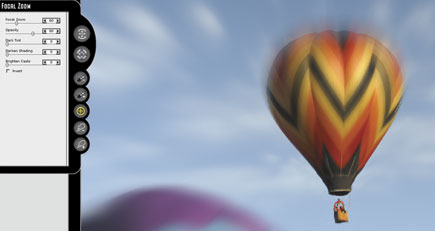
The Mystical Focus Focal Zoom Filter
Conceptually, the Focal Zoom filter in Mystical Focus is very similar to the Zoom option in the Photoshop Radial Blur filter. The difference is in the implementation. I’ll use a hot air balloon photo to demonstrate.
The first item that caught my eye when using Focal Zoom is how easy it is to set the center point of the zoom, since instead of working from within a Photoshop dialog box, you’re working directly on the photo.
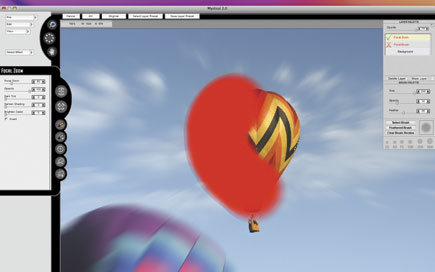
I chose the balloon photo because it presents a challenge often found when you want to use a zoom effect. Photoshop applies its zoom using an ellipse, which is fine for many purposes (for example, when the center point of the zoom is a model’s face). However, the balloon represents a very irregular ellipse (wide at the top, narrow at the bottom), plus an additional problem, in that you probably would not want to blur the family riding in the balloon’s wicker basket. This is where the Mystical Focus ability to paint on the image becomes quite useful. By clicking the Brush-Off tool, you can paint the area on the photo where you would like the effect removed.
Fortunately, the Mystical Focus Brush tools do not require an artist’s steady hand. Since you can use the Brush Panel to define a wide feathered area where the effect is only partially applied, your painting skills do not have to be perfect to get excellent results.
To work on this image (A) I clicked the Focal Zoom filter’s crosshairs icon (yellow, toward the left side of the screen), and then clicked on the image where I wanted the center point to be set (red, underneath balloon). I then painted the effect (B) and here’s the result (C).
 |
|
|
 |
|
|
 |
|
|
|
| |||||||||


![]()
Get the Latest Photo Tips, News & Reviews from Shutterbug!
| Camera Reviews Other Reviews | Mobile Reviews Photography Reviews Columns | News | Features | How-To | Resources |
 © 2026 Shutterbug
AVTech Media Americas Inc., USA
All rights reserved