- REVIEWS
Camera Reviews 
More Reviews Mobile Reviews Photography Reviews - GALLERIES
- VIDEOS
- BUYER'S GUIDES
Before & After: Knowing What You Can Do “After” Can Affect How You See “Before” You Make The Shot
The “fix” in this image made at a balloon festival (#1) is apparent, where the original shot was overexposed, losing the brilliance of the color in the balloons and washing out the blue sky. A few seconds of processing involving adjustments to exposure and enrichment of colors makes all the difference in the world, (#2).
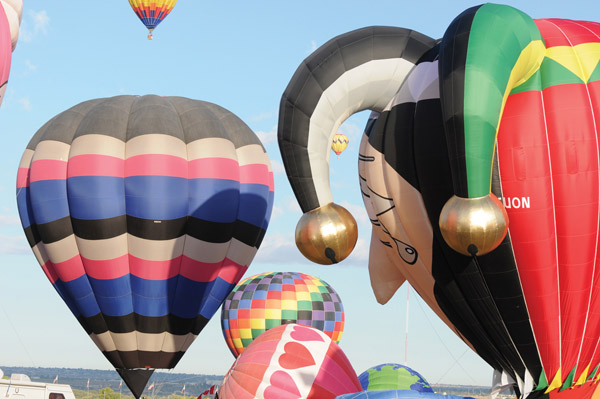
All Photos © George Schaub

This approach can open you up to many other possibilities and make you take chances when you work; it can also raise expectations of what you can create beyond what you see on the LCD review right after the shot.
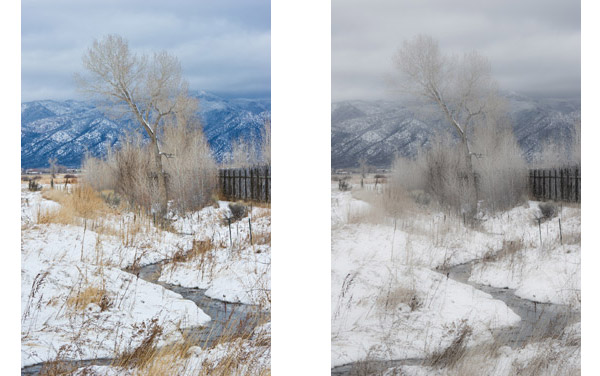
Take a look at this winterscape (#3) photographed as a storm cleared. The mood and color were captured perfectly by the camera, but when I opened it on my computer later I realized that I wanted to create a more ethereal, impressionistic scene. Without resorting to special effects software I was able to make an entirely different feel from the original shot (#4). Knowing I could do this made me look for similar scenes that I knew I would transform later using this style. I used the same “eye” when photographing this close-up of plants in the garden (#5) and then applied the same kind of processing steps to realize the vision and expand the image within that theme (#6).

Understanding the potential of the medium, as well as its limitations, will make you a better photographer. It will remove any hesitancy you have about your abilities as you can make assumptions about the image that you could not before and foster a creative environment that will raise your images to another level. The key to this concept is understanding that the image you see on review is often a pale sketch of what the captured image really holds. It is also understanding just what you can do with all the information an image holds, and that unleashing its full potential is part and parcel of digital photography practice.
It can be as simple as knowing that the image you see on the screen after the shot is nothing more than a quick preview, a small JPEG on a fairly low resolution monitor. Viewing conditions might also obscure the beauty of the shot and you’ll discover that what you see on the camera back is a pale representation of the potential within the image.
This idea can also extend to “previsualizing” what the image will look like when you make certain settings or have a certain intent about contrast, color and tone. In other words, as you gain experience you can “see” in your mind’s eye what you will do with the image later.
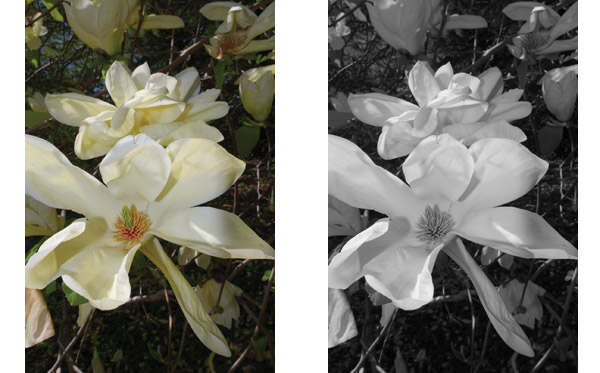
Live View mode can make a real difference in your work and if you have a camera that allows you to see what the image will look like as you change settings it can go a long way toward gaining an appreciation of the potential within every frame. This is especially true when you are photographing in Monochrome (black and white) mode. It can be tough to see in monochrome without this aid, but Live View changes the game.
I knew that these blossoms would make for an interesting black and white image (#7), in the past I might not have been able to record just the contrast and tones I wanted, and would not be entirely sure how it all would come out in monochrome. Using Live View, and programming in monochrome, an orange filter effect and a slightly muted contrast prior to making the exposure, and checking each step in the LCD monitor as I worked, allowed me to get just the look I wanted and saved lots of post-exposure processing time later (#8).
Processing reveals everything an image has to offer and learning to work on an image using in-camera and additional software will complete the circle you began when you first snapped the shutter. This can make every image you choose to work on a customized, personal view. The difference between merely recording a moment or scene and interpreting that moment or scene is all part of the previsualization process. In effect, the image you record is often a sketch while the image you process becomes a personal visual statement.
To take it another step, there are many processing programs that can be used to make photos look as if they were created in another medium. Understanding the variations these programs afford can lead you to seek subjects that would be most apt for their application. This photo of a truck with bunting for the 4th of July (#9) was shot knowing that the broad play of colors and forms would be perfect for use with a program that can instantly convert the image to make it look as if it were made with oil paint (among many other media and effects). Image (#10) shows the result.


When I photographed this engine snowplow (#11) I had no intention of printing it in color and always saw it as a potential high contrast black and white image (#12).

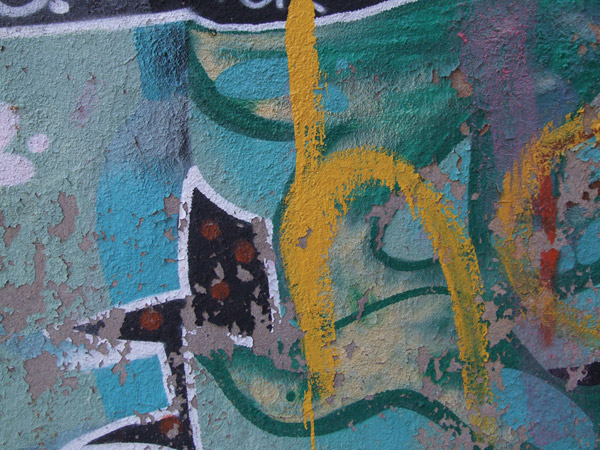
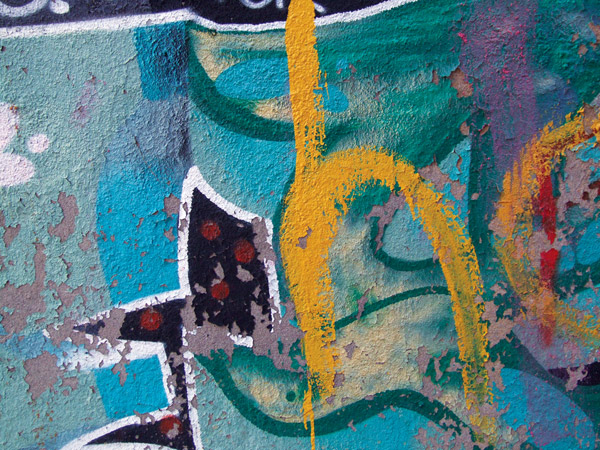
Sometimes the available light isn’t what you would prefer, or you want to add an extra touch to an image. This works especially well when working with abstracts or when you see a real need to add some “snap” to an image you know would be much more successful with it. The graffiti on this alley wall was quite colorful and bright but it was shot in the shade, so it was a bit dull (#13). In processing I was able to enhance the color richness overall and even add an extra touch to the yellow hue (#14), which in effect altered the illumination so it seemed as if the wall was photographed in bright light.
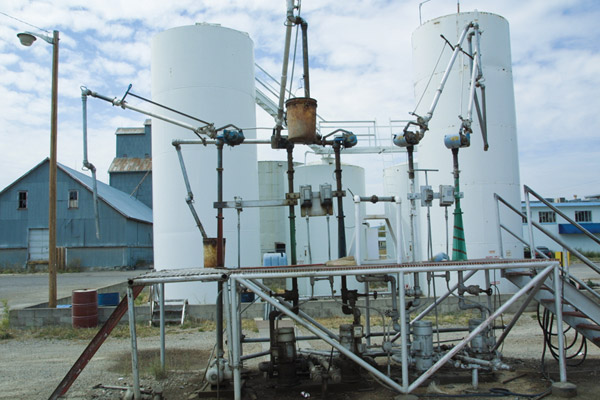
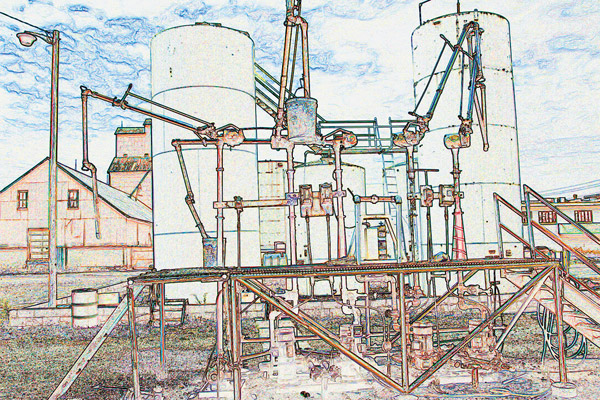
Once you have explored the potential in processing you will seek out new ideas and subjects that you never before considered. I have always admired a “line drawing” look in graphic prints, and found that a certain type of subject matter was perfect for this effect. This depot in Montana (#15) became the source for an abstract rendition that eventually led me to create a series of this type of images (#16). Having knowledge about software and how to use it is a great way to help you stretch your visual boundaries.
You can take images as far out as you like, or simply try to optimize and enhance images in a more classic style—it’s up to you. While you might not want to push image effects too far, as I did in this photo of a tree made using a Lensbaby auxiliary optic (www.lensbaby.com), contrast, saturation and hue changes (#17), it’s good to know that these days there are very few limitations to what you can do with an image, be it subtle or extreme changes and effects.


![]()
Get the Latest Photo Tips, News & Reviews from Shutterbug!
| Camera Reviews Other Reviews | Mobile Reviews Photography Reviews Columns | News | Features | How-To | Resources |
 © 2026 Shutterbug
AVTech Media Americas Inc., USA
All rights reserved