- REVIEWS
Camera Reviews 
More Reviews Mobile Reviews Photography Reviews - GALLERIES
- VIDEOS
- BUYER'S GUIDES
Adobe Photoshop Lightroom CC Software Review
![]()
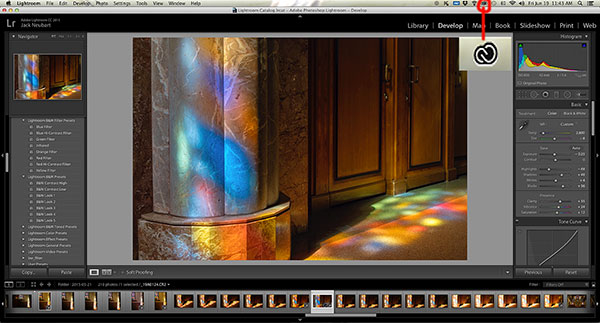
Lightroom has been always available as retail standalone software that you buy, install, update, and pay to upgrade when applicable. Well, that has changed, in part, thanks to the Adobe Creative Cloud, which unleashed a torrent of cloud-integrated apps, among them Lightroom CC.
I wasn’t convinced of the necessity to dive into the cloud when Photoshop CC was first introduced, choosing instead to remain firmly grounded with CS6. But things took a turn that would force my hand when Adobe chose to no longer support Lightroom 5 with updates. When testing new cameras and lenses, I found myself resorting to Photoshop CS6 so I’d have access to the latest Adobe Camera Raw (ACR). I was at a crossroads. Creative Cloud, show me what you’ve got.
The Adobe Creative Cloud and Lightroom CC
The Creative Cloud is a subscription-based service, or membership plan, if you prefer, now in its 2015 iteration, which includes a new release of Photoshop CC. The beauty of the Creative Cloud is that you can subscribe to the basic photo package and get both Lightroom CC and Photoshop CC, along with Bridge CC, for a mere $9.99 per month, mobile apps included.
And barring minor limitations, you can work with the desktop applications without an Internet connection. (You can still buy the standalone Lightroom alone, as version 6 for $142 street.)
You also get CreativeSync, which Adobe explains as follows: “Adobe CreativeSync keeps everything you need up to date and at your fingertips across your desktop, web, and mobile apps. It automatically syncs your files, fonts, photos, design assets, settings, metadata, Adobe Stock assets, and more. It also powers your Creative Cloud Libraries, giving you instant access to your favorite assets right from within your apps. With CreativeSync, you can start a project in any app on any device, pick it up where you left off, and finish it anywhere.”

You can terminate your membership at any time (certain caveats apply), but for as long as you remain with the plan, you’re entitled to every update and every upgrade to these applications. Adobe has even provided a simplified CC user interface to stay on top of your subscription. (Interestingly, this interface recognizes Photoshop CS6, but not Lightroom 5, which still resides on my hard drive.)
In the long term, I imagine that the subscription will prove more economical than buying/upgrading standalone products—assuming the standalones remain standing for very long. It promises to be more efficacious.
Anyway, after installing the Creative Cloud and all the applicable software, one of the first things I found I needed to do was to set up File Type Associations in Bridge CC to ensure that files in Bridge would open in Photoshop CC, not CS6. There wasn’t much I had to do in Lightroom CC once installed.
OK, So Why Do I Need Lightroom?
Adobe Photoshop clearly holds a unique role in the digital imaging world, giving you pixel-level editing, layering, merging, and blending, together with a host of other features. I know Photoshop users who have never cracked open Lightroom.
I, on the other hand, had discovered the benefits of working in Lightroom many years ago, and haven’t looked back. I’m better organized and can decide which files and folders go into my Lightroom catalog and which do not. You can easily track down needed files, especially if you’ve added keyword tags, or you can search by select metadata. What’s more, you can periodically remove folders that you no longer need from the catalog (I do that with test shots). That lets me run a clean, lean, and mean digital imaging machine.
Many of my images never even see Photoshop. Once I’ve processed the Raw files in Lightroom, they’re usually ready for their ultimate destination without further ado. Soft proofing in Lightroom CC, which now includes CMYK support, ensures that colors remain in-gamut, especially when printing, which I’m now doing on an Epson SureColor P600.
And what I was really pleased with in Lightroom CC was that, after upgrading from Lightroom 5, I did not have to re-install any of my plug-ins. They were all ready for me to use. That was not the case with Photoshop CC, which required a fresh re-install of my plug-ins.
Non-Destructive Raw Processing
But what’s special about Lightroom, and lacking in Photoshop, is this: the process is non-destructive. You can always retrace your steps and take a different approach, reprocessing the file to your heart’s content.
You can even create “virtual copies” that reside in the catalog but take up next to no space on your hard drive. And you can shape those virtual copies any way you like without affecting the original.
The only time a file leaves the Lightroom environment is when it’s converted to another file type, such as TIFF or JPEG, for external editing. In some cases, a file that goes out to a plug-in comes back as DNG. Even if the plug-in returns a TIFF or JPEG, editing from that point forward remains non-destructive.
I could go on, but you should really download a trial version just to get a feel for what Lightroom CC can do. Download it here.

What’s New in Lightroom CC (Lightroom 6)
While there are numerous new features that may strike your fancy, the ones that grabbed my attention, and which we’ll be taking a closer look at, are the following:
• HDR photo merge
• Panorama merge (stitched panorama)
• Pet eye correction (analogous to red-eye, but for critters)
• Dehaze (adds depth to fog/mist-enshrouded scenes)

HDR Photo Merge
Of course you can still use your favorite HDR plug-ins for this purpose. But the problem I’ve found with many of these is that they smack of HDR, with characteristically unrealistic tonal and color relationships. Some also tend to add digital noise, even in neutral tones.
The new HDR merge feature in Lightroom, which I prefer over that offered in Photoshop, takes a more conservative tack than what you’d find in most plug-ins. What’s more, it’s much simplified: there are few decisions you have to make, the most critical being, whether to allow Lightroom to correct for ghosting (“deghost”) among subjects/elements moving within the frame.
The HDR file is returned to Lightroom as a DNG with all metadata intact (in contrast to the way some HDR plug-ins handle metadata). DNG is essentially a Raw file. You can continue to process the HDR, since you will often find further tweaking necessary to prevent clipped highlights and shadows. But do not reset. That will undo everything. To play it safe, create a virtual copy and work on that.

The one glitch I found among select images was that when opting for any level of deghosting, Lightroom adds very noticeable artifacts—notably digital noise and color distortion in the deghosted area, clearly following the path outlined by the deghosting overlay in the preview. At this writing, Adobe is addressing this issue. There’s also no way to manually select a “key frame” as the base frame around which the HDR is built.
I should point out that Lightroom disregards tonal/exposure/contrast and local adjustments and cropping you may have made, but keeps other changes intact, such as lens profiles, sharpening, vignetting and perspective correction, and b/w conversion, during the merge process. The resulting file is renamed “(filename)-HDR.dng,” adapting one of the constituent filenames.

Panorama Merge
I once owned a Minolta panorama head but gave it away after not using it for years. Wish I had it now that I’ve taken a renewed interest in panoramic photography, thanks to the new Lightroom CC. But, thankfully, I’ve managed without it.
You can let Lightroom automatically select the projection method it uses to stitch the frames (spherical, cylindrical, perspective). Spherical is often chosen when you select Auto Select Projection, as it tends to maintain more natural proportions, especially with ultra-wide panoramas.
You’d do best using a tripod, especially for 180-degree and wider panoramas. When shooting handheld, I’ve managed to successfully create both horizontal and vertical panoramas when only two to four frames were involved. The resulting file bears the moniker “(filename)–Pano.dng.”
The entire process is fairly straightforward with Lightroom opting for simple panos—nothing fancy. Just make sure there is enough overlap (at least one-third of the frame) from frame to frame, and use the same focal length, f-stop, and ISO, with little to no variation in exposures, pivoting around a stationary axis as you pan the scene. You can also create a panorama from fisheye exposures.
I also discovered that I could shoot action sequences and show a skateboarder, for example, in two positions in the merged (what I’d call) quasi-panorama. Keep the background as free of other movement as much as possible. (This action pano process does have its quirks, but still, it’s fun).
Conclusion
There are still aspects to the Creative Cloud that I have yet to explore. One of these is the new Adobe Stock photo library connection; another is interconnectivity with my iOS devices and Android smartphone. But that aside, just in terms of the new Lightroom CC, I’ve already made considerable use of several new features.
The new HDR merge is a welcome addition. Often I feel that HDR apps just pile on lots of settings that are redundant to those already in Lightroom. Now you no longer have to deal with all that, and you can avoid trying to figure out what some of those esoteric settings are all about.
You simply work in Lightroom to modify the image as you normally would once the HDR image is generated. (For now, avoid scenes with lots of movement between frames, as a small glitch will spoil your results. But don’t let that stop you from bracketing handheld—provided you have a steady hand.)

The panorama merge is about as simple as it gets. Again, once the pano file is generated, you have full access to Lightroom’s tools. I’m still exploring the nuances, but that doesn’t stop me from taking full advantage of this feature and going out to shoot more pano sequences—although I’ll use a tripod for much of this in the future, just to be safe.
One more thing to keep in mind: an advantage to both HDR and pano merges is that you’re building a much larger file than the original, which could have greater application, especially if you’re working with a camera of modest resolution.
Pet eye corrections are not a done deal as is. You still have to go into Photoshop to clean up the eyes.

Dehazing proved useful in adding depth to foggy scenes. You can remove haze by pushing the slider to the right (which increases contrast), similar to the ClearView function in DxO OpticsPro 10.
But Lightroom does it one better: move the slider in the opposite direction and add a veil of haze for a gauzy, romantic feeling. Or even use this tool simply to reduce contrast and correct for shadow clipping (move the slider to the left just a tiny bit, and watch the histogram).
Other new features didn’t grab my attention nearly as much. Still, it’s good to see that Lightroom continues to grow, and now as part of the Adobe Creative Cloud, the sky’s the limit.
(Note: I tested Lightroom CC on an iMac, under OS X 10.9.5, equipped with a 3.1 GHz Intel Core i7 processor, 16 GB RAM, and NVIDIA GeForce GT 650M 512 MB VRAM; outputting to an Epson SureColor P600 wide-format printer.)


![]()
Get the Latest Photo Tips, News & Reviews from Shutterbug!
| Camera Reviews Other Reviews | Mobile Reviews Photography Reviews Columns | News | Features | How-To | Resources |
 © 2026 Shutterbug
AVTech Media Americas Inc., USA
All rights reserved