- REVIEWS
Camera Reviews 
More Reviews Mobile Reviews Photography Reviews - GALLERIES
- VIDEOS
- BUYER'S GUIDES
Wildlife Photography: Lenses, ISO, And Shutter Speed
In almost all instances, you will need a serious telephoto lens. When I travel to Europe, Asia, or Latin America, my longest lens is a 70-200mm, and with a 1.4x teleconverter I feel I’ve covered most bases. However, for wildlife you need a lens that is long enough to fill the frame with distant subjects. In addition, it should have a maximum lens aperture that gathers enough light so in low-light circumstances you can use a shutter speed that enables you to get sharp pictures.
Even when subjects are relatively close, like the crowned crane (#1) that was only about 70 ft from my safari vehicle in Kenya, I couldn’t get a tight head shot with an average telephoto. I used a 500mm lens plus a 2x teleconverter—an astonishing 1000mm of magnification—to get this picture. With a 300mm lens, I would have been limited to capturing the entire bird with some of the bush around it. That would have been an acceptable picture, I’m sure, but it wouldn’t have the impact of this photograph.
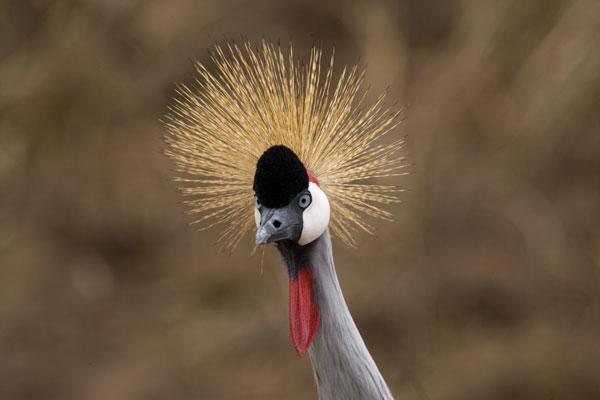
All Photos © 2010, Jim Zuckerman, All Rights Reserved
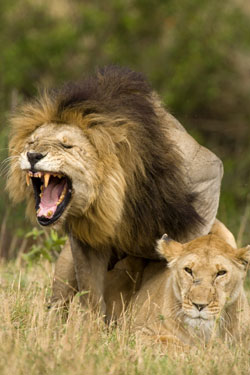
I would recommend 400mm as a minimum focal length for shooting wildlife. Obviously, the longer the focal length, the more you can fill the frame with small animals and birds. Not all compositions have to be frame filling, of course, but for maximum impact it’s great to see your subjects close up and with tremendous detail. I feel that’s why the shot of mating lions (#2) is so powerful. They were about 80 ft away, and with a 500mm lens I was able to focus exclusively on the action.
As the focal length of the lens you decide to use increases, three things happen: the lens gets more expensive, it becomes heavier, and it takes up more volume in your photo backpack. Get the longest focal length lens you can afford and that you are willing to carry on your travels. I chose the 500mm f/4 Canon telephoto because the 600mm f/4 is just too large to fit into the overhead compartments of small aircraft, and the 400mm f/2.8 is even larger. It’s a monster. The 500mm was a compromise, but I can tell you that it’s the best lens I’ve ever had for wildlife photography.
The maximum aperture of the lens is extremely important in your decision to buy and carry a lens for wildlife photography. The reason why this is so crucial is because you want sharp pictures. The general rule that helps photographers get sharp pictures with telephoto lenses is this: the shutter speed should be the reciprocal of the focal length of the lens—or faster. For example, if you are using a 400mm lens, you should be shooting with a shutter speed of 1⁄400th of a second or faster to get a sharp picture. If you are using a 500mm lens with a 1.4x teleconverter, then according to this guideline the shutter should be at least 1⁄700th of a second. Because the shutter speed is so critical to getting sharp images, the maximum lens aperture is a vital part of the equation. Even a one stop difference in speed can mean that your pictures will be tack sharp as opposed to disappointingly soft.
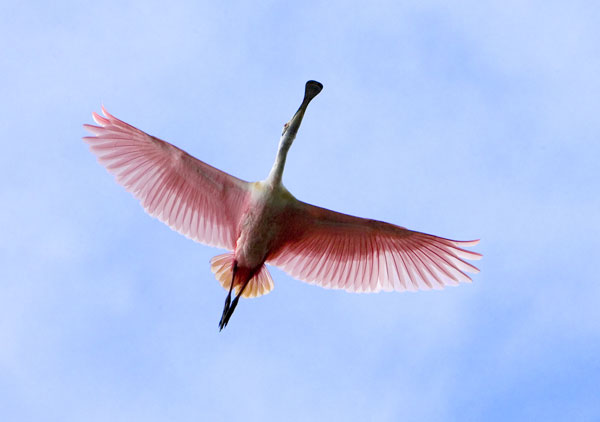
Can you get sharp pictures if your shutter speed is slower than the reciprocal of the focal length of the lens? Yes, but the odds are working against you. If the lens is not on a rock solid support and/or the subject is moving, don’t expect tack sharp images unless the shutter speed is extremely fast. For example, the roseate spoonbill I photographed in Tampa Bay, Florida (#3) from a small boat precluded the use of a tripod. I was hand holding a 500mm f/4 lens while shooting straight up as the bird flew overhead, and to ensure I was able to get a sharp picture I set the shutter to 1⁄2000th of a second. In this case, depth of field was not relevant because I was basically shooting a single plane, and that allowed me to open the lens and thus use a fast shutter.
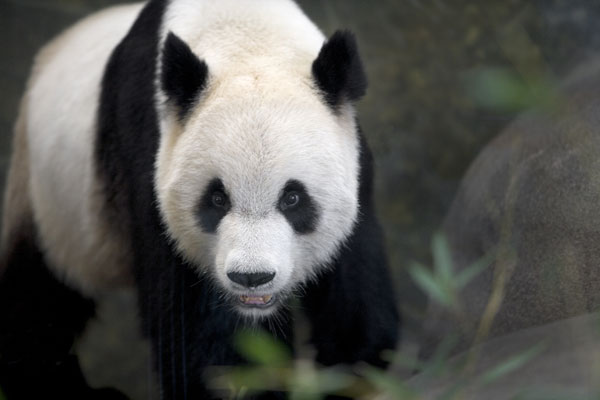
Most wildlife shots will be sharp if you use 1⁄250 to 1⁄500th of a second. When I traveled to Memphis to photograph pandas in the zoo, the lighting conditions were dim, and therefore I had to use slower shutter speeds. The picture I took behind glass (#4) was shot at 1⁄125th of a second, but because the animal was moving so slowly I was able to get away with the slower speed primarily because my focal length was only 170mm. Fortunately I was able to get close enough that I didn’t need the super telephoto.
An option that you may consider in buying a telephoto lens for wildlife photography is to get a DO lens. DO stands for Diffractive Optic, and although these are not inexpensive pieces of equipment, they are shorter than standard lenses and they also are designed to decrease chromatic aberration. For example, the Canon 70-300mm DO lens has the same maximum aperture as the standard 70-300mm (f/4.5–f/5.6) but it is 1” shorter. If the volume of equipment you carry is of the utmost importance, then this is a good option for you.
Image Stabilization
Image stabilized lenses are very useful in some situations. If you are hand holding the camera and the subject isn’t moving, then you can get sharp pictures in low light environments. Slow shutter speeds (such as 1⁄10th to 1⁄45th of a second) that automatically produce less than sharp pictures will now give you acceptably sharp images. You still have to hold your breath and squeeze the shutter button gently, but I am amazed at how effective the IS feature is (with Nikon it’s called VR—Vibration Reduction and other lens makers have similar branded names for their stabilized lenses).
There are two caveats, though. First, if your subject is moving then all bets are off. Don’t expect sharp pictures of a moving subject when shooting with slow shutter speeds even though the Image Stabilization feature is switched on. Second, if you use a tripod, turn the IS feature off. Even though camera manufacturers indicate that with some lenses it can be left on when using a tripod, my experience is that this isn’t true. I haven’t tested all IS lenses, but it’s better to be safe than sorry. You don’t need it turned on anyway when a tripod is being used.
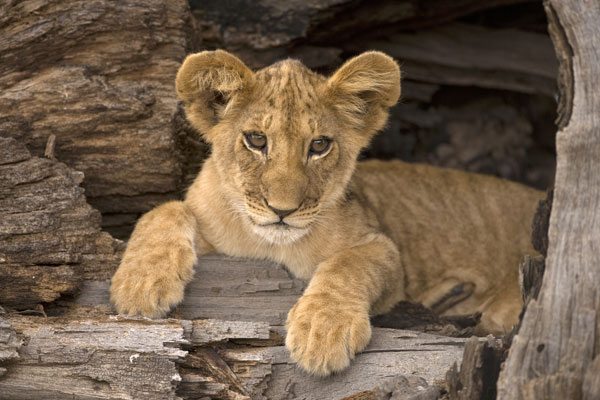
When you are shooting from a vehicle and using a bean bag, which is the typical means of camera support while on safari, I discovered that the IS feature has to be turned off as well. I thought that it would be a good idea to leave it turned on because, I reasoned, a bean bag is not as solid a support as a tripod. I discovered this was a mistake. During one of my photo tours to Kenya, our group found three lion cubs in a tree one morning in Samburu National Park (#5), and I took about a dozen close-up pictures of one of the cubs before I examined the images on my LCD monitor. When I enlarged them I was surprised and disappointed to see that the images weren’t sharp, so I turned off the IS on the lens and suddenly everything was fine.
Flash
I always bring my flash with me no matter where I travel. You never know when it will allow you to get a picture that otherwise would have been impossible to capture due to low light. For example, I didn’t expect a lodge in which I stayed in the Maasai Mara National Park in Kenya to put food out for a crocodile every night. A low stone wall allowed me to get very close to the reptile without danger, and I used a 50mm normal lens to get this picture (#6). It would not have been possible without a flash. As I look at this, it would have been better if I had taken this with a friend holding the flash off the camera to get side lighting. Using the flash on-camera is convenient and effortless, but now I travel with the Pocket Wizard wireless transmitter so I can shoot with the flash illuminating a subject from any angle. The lighting is almost always more attractive.

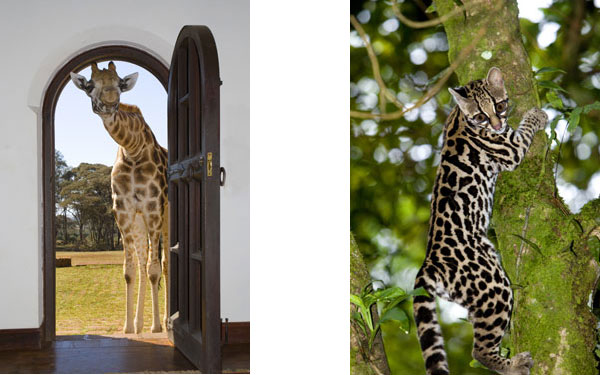
Fill flash is an important aspect of outdoor lighting, and again situations may arise where the additional light you can provide is crucial to opening up the shadows and balancing the light on the subject with the light in the background. The unique visitor at the front door of the Giraffe Manor outside of Nairobi (#7) is a great example. Had I not used fill flash here, either the giraffe would have been exposed correctly with the background entirely overexposed, or the giraffe would have been a silhouette against a correctly exposed background. The flash enabled me to expose correctly for both the foreground and the outdoor environment. I used the same technique in Costa Rica when I photographed a rare jungle cat, an oncilla (#8). Photography in a tropical forest is challenging because the light on the jungle floor is so dark, so in this case I was fortunate that I had a flash with me.
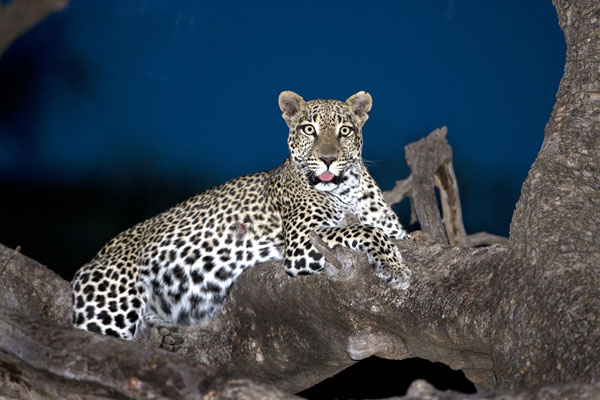
I was also lucky to have a flash on safari one evening. We were late in getting back to the lodge for dinner because we spotted a leopard in a tree at twilight (#9). It was a unique situation, and in balancing the flash with the cobalt blue sky I captured a favorite picture from the trip. I never expected to use flash, but it’s good to know it’s in my backpack because so many times it proves its usefulness.
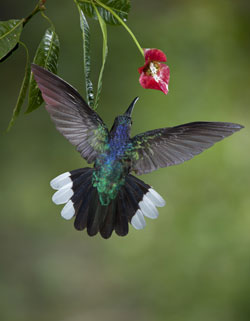
Hummingbird photography requires a multiple flash setup to freeze the movement of the wings. When I traveled to Costa Rica to photograph some of the exotic species there (#10) I had to use four flash units. Two were placed on either side of the flower that attracted the birds, one was a backlight on the bird, and the fourth one was positioned to illuminate the background (which was a large print of out of focus foliage). Besides the controllable lighting, the reason why flash equipment is used is because the flash duration can be made to be extremely short. If you cut the power down to 1⁄16th power on all four flash units, the flash duration (i.e. the actual length of time the light inside the flash is on during the exposure) becomes approximately 1⁄16000th of a second. This is brief enough to freeze the wings. The shutter speed of the camera becomes irrelevant in this case. Its function is to be fast enough to eliminate ambient daylight but slow enough to sync with the flash. I usually use 1⁄250th of a second as the camera’s shutter speed when shooting hummingbirds.
Shooting Perspective
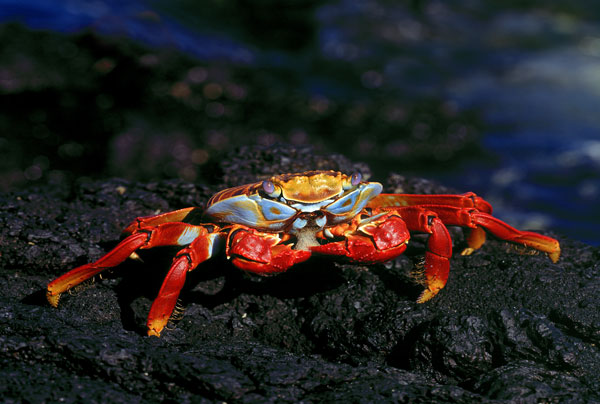
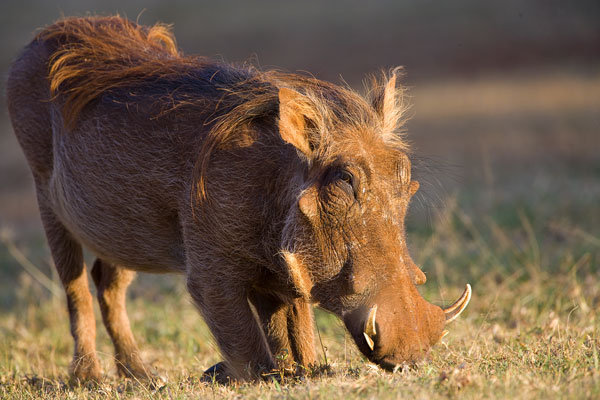
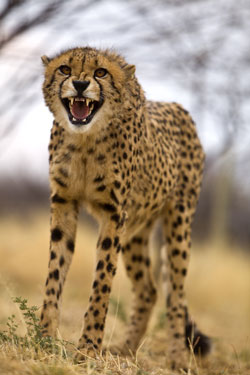
The major frustration I have when I am shooting from a vehicle—such as when I’m on safari or in places like Bosque del Apache in New Mexico—is that the shooting position is too high. When you photograph wildlife, the subjects gain greater stature if you shoot from ground level. Lying on the ground creates a more intimate portrait and one that is incredibly compelling. This is true for small animals that are very close to the ground, like sally lightfoot crabs in the Galapagos Islands (#11) and warthogs (#12) as well as large animals like elephants (#13). We all know that elephants are huge, of course, but to photograph them from ground level makes them even more impressive. In Africa, whenever I have the opportunity to shoot out of a vehicle, I take it. On a recent photo tour to Namibia, I brought my group to a cheetah preserve where we were able to shoot captive cheetahs in natural environments while we were kneeling or laying on the ground. Everyone was thrilled with the pictures (#14).

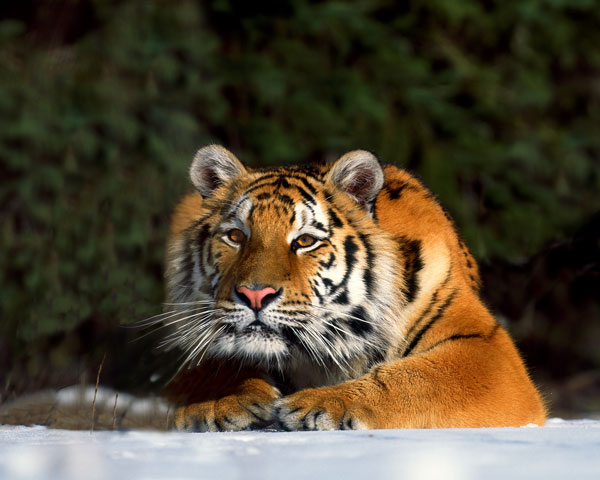
Even when a larger animal is lying on the ground, like the Siberian tiger I photographed at a Montana game farm (#15), spread the legs of your tripod out so the camera can be positioned below eye level. The tiger appears to be even more powerful than we know he is because my camera was just a few inches above the snow when I took this picture.
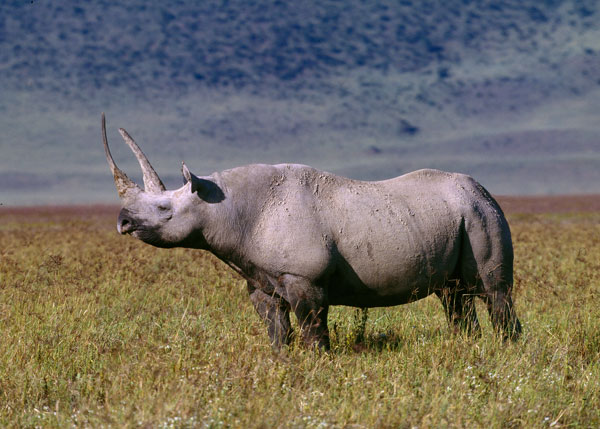
If you must shoot from a vehicle, instead of standing up and taking pictures out of the hatch, shoot through the side window. It is less comfortable, but it will result in better pictures. Also, use the longest lens you have. If the animal is far away, the fact that the lens is parallel with the ground and not oblique to it (as if you are shooting downward) means that you’ll get the best type of composition without shooting from ground level. The black rhino I photographed in the Ngorongoro Crater, Tanzania is an example (#16).
ISO Strategy
The optimal setting for the ISO is as low as possible. This minimizes digital noise. When we all shot film, many photographers liked fast and ultra fast films because of their coarse grain structure. The pronounced texture added an interesting look to the images. Now, however, no one likes the digital equivalent—noise. Therefore, the lower the ISO setting means your pictures will look sharper, have better contrast, and won’t have the unattractive texture of noise.
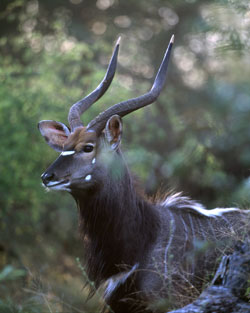
The other side of the equation, though, is shutter speed. When shooting wildlife, this is especially important because animals move. If your pictures are blurred due to a slow shutter, lack of digital noise is irrelevant. Therefore, the strategy that you have to use in circumstances where the light is low is this: raise the ISO until the shutter speed is fast enough to get a sharp picture. The rare nyala, an antelope I photographed in South Africa (#17), is an example. The light was muted, and in order to take a sharp picture I had to raise the ISO until my shutter speed was fast enough to get a sharp image.
If you see that your shutter is 1⁄80th of a second and the lens you are using is a 300mm, in order to increase the speed of the shutter to at least 1⁄300th of a second (this is two f/stops—1⁄80>1⁄160>1⁄320) the ISO has to be raised by two steps. If the ISO is 100, it needs to be changed to 400. If the ISO is already high—say 800—then it needs to be pushed higher, to 3200. This is assuming, of course, that your lens aperture is already wide open. When you are struggling to make the picture as sharp as possible by raising the ISO to get a faster shutter, you don’t have the luxury of depth of field.
None of us like shooting with such a high ISO, of course. 3200 is uncomfortably high, even with the new generation of cameras that handle digital noise quite well. You might try and get away with ISO 1600, but then the shutter speed will be 1⁄160 in the example above. This might give you a sharp picture, or it might result in a photo that is almost sharp. That’s the challenge. If you have the time, you could shoot it both ways. Since wildlife subjects are so unpredictable and they move all the time, this may not be an option. I would first go for the faster shutter speed, and then if necessary in post-processing you can use a noise-reducing program like Noise Ninja to reduce the unwanted noise resulting from the high ISO setting.
Animals In Captivity
There are many types of opportunities you’ll encounter in your travels where you can photograph wildlife in captive environments. Sometimes these places are photographer-friendly. These include zoos, rehabilitation facilities, bird parks, reptile houses, butterfly farms, and aquariums. Photographing animals in these circumstances is not as rewarding and exciting as shooting them in the wild, but the pictures can nevertheless be outstanding and you can have a great time doing it.
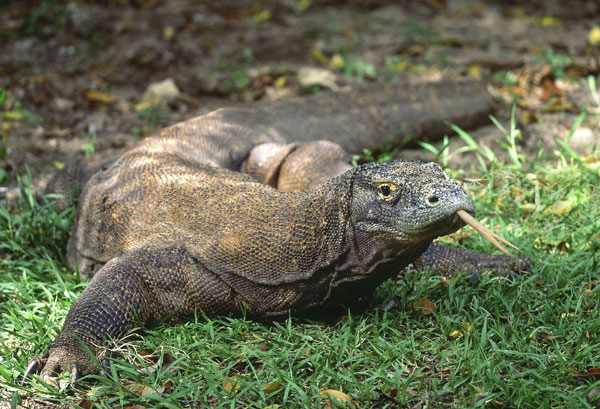
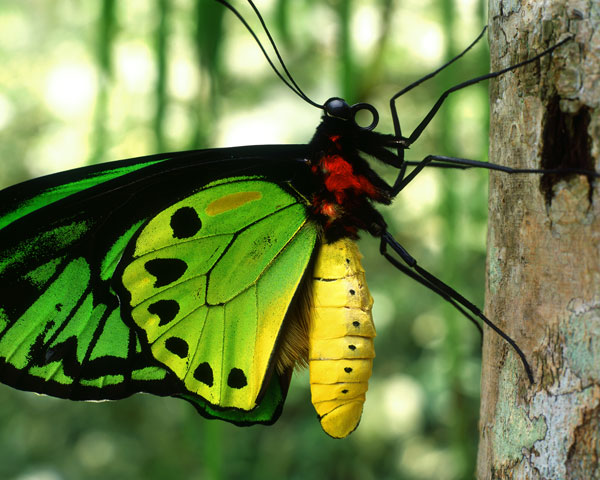
In Surabaya, Indonesia, for example, I was able to get a good shot of a Komodo dragon (#18). I haven’t been to the island of Komodo yet, so this was an opportunity to photograph the largest living reptile. On the island of Bali also in Indonesia, there is a wonderful butterfly farm and here you can take pictures of many species of exotic butterflies, including the birdwings—the largest butterflies in the world (#19).
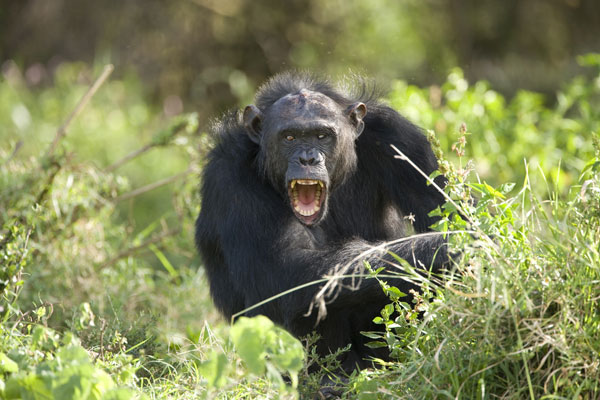
When I was in Kenya, I was able to visit the Jane Goodall chimpanzee center and photograph the chimps on a small island with a telelphoto (#20) and also through the electrified fence where mothers brought their babies (#21) to view these strange creatures with cameras.

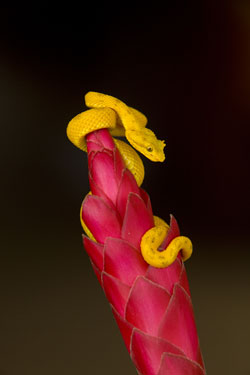
In a reptile house in Costa Rica, I bring my photo tour group to photograph the exotic indigenous snakes, frogs, turtles, and other reptilian denizens of the country (#22). This is a wonderful opportunity to capture amazing animals that would be extremely difficult and sometimes very dangerous to get close to in the wild.


![]()
Get the Latest Photo Tips, News & Reviews from Shutterbug!
| Camera Reviews Other Reviews | Mobile Reviews Photography Reviews Columns | News | Features | How-To | Resources |
 © 2026 Shutterbug
AVTech Media Americas Inc., USA
All rights reserved