- REVIEWS
Camera Reviews 
More Reviews Mobile Reviews Photography Reviews - GALLERIES
- VIDEOS
- BUYER'S GUIDES
Samsung NX1 Mirrorless Camera Review
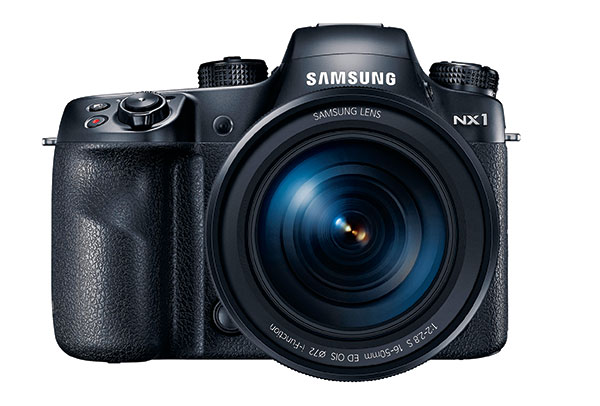
I’ve worked with mirrorless cameras in the past, but never found them quite up to the task. After unpacking the new Samsung NX1 ($1,499, body only) and 16-50mm f/2-2.8 S ED OIS lens ($1,299) and taking a closer look at the two, I thought, this could be the deal changer. I might finally be ready to trade in my digital SLRs for a mirrorless interchangeable lens camera.
On the face of it, the NX1 can go head-to-head with my Nikon and Canon gear, beginning with a 28.2MP backside-illuminated (BSI) CMOS APS-C (cropped) sensor—without a low-pass filter (for added sharpness). Add to that a crystal-clear electronic viewfinder (EVF), touch-panel display, maximum 15 fps still capture at full resolution, 4K video capture, and fast AF.
This camera is certainly loaded with enough features to attract even the most hardened among us. But performance is what counts. Is the NX1 a solid-enough performer to sway the pro or serious amateur away from DSLR-dom for good? We shall see.
Build
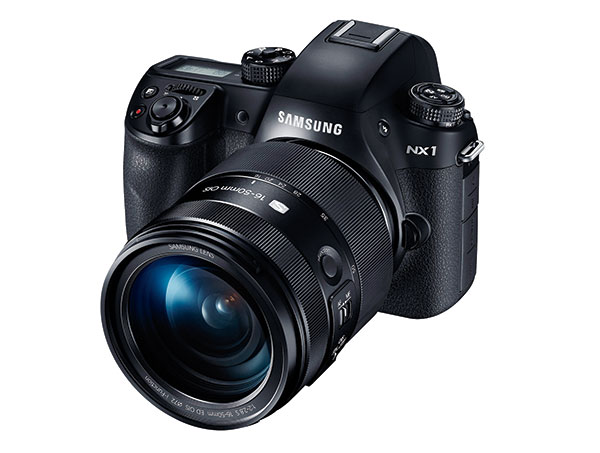
From the moment I held the camera and lens in my hands, I knew I’d be at home with this duo. The camera is not exactly small. In fact, the fairly sizable grip, together with the thumb rest, offered a firm grasp. And the camera felt sturdy. That’s not surprising, given the tough magnesium alloy construction. Add to that dust and splash resistance and you have a pretty sturdy rig.
Size aside, you also have to contend with weight, which came in at over 2.5 pounds for the combo, with the 16-50mm S lens weighing a bit more than the camera body. No lightweight, but that’s not entirely bad news either. The added downward pull of the lens helps to further stabilize the camera, adding to the lens’s built-in OIS (optical image stabilization). In my tests, this gave me a three-stop window when shooting handheld by available light and viewing via the EVF (electronic viewfinder). However, OIS was not entirely effective when viewing on the back panel and panning with AF tracking, as I’d expected, given a less steady grip on the camera when shooting in this fashion.
Viewing and focusing via the EVF was, as the British say, brilliant, in every sense of the word. The only time I knew I was looking at an EVF instead of through an optical finder, aside from seeing a full information display, was in the brief moment when I was greeted by a black screen waiting for the camera to come to life when switched on or awakened from sleep. If activated, auto sensor cleaning will be the first thing you see.
One thing I didn’t care for was the SD card slot. Opening the card door may defy someone with arthritic or sweaty fingers. Beyond that, accessing the card may be difficult for someone with stocky fingers. In contrast, the battery compartment is easily accessible. But I wish Samsung had provided a separate charger. This way you could charge an extra battery and still have full use of the camera, or leave it safely tucked away.
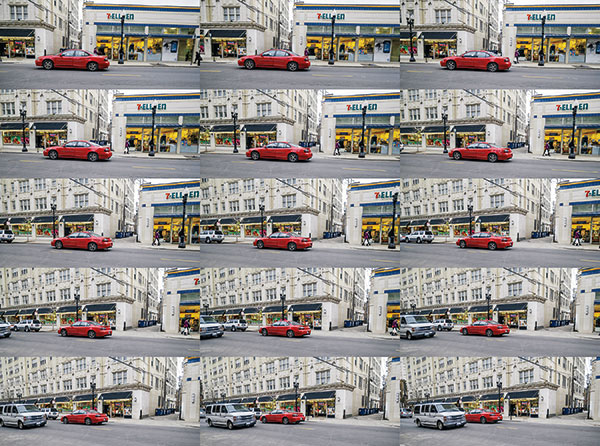
To track moving subjects with the NX1 requires the touch panel. I selected Tracking AF and the fastest burst speed (15 fps), setting the 16-50mm S lens at 18mm, and panning with a 1/250 sec exposure (ISO 400). AF tracking is lost once a sizable obstacle passes between subject and camera, so I stopped the sequence before another car obstructed my view. I should add that the camera didn’t miss a beat, despite the biting cold.
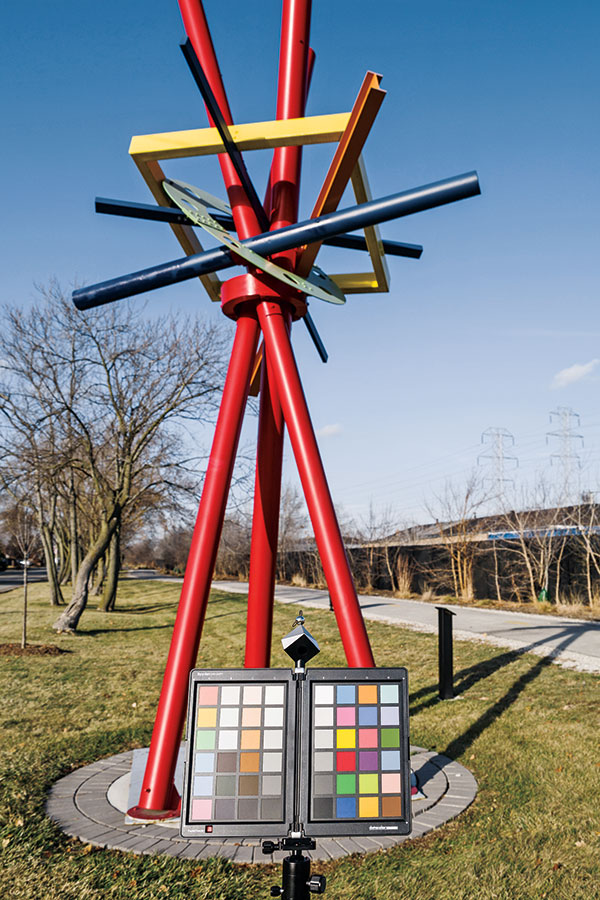
I made this exposure at ISO 100 in aperture priority mode (f/5.6) and AWB. In this test exposure, the camera performed commendably. Test target: Datacolor SpyderCheckr.

Photographing the Chicago skyline was a breeze. As was my wont, I composed and focused using the EVF. As with all the images for this report, I first converted the Raw file using the Samsung DNG Converter, then processed in Adobe Lightroom. (Technical info: ISO 100, f/4.5, 1/250 sec.)
Interface
The buttons I use are essentially, if not entirely, where I expected or wanted them to be. For starters, the on/off switch encircles the shutter release, as on my Nikons. And the exposure override (“EV button”) is behind it, to the right. The movie-record button sits immediately in front of this one and alongside the shutter release—a much better place for it than at the back, where it can be accidentally activated, as on some cameras.
Having said that, I occasionally found myself accidentally hitting the EV button during movie shooting when my eye was glued to the EVF. There’s also a control dial (“Command dial 1”) behind the release.
Move to the rear and you’ll find other key controls. Just to name the ones I used mostly, they include the second control dial and Menu, playback, AF on, and delete buttons. Another button lets you select a mobile Wi-Fi function involving a compatible device loaded with the necessary Samsung software. However, support for my iPad and Android smartphone were still wanting as I write this.
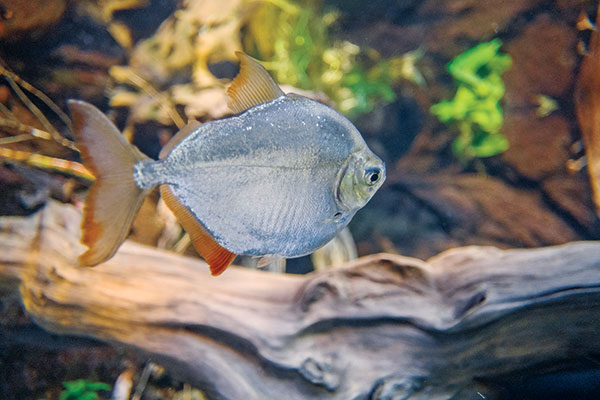
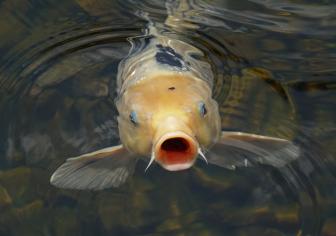
Fish at the aquarium can be tough to capture while swimming. Fortunately, this silver dollar at Chicago’s Shedd Aquarium remained relatively still, making it easy to photograph under subdued lighting. (Technical info: available light, ISO 1600, f/2, 1/30 sec.)

Shooting handheld by available light, I tested image stabilization in the 16-50mm S lens at several different shutter speeds. The one that proved optimum under this set of conditions, with both hands firmly on the camera and supporting the lens and viewing via the EVF, was 1/8 sec (ISO 100) at 50mm (75mm, 35mm equivalent), which established a three-stop window for OIS.
Displays
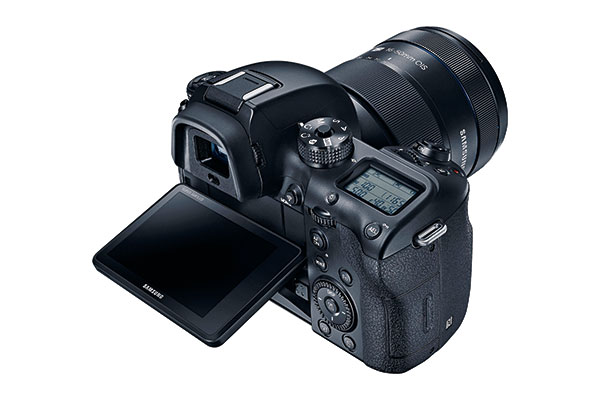
The 2360k-dot OLED (organic light-emitting diode) EVF switches on automatically when it senses your eye, with the equally alluring three-inch, 1036k-dot Super AMOLED (active-matrix OLED) back panel display otherwise in play. You can also manually switch between the two.
With just a hint of light to work with, you can practically see in the dark with the EVF, and bright daylight poses no problem when viewing the AMOLED panel. One reason to use the back panel: it’s capacitive (fingers only; stylus verboten). Oh, and it tilts, at specified angles—but does not swing up all the way, which is disappointing, I’m sure, for all you selfie lovers.
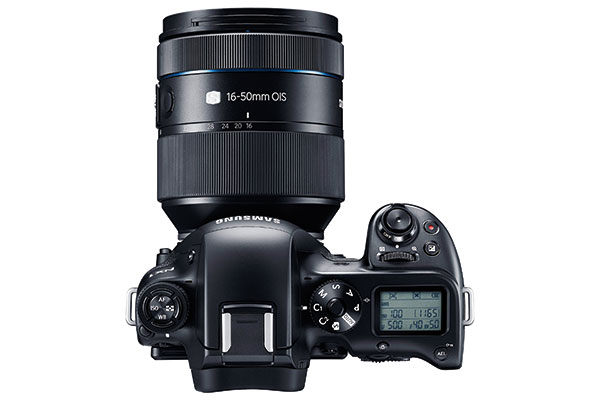
As on my favorite DSLRs, there’s a vanilla LCD info panel on top, which is a step in the right direction. It’s much easier to read user settings here than on the rear panel or in the EVF, both of which tend to get claustrophobic when filled with data. In fact, you might want to wipe the slate clean, as it were, for an unobstructed view, but then you wouldn’t be able to see the live histogram and distance indicator, or, alternately, the digital level gauge. Spoiler alert: You’ll want to clear the color displays for Touch AF and Tracking AF (more below).
Autofocus
The NX1 incorporates the new DRIMe V Image Processor, which, among other things, is responsible for what has proven to be a super-responsive autofocus (AF) system. There are an amazing 205 Phase Detection AF Points, 153 of which are cross-type sensors, and 209 Contrast AF Points (which kicks in under low-light conditions), usable over an AF range from EV -4 to 20. And they practically cover the entire screen. What’s more, the AF-assist lamp is patterned, to further aid in focusing under subdued lighting. Video enthusiasts will appreciate this: phase-detect AF operates when shooting movies.
Selecting AF functions is where the camera falters, as they are spread too far apart to be used efficiently. They should be positioned together to simplify operation. AF mode is clearly marked on top (alongside WB, ISO, and metering pattern). It lets you select single, continuous, or active (auto-switching single/continuous with movement detection) AF.
However, the second AF button on the rear, on the Navigation wheel, is not marked as such. It’s accessed by hitting the left side of this wheel, giving you a choice between a single AF point and multiple AF points. Size for each single AF point, or the area governed by multi AF, is user controlled, via the OK button and Command dial 1.
There are also AF modes assigned strictly to the touch panel. The choices: Touch AF, which focuses on the point you touch; AF Point, which simply assigns the focus point to an area you touch on the screen, requiring follow-up with the AF-on or shutter button; and One touch shot, which focuses on the selected point and shoots.
In addition, the touch panel offers Tracking AF. Regrettably, this function is exclusive to the external panel and lacks predictive AF. I did find a way to use it with the EVF. But as I discovered, this approach can also crash the camera if mishandled, so stick with the touch screen. (If you get into trouble, remove and reinsert the battery to reboot and all will be well again.) In the end, Tracking AF worked quite nicely.
Important notes: Tracking AF locks autofocus in continuous mode, even if you later switch to the EVF. You have to return to the touch panel and select another AF mode to allow you to go back to Single AF (via the top-panel button). Also, if you use the touch panel for AF, clear the screen or you’ll find that icons interfere with touch operation.
You also have the option of manual focus, with a magnified image and focus peaking (a bright outline surrounding points of focus).


Using the built-in flash for close-ups with the 16-50mm S lens easily obstructs part of the light toward the bottom, with or without the lens shade attached, as in this shot of an orchid. Shoot from a greater distance and the lens/shade may still obstruct a portion of the light, as in this broader shot. Compare each with their available light counterparts. Location: Lincoln Park Conservatory.
Image Quality
I was immediately charmed by the Samsung NX1 as soon as I got it out of the box. And now, seeing the impressive image quality this camera can produce and its overall speedy performance, my enthusiasm has not waned, at least not appreciably.
The camera offers the shooting modes I need. Multi-pattern metering proved itself capable with a wide range of subjects, ranging from landscapes to zoo and aquarium displays, provided I was willing to engage exposure compensation on occasion. Color balance under AWB was generally reliable.
Most importantly, AF operation via the EVF or touch panel proved remarkably adept. The camera also proved to be fairly quiet. I even ran the camera at the maximum 15 fps in numbing cold, capturing Raw plus super-fine JPEGs, and the camera performed flawlessly. If you’re new to using a serious camera, the plethora of buttons on the NX1 may appear intimidating. But operating the camera, for the most part, will become second nature after a few outings and provided you use the camera regularly.
What impressed me as much as the camera’s AF system was the context-based adaptive noise reduction. As a Samsung representative explained, it analyzes the image in depth and applies the correct amount of NR accordingly. Chromatic noise was entirely absent, even in JPEGs without any NR applied, in test images shot at ISO 6400 (I recommend Normal High ISO NR, to be practical). Yes, luminosity noise was apparent when the ISO hit 1600 and 3200, but not to the detriment of the image. Even at ISO 12,800 and 25,600, where noise was at its worst, it was still far better than on many other cameras, and the images were easily usable.
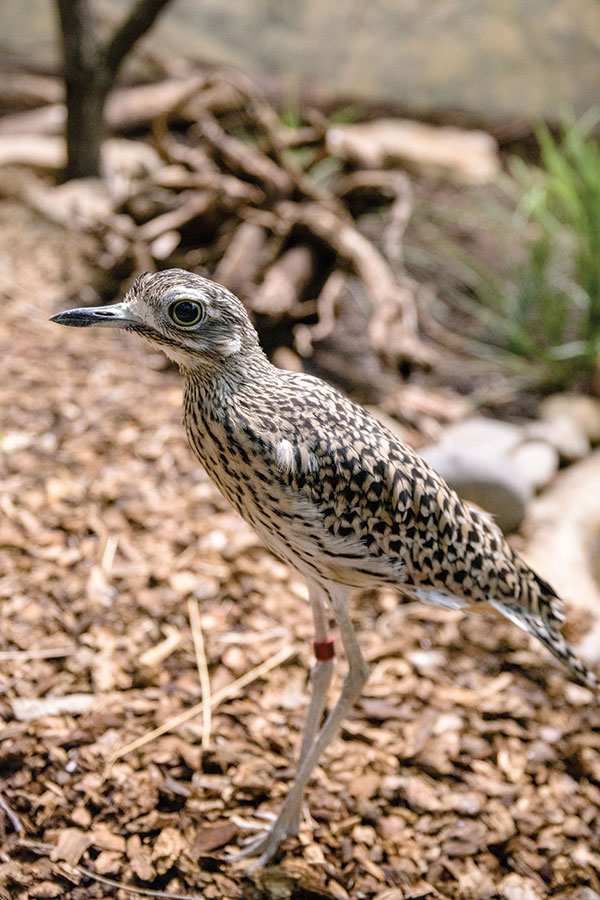
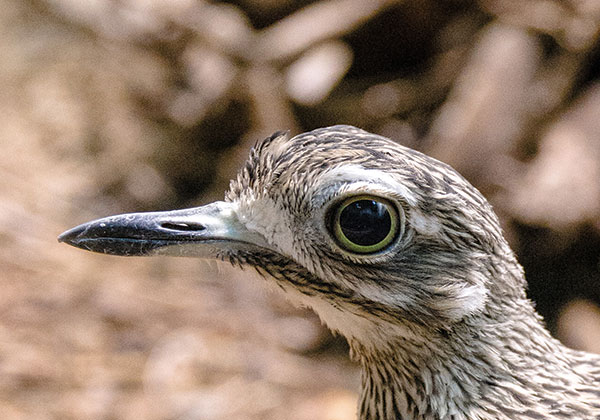
I photographed this spotted dikkop at Chicago’s Lincoln Park Zoo. Not even the glass diminished the sharpness of this camera/lens combo. But more importantly, check out the noise, or lack thereof, in this ISO 1600 exposure made by available light. Okay, you can detect some luminosity noise, but it’s far from unpleasant.
A Few Disappointments
The one area that proved disappointing was the built-in flash in combination with the 16-50mm S lens: There was almost no scenario where the lens alone (and, worse, with lens shade attached) did not block a portion of the light. What’s more, setting a flash override requires the Menu, which is counterproductive and counterintuitive. But at least the flash was not underpowered, and otherwise did a nice job as a fill light.
To benefit from the camera’s built-in chromatic aberration and distortion corrections, you have to first convert the SRW Raw files to DNG files, using the Samsung DNG Converter app (comes with the i-Launcher software that launches when you plug the camera with SD card into the computer via the supplied USB 2.0 cable, after switching the camera on). You can then import these converted files into Adobe Lightroom. It may be the long way round, but the improvements are noteworthy and extend to color balance as well. All image files for this report were first converted to DNG and then processed in Lightroom.
When viewing videos that I recorded with the camera—and these were in Full HD, not 4K, since I didn’t have a suitable playback monitor, I hit a snag. It turns out that the camera records all videos with the newer H.265 codec.
I first had to convert these files with the Samsung Video Conversion software (also included). Turned out to be a painless process, but the newly created MP4 files were several times the size of the originals, from 116MB to over 600MB in one case!
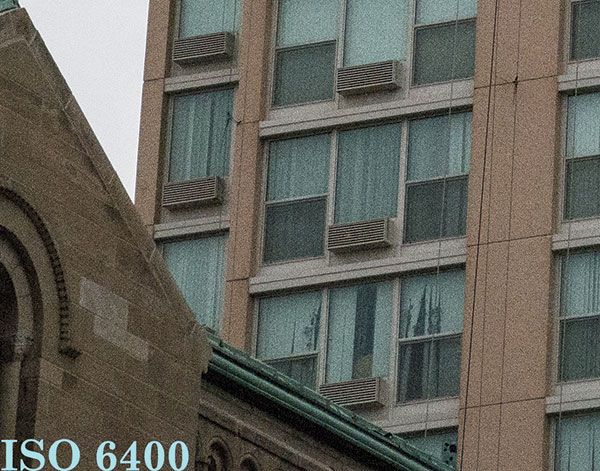


Admittedly, luminosity noise at ISO 25,600 may be objectionable, but to me the noise level at 12,800 is reasonable and certainly acceptable at ISO 6400. But you be the judge.
Final Analysis
In the final analysis, the Samsung NX1 is a great value and an admirable performer, delivering in diverse settings almost without flinching. The only thing that, upon reflection, bothers me is this: I found myself largely resorting to Program shooting mode and Auto ISO—two settings that I’d use with a point-and-shoot. In short, I felt that the camera didn’t quite meet my criteria for an effective DSLR replacement, especially owing to the limited range of lenses and lack of features I’m used to. But if I didn’t own a DSLR, the NX1 would definitely be my mirrorless camera of choice. And if my budget allowed, I’d bundle it with the 16-50mm S lens for starters.
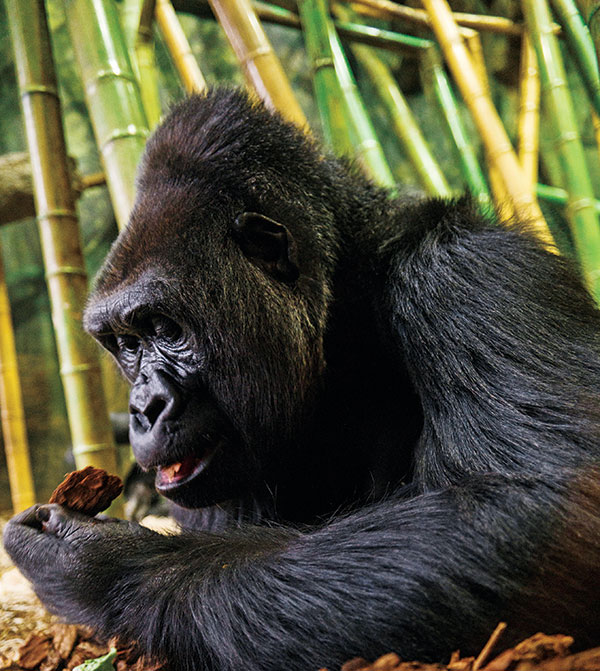
I used the back panel and Touch AF to capture the pensive expression on this gorilla at Chicago’s Lincoln Park Zoo. Given this magnificent creature’s movements, as slight as they were, perhaps I would have been better served by One touch shot or Tracking AF, or a higher ISO and faster shutter speed, given that flash would have disturbed the mood I was trying to capture. (Technical info: available light, ISO 1600, f/2, 1/30 sec.)
A Solid Lens
Samsung’s 16-50mm f/2-2.8 S ED OIS lens (24-75mm, 35mm equivalent) is entirely metal and feels solid. That, together with a fast f/2-2.8 maximum aperture, easily explains its heft. The only thing missing is a distance scale. For me, I find it makes it easy to set infinity or especially close focus when using manual focus with difficult subjects.
There are three functions supported on the lens: AF/MF, OIS (on/off), and a curious button labeled i-Function. I largely disregarded this button, to my chagrin, because, once I tried it, I realized how beneficial it was in economically selecting either f/stop or shutter speed (respectively in aperture/shutter priority shooting mode—both in manual), ISO, EV override, and WB, in that order. And the choices are visible in the EVF or on the back panel.
The lens didn’t exhibit any drift, but did suffer from pushback, when pressed against a display window, for instance, at the aquarium. Zooming felt a little gritty, but the focusing ring rotated as smoothly as cutting through soft butter. However, it continues to rotate, without any tactile indication at either end. I didn’t care for the manual focusing aids in the viewfinder and found them somewhat tardy and annoying. But all in all, I was satisfied with the performance of the lens.
For more information and specs on the Samsung NX1, visit www.samsung.com.


![]()
Get the Latest Photo Tips, News & Reviews from Shutterbug!
| Camera Reviews Other Reviews | Mobile Reviews Photography Reviews Columns | News | Features | How-To | Resources |
 © 2025 Shutterbug
AVTech Media Americas Inc., USA
All rights reserved