- REVIEWS
Camera Reviews 
More Reviews Mobile Reviews Photography Reviews - GALLERIES
- VIDEOS
- BUYER'S GUIDES
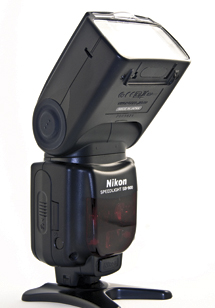
The Nikon Speedlight SB-900; Nikon’s Flagship Strobe Gets Bigger But More User-Friendly
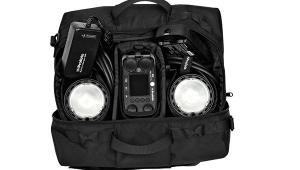
Nikon’s Speedlight SB-900 takes over the reins from the SB-800 as the company’s flagship dedicated shoe-mount strobe. In doing so, it brings some noteworthy enhancements to the table, not least of which is an improved user interface, including upgradeable firmware (with compatible cameras—via the camera); DX/FX sensing to output appropriate spread of light for imaging sensor in use (not just the focal length); expanded zoom coverage (compared with the SB-800); choice of light-distribution patterns (for even coverage or centered on the subject); and color filter identification (with select cameras). Okay, some of these features are only supported on a few cameras at the moment, but I expect that this is a harbinger of what is to come and will apply to all future Nikon D-SLRs. And if you need a second flash for wireless multi-flash, then this is also a step in the right direction, because the new interface brings some improvements in this area as well. Plus, Nikon packed a few accessories with this flash that are a step above those that came with the SB-800. On the other hand, if you feel the SB-800 is already too much in terms of size and cost, then you’ll be disappointed by the new flash, which is considerably bigger and more costly, selling at around $469.
 |
 |
|
|
||
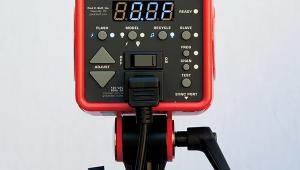
As part of its improved interface, the SB-900 replaces the two cursor buttons found on the SB-800 with a dial, which is much easier and quicker to use. In fact, it (along with the existing buttons) can be operated while wearing woolen gloves. Hit the “OK” button in the center to lock in a setting, or do nothing and the setting takes hold after a few seconds.
 |
 |
|
|
1a
|
1b
|
|
|
||
Custom Functions
Holding down the “OK” key for a couple of seconds will bring up the Custom Functions menu. Then it becomes a matter of using the dial and OK button to choose each setting. The top left button—and only this button—immediately exits the screen.
There are lots of custom functions; ones you’d probably want to set immediately are units of measurement (m/ft) and standby. Waking the flash up from standby requires the flash test button—or lightly pressing the camera’s shutter release. If you set standby to “auto” in custom functions, turning the camera off will put the flash to sleep automatically. But beware that the flash tends to nod off rather quickly at this setting all on its own.
 |
|
|
2a
|
|
 |
|
|
2b
|
|
|
|
| |||||||||


![]()
Get the Latest Photo Tips, News & Reviews from Shutterbug!
| Camera Reviews Other Reviews | Mobile Reviews Photography Reviews Columns | News | Features | How-To | Resources |
 © 2026 Shutterbug
AVTech Media Americas Inc., USA
All rights reserved