- REVIEWS
Camera Reviews 
More Reviews Mobile Reviews Photography Reviews - GALLERIES
- VIDEOS
- BUYER'S GUIDES
Metering Modes
Metering Modes
by George Schaub
Metering modes determine how light is interpreted and translated into photographic terms. The exposure meter and accompanying microprocessor measure and convert various brightness levels to aperture and shutter speed values, which are the way the camera controls light, and set them for you in the Autoexposure modes.
 |
|
|
There are four advanced Metering modes and numerous Scene or Picture modes. The automated modes are: Program, Aperture-Priority, and Shutter Priority. In Manual Exposure mode the camera still makes readings, but you make the settings yourself. All the Scene or Picture modes you might have on your camera are derivations of the Advanced modes with other image attributes (contrast, color saturation, etc.) thrown in. Scene modes might be helpful in a pinch but I don’t recommend relying on them, as they do not help you learn and master exposure. Let’s start with the Automatic “Priority” modes.
These are marked as AV (Aperture Value) and TV or S (Shutter Value) on your mode selector dial. Aperture-priority means that you select the aperture for a desired depth of field and the camera selects the shutter speed for a good exposure.
 |
Shutter-Priority mode is when you select the shutter speed for a desired depiction of motion and the system picks the aperture. In both instances the system takes the ISO and the metering pattern you set into consideration—the ISO as a foundation from where to begin calculations, and the pattern as to how and from where the light information is gathered.
To get sharpness from the bow of the boats to the houses in the background I chose Aperture-Priority mode, set the aperture to f/11 and checked sharpness with the depth of field preview button. Exposure at f/11 was 1⁄30 sec, so I raised ISO from 100 to 400 and got a shutter speed of 1/125 sec.
When deep depth of field is the primary image effect you want then choose aperture priority, use a narrow aperture and as short a focal length lens as you have in your camera bag, here a 28mm set at f/22 at 1⁄60 sec.
 |
S or TV mode is great for choosing shutter speeds for motion depiction, but it’s also useful when working with long telephoto lenses handheld. Following the 1/focal length rule to ensure steadiness, this shot was made with a 300mm lens at 1/500 sec (for insurance), with the shutter speed set in Shutter-Priority mode.
Program Exposure mode is a bit more complex. It takes ISO, the lens mounted (and the program’s interpretation of a hand-holdable shutter speed) and whether the flash is activated in order to arrive at a combination aperture and shutter speed setting. Your Program mode might also come with something called “program shift,” which allows you to change the equivalent exposure if you want. For example, if the program yields f/8 at 1/125 sec you can go to f/5.6 at 1/250, f/4 at 1/500, or narrow aperture and get slower shutter speeds. Program Shift is an excellent way to work once you understand equivalent exposures and how to use them to attain the image effects you desire, and when used makes having to choose AV or S Priority modes unnecessary.
 |
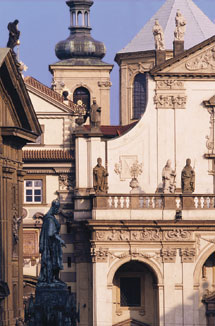
There was no flash allowed inside this church so I set Program Exposure mode at ISO 800 and worked with Program Shift to get an exposure of f/8 at 1⁄30 sec.
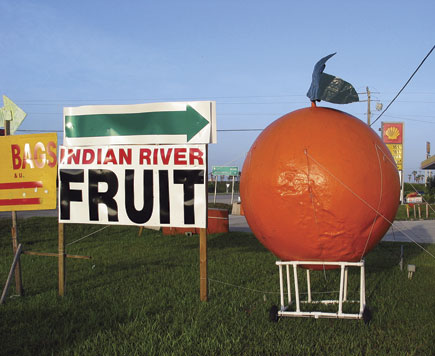
Program can also be used for quick grab shots when you do not want to concern yourself with settings. This photo was made while walking from a store to my car. Note the gas prices in the background. Exposure was f/11 at 1/125 sec with a 50mm focal length lens. Left to its own, Program will generally favor faster shutter speeds to ensure shot steadiness.
 |
Manual Exposure mode is pretty handy, and seems more complicated than it actually is. You frame the scene and the metering system “suggests” an aperture and shutter speed value, indicated by the scale in the finder. The setting you have may or may not agree with that. If you want to make the readings the system suggests you move the aperture or shutter dial until the arrow in the scale points to the center of that scale—it’s called “nulling out” the settings.
Why use manual? Some folks just like to fiddle. But on a more useful note you can use manual in two ways:
When you want to quickly change the exposure. In manual you can easily make an exposure with more or less light just by turning the aperture ring/dial or the shutter ring/dial.
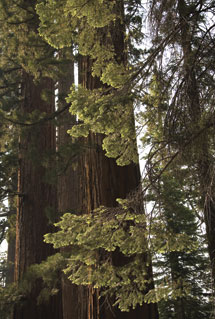 |
Manual Exposure mode allows you to quickly change exposures in the field. I misread the first exposure; I checked the image review and the trees became quite light and the foreground branches were overexposed. A quick turn of the Command dial to the minus exposure side gave me just the exposure I desired.
When you want to keep exposure constant regardless of where you point the camera. This can come in handy when lighting does not change and you want to shoot without changing settings. I often do this when I have one scene in which the light is constant and I want to take a number of exposures without reading and locking each time.
One situation where you should always utilize Manual Exposure mode is when shooting panoramic scenes for stitching. This ensures that the light will be consistent from frame to frame and that there will not be any obvious seams in the final stitched image. This photo (next page, top) from Glacier Point in Yosemite National Park was exposed at f/8 at 1⁄60 sec for every frame of this nine-frame panorama.
 |
Scene Modes
Here’s our thinking on Scene modes. They rely too much on automation that might or might not match the image effects you have in mind. For example, in Portrait mode the exposure system is programmed to yield as wide an aperture setting as light and ISO setting allow so that the subject is sharp and the background unsharp (in many cameras it also alters your color and sharpness rendition as well, without telling you). That’s fine if that’s what you had in mind, but there are many ways to handle foreground and background in portraits, and choosing this mode is just one way.
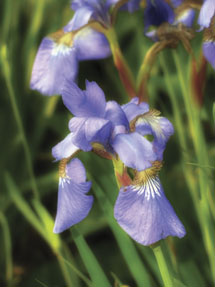
This Scene mode on a point-and-shoot camera produces soft focus effects and overall delivers a good image. Though the effect is as advertised, it is a “set piece” that will deliver the same kind of image time after time. This preprogrammed type of shooting can be fun but you can customize your own images by working with the other Exposure modes and software even more.
 |
Here’s a quick rundown on how the choices affect aperture and shutter speed combinations:
Portrait: Wider aperture; yields shallow depth of field. Also might reduce contrast, add warmth.
Sports: Yields fastest shutter speed given light levels, ISO etc. Might also automatically raise ISO to yield faster shutter speeds.
Auto ISO: You set the aperture and shutter speed desired and system sets the ISO required.
DEP: Canon only, you choose two subjects at distance from one another, indicate both with slight pressure on shutter release and the system selects aperture to include both in depth of field. Shutter speed follows suit.
Slow Sync: (night portrait) Camera uses slower shutter speed than flash sync speed (usually 1/125 or 1/250 sec) to allow in more ambient light during flash exposure.
In short, if you want to learn about photography and apply your own personal touch to your images, just forget about Scene modes.


![]()
Get the Latest Photo Tips, News & Reviews from Shutterbug!
| Camera Reviews Other Reviews | Mobile Reviews Photography Reviews Columns | News | Features | How-To | Resources |
 © 2026 Shutterbug
AVTech Media Americas Inc., USA
All rights reserved