- REVIEWS
Camera Reviews 
More Reviews Mobile Reviews Photography Reviews - GALLERIES
- VIDEOS
- BUYER'S GUIDES
Low Light Photography
Low Light Photography
The Night Time Is The Right Time
by Fredrik Froman
Light is light. It doesn’t matter if it comes from the sun, the moon, street lights, or even a flash. In very low light you can still get a photo; it might just take some time since you might have to expose the scene for minutes instead of fractions of a second. Indeed, the photos you get when shooting in low light are often very colorful and full of interesting shadows and highlights.
To me, nothing quite matches night time photography. If you haven’t tried capturing a city at night as the lights of the skyscrapers fill the star filled sky you are missing a great photo opportunity. Just follow some of the simple guidelines I suggest here and I promise you will not be disappointed with the photos you take.
 |
|
|
You can mix and match color when working with night light and fill light. Here a colored gel has been added to the accessory light to both fill and add color variety to this railroad crossing sign.
Most important would be the choice of location, timing, and point of view. You can also use some advanced light painting techniques to add color, or to highlight interesting features in the composition. You can take away shadows or even add depth to the composition.
Timing Is Everything
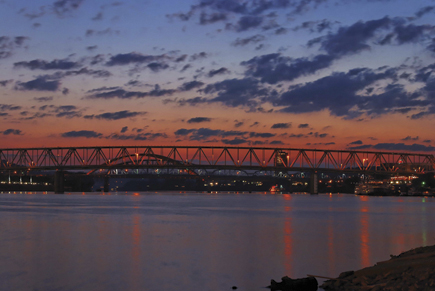
One of the most important features of a good low light city photograph is an interesting sky. A totally black sky often looks empty and does not add anything to the photo. One way of adding color to the sky is to catch the sky during the “blue hour.” At this time the sky still has some color and light in it. My favorite time to shoot is about 15 minutes before sunrise or after sunset. During this time the sky gets a deep blue color, just the right blue, for only a couple of minutes. Using this time often makes a color photo really stand out. Make sure to constantly compare the brightness of the sky to the brightness of the main subject and take the photo when they are almost the same. This will ensure that you don’t get too much contrast between the two. Take the picture 10 minutes too early, and the sky becomes black. Take the picture 10 minutes too late, and the sky has become too bright, making it overexposed.
Right before sunrise is a perfect time to shoot, as the contrast between sky and city lights is more balanced.
 |
|
 |
|
|
Angle To The Sun
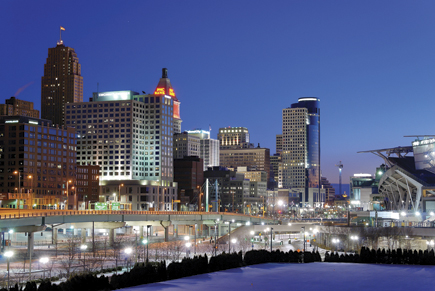
Another thing to look for is the color of the sky at different points in the sky. Look up and you’ll see that the color can go from very light blue or almost gray close to the sun’s location, and gradually change to pink, purple, light blue, dark blue, and almost black at 180? to the sun. In other words, you can choose the color of the sky by shooting at different angles to the sun. The sky can often be gray close to the horizon and blue straight up which also can be used to get that perfect picture.
I love shooting during what I call the “blue hour”, when sky color provides a perfect counterpoint to city lights.
 |
|
|
Light Painting
Light painting is a technique in which you use different handheld light sources to add color or fill in shadows. Any light source will work—a cheap garage sale flashlight, a small LED flashlight, or even an expensive and bright HID light will do the trick. The lights are used to highlight interesting features in the composition. Even such a small change as highlighting a sign can change a composition and increase visual variety and interest.
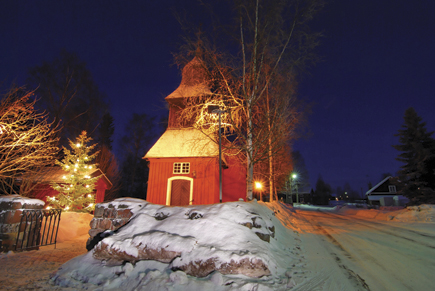
When the sky is pitch black you can use a simple flashlight, as in this shot, to “paint” your scene with light.
 |
|
|
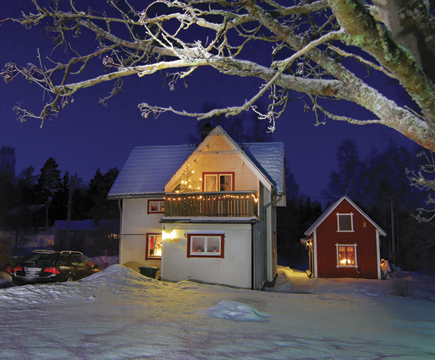
The light painting technique can also be used to enhance the contrast of the picture. If the composition has some very dark areas that tend to get underexposed, then a flashlight or camera flash can change the outcome dramatically. In the picture of the small house with snow on the roof I had to paint almost the whole scene to bring detail into the shadows.
Here I used fill flash to illuminate the foreground and give a sense of depth to the image.
 |
|
 |
|
|
Highlight the areas you think would add something to the picture. Big trees that are majestic in daylight can look boring or just seem like huge dark masses without some help from an auxiliary light. “Paint” them with a strong flashlight and the trees can get texture and detail back.
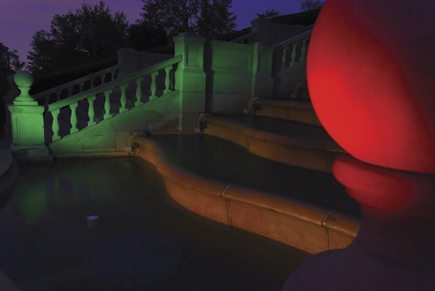
The light painting technique is also great for adding color in more artsy pictures. Here your imagination is the only limit. You can add extremely interesting touches to a photo by using a simple LED or even car headlights. The painted light might even be the main subject.
When you paint with light your imagination can be at play, as you control both the color of objects and what will be illuminated or dark within the frame.
 |
|
|
Tips For Getting A Great Low Light Photo
1. Timing: Take the picture at the time of the day that gives you the sky you want.
2. Angle: Choose your angle to the sun depending on sky color.
3. Light Painting: Use light to add color or to highlight interesting features.
Fredrik Froman works as an aerospace engineer. To contact the author his e-mail is: Fredrik.Froman@Live.se.
Photos:
All of the photos were shot with a Nikon D80 using long exposure and a tripod. Tokina AT-X 116 Pro DX lens or a Nikkor 18-200mm VR lens.


![]()
Get the Latest Photo Tips, News & Reviews from Shutterbug!
| Camera Reviews Other Reviews | Mobile Reviews Photography Reviews Columns | News | Features | How-To | Resources |
 © 2026 Shutterbug
AVTech Media Americas Inc., USA
All rights reserved