- REVIEWS
Camera Reviews 
More Reviews Mobile Reviews Photography Reviews - GALLERIES
- VIDEOS
- BUYER'S GUIDES
How I Photograph Women
How I Photograph Women
Using The Least Amount Of Equipment
by Joe Farace
It may come as a surprise to some of you but I didn’t start out to be a people photographer. When Mary and I opened our studio in 1982, we divided the workload based on the type of images that clients wanted. It turned out to be a simple division of labor: she photographed people and I photographed things, mostly architecture and some products. Every now and then because of scheduling and availability I would shoot a few business portraits, but people were really Mary’s game. When she took an extended sabbatical from the studio’s day-to-day operations, things changed, and after looking at some of the new glamour photography appearing on the Internet I got interested in photographing people, especially women. I had to start from scratch after selling all the lighting equipment because “I was never going to photograph people.” That was when I learned to never, say “never.”
 |
|
|
The Great Indoors
All of the ingredients for making great photographs of women are easy to find: You need a subject, camera, and some light. I didn’t worry about where tomake portraits because, as I wrote about recently in “Studio in a Small Space” in Shutterbug, you don’t always need a dedicated studio or even lots of room to produce studio portraits. That’s because we all have access to “the great outdoors” and a better-than-average shot at creating great indoor portraits too if we just take the time to look around.
 |
|
|
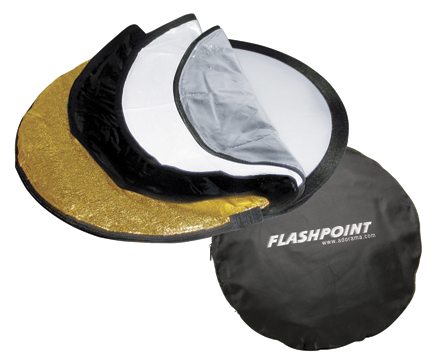
Portraits are all about light, so start by looking around your home for places where there’s plenty of existing light. In my current home the best and most natural light is found in my kitchen. Yes, the kitchen is my favorite place to shoot in the house year round. It has a large, north-facing bay window with three large individual windows with up-and-down blinds that let me control light better than many studios. All I need is a little help from reflectors and fill flash.
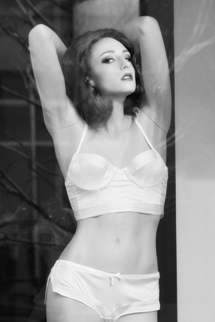
To show how similar lighting techniques can produce completely different results, let me show you how I create high or low-key portraits indoors in non-studio environments. High key photographs typically consist of lighter tones, so I use soft, non-directional lighting with images that contain white or pale tones. High key portraits often contain small, darker areas such as eyes to keep them from being too flat and boring. It’s a good method for photographing blondes, which is what Leslie was (mostly) when I made her portrait.
 |
|
|
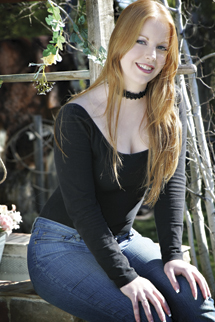
If the front of my house gets lots of light, the back gets less, especially near the dining room door that I use to create low-key portraits. The door has a large window with built-in blinds so I can control the amount of light. Low key pictures concentrate on the darker tones, conveying an atmosphere of mystery and use higher contrast lighting, with some of the subject in shadow. They typically have a few brightly lit small areas, again to keep it from being dull. It’s a useful technique for photographing brunettes and I photographed Sabrina wearing black in a similar pose to Leslie (in white) to show how two completely different moods can be created using similar lighting techniques.
 |
|
|
The Great Outdoors
One of my favorite techniques for outdoor portraiture is using backlighting to produce highlights on the subject’s hair and blow out the background to create a pseudo high-key effect. Want to try it? The next time you plan to photograph somebody outdoors, place them in the kind of position you might normally use with the sun on their face, but then turn her around. Right away the subject is more relaxed because the sun is behind her and she won’t have to squint! Next turn on your flash, whether it’s built-in or a shoe-mount unit. Be sure to use flash, otherwise she‘ll be a silhouette in the portrait. In order to get a final image you can live with, you may have to open the lens a few stops over the metered exposure just as you might with any backlit subject.
 |
 |
||
|
|
Tip: If you plan to shoot full length portraits instead of close-ups, a more powerful shoe-mounted flash will be more effective for fill light than the weaker pop-up flashes found on entry-level digital SLRs.
 |
|
|
Working outdoors can be fun, but introduces a bunch of variables that you can’t control, starting with the weather, especially wind and bugs. After just a few shots at a lake near my home, Helen had enough of the bugs crawling on her and believe me it’s hard to photograph anybody when they’re jumping up and down while being assaulted by creepy-crawlies.
The Digital Darkroom To The Rescue
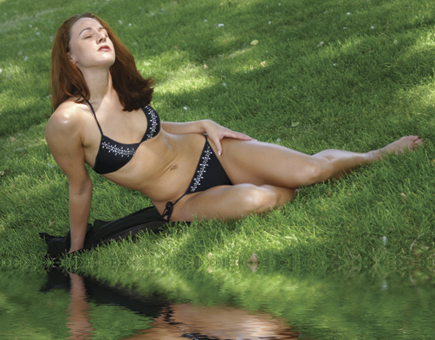
When Megan asked me to photograph her next to a lake she decided not to deal with the bugs but that didn’t stop me from giving her the kind of photograph she wanted. I created a digital lake.
 |
|
|
Step 1: I started by making a photograph of Megan in her swimsuit at a local park using the kinds of techniques that are mentioned elsewhere in this article.
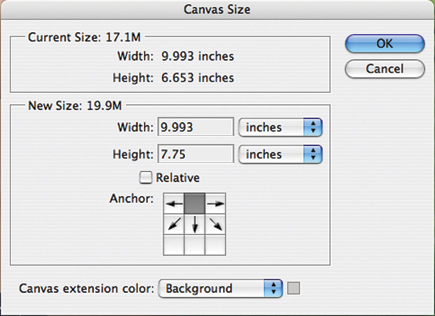
Step 2: There needed to be space at the bottom of the frame for the digital “water.”
Tip: I could have planned ahead and made this space in-camera but it would have resulted in her being smaller in the frame. This is a trade-off you’ll need to consider when trying this technique.
 |
|
|
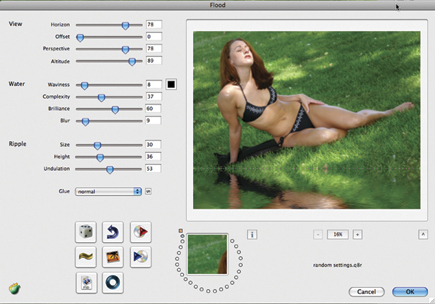
Step 3: The best way to add digital water to an image is to use Flaming Pear Software’s (www.flamingpear.com) Flood plug-in and I used it with Adobe Photoshop to create the effect that matched my concept of a peaceful lake with a light breeze blowing.
Step 4: After you click Flood’s OK button, you’re finished. Voila! Digital lake side.
 |
|
|
A Few Words About Posing
There is as much useless advice written about posing portrait subjects as there is about the best way to process Raw image files and typically the person giving the advice knows that his or her method is the best way. I can’t tell you the best way to pose people, just how I do it.
I start by looking for a suitable background and try to find a way for the subject to interact with it, not just stand there. One of my favorite throwaway lines is that “if you find the right background, the foreground will take care of itself.” Then I demonstrate to the subject how and where I want her to stand or sit. I’m always loose about this and the people almost always put themselves into a pose that’s better than mine and is comfortable for them. At that point I will refine the pose from the camera position by having her shift weight from one foot to another or have her to tilt her head one way or another.
As we work, I continue to refine the pose by giving directions and feedback, sometimes stopping to show some of the images on the camera’s LCD screen. I keep shooting a few more past what I think is the best pose to take care of any potentially half-closed eyes or blinks, but usually when I think “that’s it”, that’s it. The most important advice I can give you—and you can take this to the bank— is to keep talking to the subject so the portrait becomes a collaboration between the two of you.
Joe Farace is the author of “The Complete Guide to Digital Infrared Photography” published by Lark Books and available at Barnes & Noble and Amazon.com.


![]()
Get the Latest Photo Tips, News & Reviews from Shutterbug!
| Camera Reviews Other Reviews | Mobile Reviews Photography Reviews Columns | News | Features | How-To | Resources |
 © 2026 Shutterbug
AVTech Media Americas Inc., USA
All rights reserved