- REVIEWS
Camera Reviews 
More Reviews Mobile Reviews Photography Reviews - GALLERIES
- VIDEOS
- BUYER'S GUIDES
Going Dark: How to Build and Equip a Photographic Darkroom
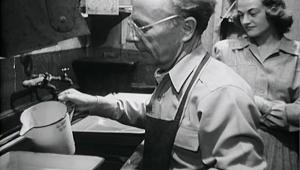
The renaissance in film photography these days has created the need for a “wet” darkroom. It’s a fun alternative to digital printmaking. Nothing beats watching an image come to life in the developing tray.
Unfortunately, many photographers think building a darkroom is expensive, time-consuming, and difficult. This is not true.
The cost of used darkroom gear has been reduced to bargain levels, mostly due to the explosion of digital photography. I recently paid $125 for a complete set of darkroom equipment, including a Simmon Omega B-22 enlarger, a 50mm lens (for 35mm film), a 75mm lens (for 6x6 or 120 negatives), plus trays, easels, custom timers, etc. The former owner even included several boxes of usable paper and dozens of reference books and magazines. There are similar opportunities online or via your local newspaper or shoppers’ guides, tag sales, etc.
What You’ll Need
Step one is to evaluate and measure your available space. The ideal setup is one where you have running hot and cold water, but lack of this is not a deal-breaker. A closet, guest room, garage, or basement can all serve as locations. Here, not necessarily in order of importance, are the requirements:
1. Ability to make your selected space dark, although a changing bag will make do for the critical task of loading film into tanks. The “dark” for the remaining processes can have a small amount of light leaking in, but not much.
2. Access to running hot and cold water. A sink with automatic hot and cold running water is ideal, but many photographers accomplish wet tasks on a counter and go to a nearby laundry or bathroom to complete steps like film or paper washing, cleaning up utensils, etc.
3. Sufficient room for the enlarger and related accessories (paper safe, lenses, negative holders, canned air, etc.).
4. Adequate ventilation. Film and paper chemicals are toxic, so decent ventilation is a must.
5. Some kind of flat workspace—it can be a borrowed kitchen or dining room table—for trimming and mounting prints.
6. A source of music, if you like. Printing can be enjoyed over many hours’ time, and good music soothes the savage beast. Some say it can even determine the quality of prints.

Setting It Up
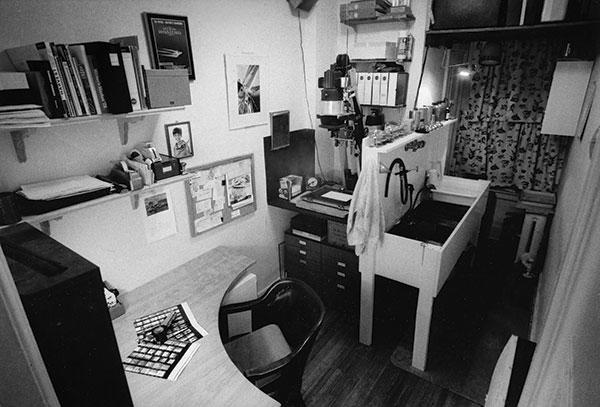
Location can be simple. Over the years I have built darkrooms in a converted coal bin, closet, guest room, basement (even one huge 15x20-foot basement room!), attic, and garage. Your darkroom can have a regular swinging door, bifold doors, or even drapes to separate it from the rest of the house or apartment. It can be permanent or temporary.
We once set up a darkroom in the basement of Clowes Hall in Indianapolis to give patrons prints (shot before an opera performance) afterwards. So, the only limit to the space issue is your imagination.
The ideal darkroom is neither too big nor too small. Too big and you’ll tire yourself out walking from one area to the other. Too small is, well, too small and difficult to get things done easily.

Think of ideas like using a small swiveling stool to swing around from the wet to dry sides, or a small chair on wheels. Make sure, if possible, to install comfortable tile or indoor/outdoor carpeting underfoot to ease fatigue.
Another consideration is what kind of work will you be doing for the most part. A darkroom designed for 16x20-inch exhibition prints is different from a darkroom whose output is mostly 8x10-inch prints.
The size of trays, print driers (and style of drying), and basic workspaces are key issues. Perhaps you only want to develop film and scan the negatives.
Or make a lot of small enlargements from many negatives to create small subject-specific albums. The possibilities are endless. The key to success is to plan ahead.

One design takes two sheets of 4x8-foot plywood and cuts them up into various pieces to make both the wet and dry “units.” Have the lumberyard cut the pieces of plywood into two pieces, each 2x8 feet (to fit into the car).
You can further cut the pieces and fit them together as shown in the sketches and model. You can change the dimensions to fit your space.
The construction style in our example is to attach 1x2-inch “furring strips” to the plywood to provide framework. The 3/4-inch plywood will then be attached to the 1x2-inch strips. Four 2x4’s are used as legs.
The plywood pieces will be glued, and some pieces (like the inside of the sink) will be painted with outside enamel paint. In our example we are going to have a sink 60x24x8 inches, a dry side 36x24x3/4 inches, and a partition in between 24x96x3/4 inches. This will allow four 11x14-inch trays to fit inside the sink.
If you have less width, you can always use the fourth tray in a laundry room or on a rack, etc. And if you need 16x20-inch trays, simply enlarge the dimensions.
Paint the pieces with contact cement on both sides, then use a clamp or another person to hold the pieces of plywood together while you screw in brass screws.
After you put the pieces together, you now have the two elements (sink and dry side) ready to finish and install. The sink ideally should have a mixing valve to provide hot and cold running water, and a drain in the bottom corner (make the bottom slope down from front to back and left to right).
Paint everything with primer, then outdoor enamel paint. After the paint is dry caulk the inside of the sink with silicone or similar caulking, then fasten each element to the wall with screws or brackets.
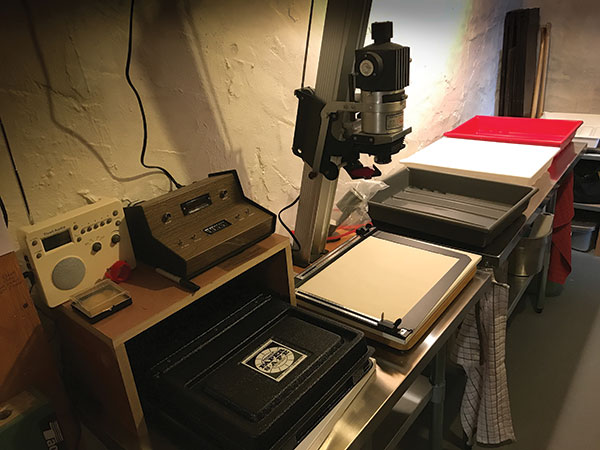
As you can imagine, there are countless variations on this basic design. You can use wide stainless steel shelves, installed in a staggered manner, to hold the trays and a basic tool kit drawer to hold the enlarger. A visit to your local hardware store or box store will provide a lot of inspiration (you supply the perspiration). Ironically, after carefully planning a plywood sink and dry table, we ended up using two stainless steel kitchen work tables.
Equipping Your Darkroom
Now that you have the basic dry side and wet sink or workspace finished, it’s time to start equipping the darkroom in order to develop film or make prints. The steps are simple, and you can accomplish them no matter what size, shape, and location of your darkroom.
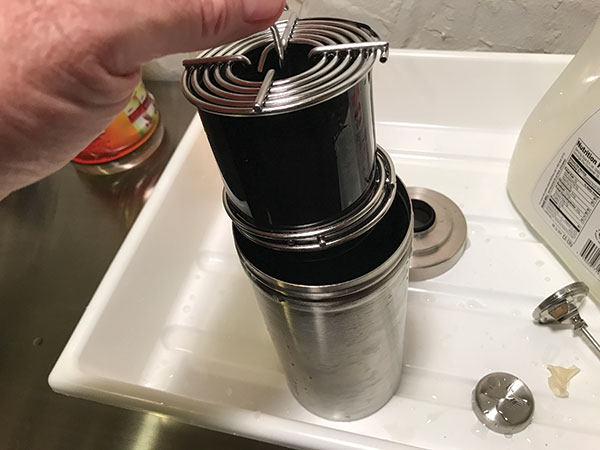
Developing film, the obvious first step, is usually done by using a plastic or stainless steel film developing tank. The advantage of the latter is that you can immerse the tank in a bath of water to maintain a desired temperature.
Stainless reels also dry quickly, so you’re ready for the next batch of developing. Plastic takes longer and the film will stick more easily, making them difficult to load.
Of course, complete darkness is required to load the tanks with film. Even a little bit of stray light can fog film. If you don’t have complete darkness, use a changing bag; the rest of the steps can be carried out in daylight.
This is not an in-depth article on darkroom technique, rather an overview of building and equipping a darkroom in relation to functionality. A quick tour of dealer catalogs will offer plenty of choices in equipment, including chemicals for all the steps required. Interestingly, more products are being introduced to the marketplace as interest grows.
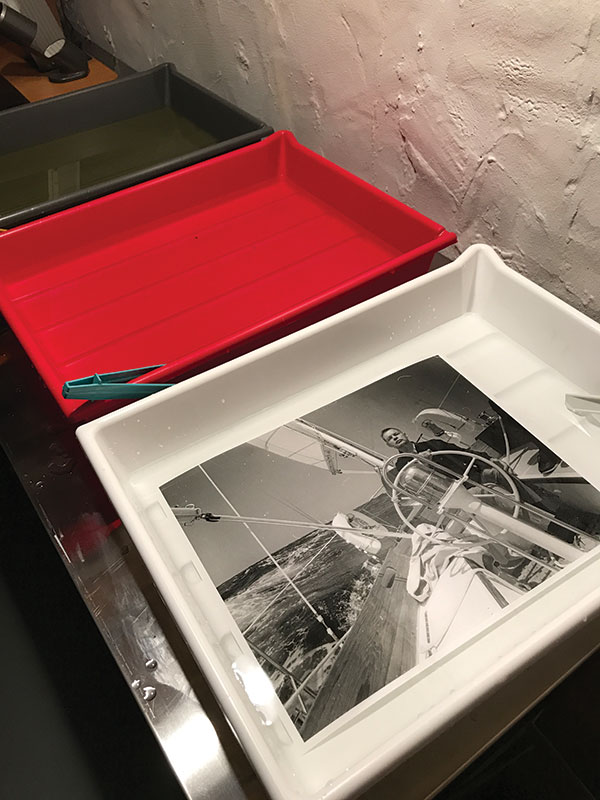
After developing comes a quick rinse in water or short stop, then fixer (or hypo, as it’s sometimes called, rapid or regular variety). A good washing is then followed by a 30-second dip in a wetting agent and then you can hang the film up to dry.
Other Considerations
Now comes a critical step. In many darkrooms, there is enough dust floating around to ruin negatives (the resulting spots demand retouching). The answer, though, is simple. Get a plastic hanging closet clothes protector and you have a cheap yet effective dustproof film dryer (cut out the bottom to allow full rolls of film to hang).
The next step is creating a contact sheet. Many photographers like to use archival plastic negative sheets like those from Print File, in which case cut the negatives into strips according to format. Then place the negatives on top of a piece of photographic paper.
Although there are all kinds of contact sheet devices for sale, all you need are two pieces of glass, slightly larger than the paper (usually 8x10 inches in size). Place the negatives in strips on top of the paper. Adjust the aperture to about f/5.6 and try about 10 seconds of exposure. A little practice (or a test strip) will give you the correct aperture and time for an average roll of negatives.

Developing trays can be purchased at your dealer or you can use Rubbermaid dishwashing tubs. You need at least four: developer, short stop (can be water), hypo (fixer), and wash.
The step that requires some additional design thought is how to wash film and prints. Whether it’s a darkroom with running water or you use the laundry or kitchen sink, a simple dishwashing pan with a set of holes drilled along the bottom will do the job.
Just start the running water and the fixer will settle to the bottom and thus be washed out. In order to save water, use a hypo (fixer) removal agent before washing. Resin-Coated (RC) paper, incidentally, needs only about 10 minutes of washing.
The last step is drying prints. A simple drying solution is a book with blotter pages, available from most dealers. You could also build a small cabinet with window screen shelves.
For enlargements, the only additional equipment needed is an easel for holding paper (try eBay), a focusing aid for the sharpest results, a paper safe to make handling paper easier, a timer (a foot switch is a help here), a safelight, and a white light for examining prints in the hypo.
So those are the basics of building your own darkroom. Have fun!


![]()
Get the Latest Photo Tips, News & Reviews from Shutterbug!
| Camera Reviews Other Reviews | Mobile Reviews Photography Reviews Columns | News | Features | How-To | Resources |
 © 2026 Shutterbug
AVTech Media Americas Inc., USA
All rights reserved