- REVIEWS
Camera Reviews 
More Reviews Mobile Reviews Photography Reviews - GALLERIES
- VIDEOS
- BUYER'S GUIDES
Fighting Digital Noise: DxO Optics Pro 9
DxO Optics Pro is a Raw converter that keeps pace with the ever-growing, ever-changing world of digital photography. The newest version—DxO Optics Pro 9 (for Mac or Windows)—focuses on one of digital imaging’s most troubling artifacts: digital noise. Whether you’re shooting at high ISOs or bringing out blocked shadow detail in a seriously underexposed image or an HDR photo, digital noise (luminance and chrominance) can rear its ugly head. And now we can finally deliver a knockout punch to this culprit. But before you get in the ring, there are a few things you should know.

A PRIME Noise Fighter
DxO’s denoising algorithms have been competent in the past, but not earth shattering. When it came to denoising, one Raw converter was arguably as good as the next. So DxO apparently decided to up the ante and re-enter the fight with not merely a challenger, but a champion. Which brings us to PRIME: the new denoising algorithm featured in DxO Optics Pro 9. PRIME, by the way, is an acronym for Probabilistic Raw IMage Enhancement.
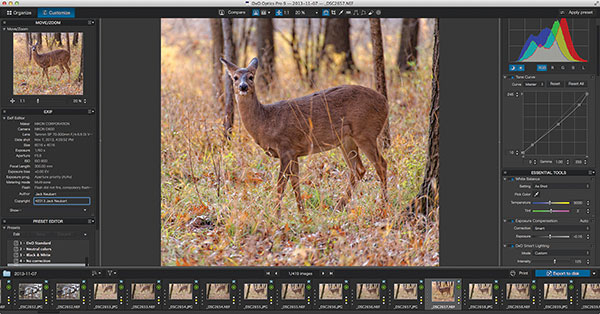
Optics Pro 9 features a customizable interface that uses only two screens. The first, “Organize,” is where you select image folders. The second (shown) is “Customize,” where all the image editing is done, with an array of settings palettes that you pick and choose to reveal or not. You can apply Presets (keep in mind that Presets override existing settings); export (to disk and other applications); and print in either screen. DxO Optics Pro 9 has its own way of doing things. Lightroom users will need to adjust how they work when entering DxO territory.
All Photos © Jack Neubart
As DxO explains it, “the denoising algorithms (in PRIME) analyze the structure of Raw images in depth: more than a thousand neighboring pixels are surveyed for each pixel. This extensive exploration identifies similar data (for) use (in reconstructing) image information.”
The result? Simply stated, impressive!
Even the more basic, but newly improved, High Quality NR setting goes far in removing both luminance and chrominance noise, with both Raw and JPEG images. As a rule of thumb, the High Quality setting should be used with ISO levels in the range of 800 to 1600 (you’ll have to judge, based on your camera’s performance). I found this setting was also very effective with underexposed images.


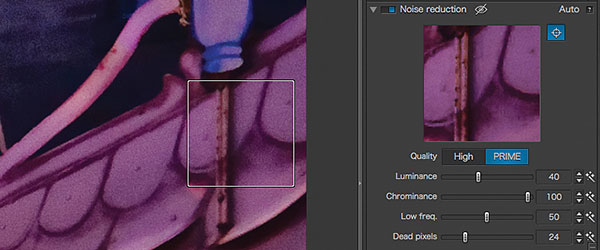

In this highlight-biased exposure (A) I wanted to minimize digital noise in the highly underexposed areas in this ISO 1000 exposure with a Nikon D600. Compare the original image detail (B) with the screen grab (C) that shows the “Magnifier” and settings for DxO Optic Pro 9’s new PRIME denoising. For my final image (D) I used various controls to balance the highlight and shadow plus exaggerated the colors with added saturation to give the shot more of a carnival-like atmosphere.
Raw Only
PRIME denoising applies solely to Raw images and should be used with extremely high ISO values or otherwise seriously noisy images. The difference in noise removal between PRIME and High Quality is barely noticeable, except when viewed at 100 percent. PRIME imbues the image with a smooth, velvety texture. High Quality denoising arguably has an almost indiscernibly rougher feel.
One side effect with DxO denoising—and most notably with PRIME—is that the image may look a tad softer, especially when viewed at 100 percent. Still, it’s a far cry from that plastic look that some noise-reducing software typically produces.
According to DxO and my own experience, you can counter this image softening by taking several steps. One involves an increase in the DxO Lens Softness Global setting while reducing Bokeh. DxO Lens Softness is a sharpness setting derived from the DxO Optics Module for the camera/lens in question, often without adding annoying halo artifacts—when not overdone (it may obviate the need for the Unsharp Mask). Additional steps include adding contrast, and maybe also the “Microcontrast” setting (Clarity in ACR-speak), and possibly boosting “Protect saturated colors.” Keep in mind that one setting may affect others and the overall look and feel of the image, requiring further adjustments elsewhere.
Image softness aside, the most obvious downside to PRIME denoising is that processing time when exporting the image can literally take several minutes. But this process is done in the background, meaning that you can continue to edit more files as it works. I would avoid batch processing large numbers of files using PRIME, as this would very likely stress your computer’s resources. Limit yourself to exporting a few images at a time with PRIME and you should be fine. Exporting with the High Quality NR setting, on the other hand, is quick and efficient—and not a noticeable strain on the system.
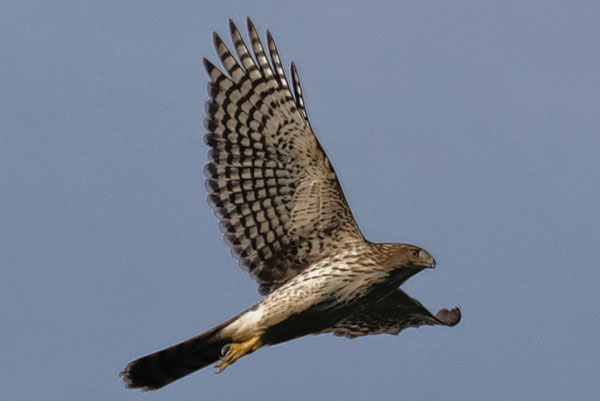
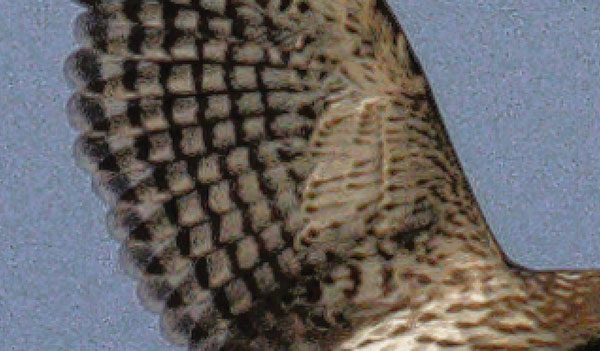
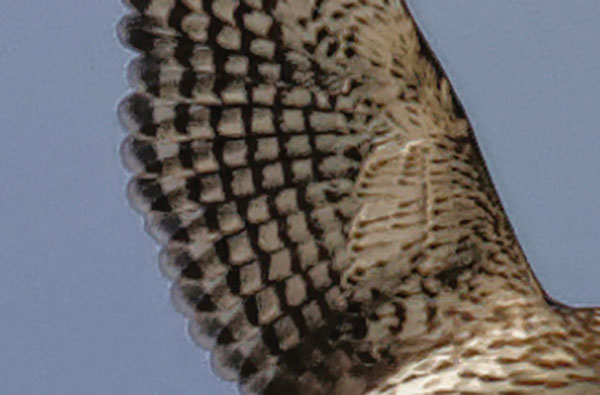
Even daylight shots at moderate ISO settings can get noisy. I spotted this Cooper’s hawk off in the distance and knew I would have to crop tight (A). I took the shot at ISO 800 and later Optics Pro 9 revealed a fair amount of noise in the sky (B). I employed PRIME denoising and to counter the slight image softening, I boosted contrast levels and adjusted DxO Lens Softness (Global and Bokeh at 0), without adding Unsharp Mask (to avoid artifacts). You can see the difference in the blue sky in the before and after(C) shots.
New “Smart” Algorithms
Optics Pro 9 doesn’t sit on its laurels with its denoising algorithms; it also redefines how it deals with exposure and tonal corrections by employing “Smart” technology (seems DxO is keen on catchwords). Two settings use this technology: Exposure Compensation and DxO Smart Lighting.
You’ll note that Optics Pro does not have an “exposure” setting per se and certainly nothing similar to Lightroom’s tone/auto settings. Instead, this parameter is given as “Exposure Compensation.” On close examination, what this setting does is move the highlights in the histogram to the left or right (note the “highlight priority” options). However, the results are very uneven, sometimes resulting in a logarithmic leap between one setting and the next, other times showing a negligible difference. But this is likely due to how the algorithms interpret the image.
DxO Smart Lighting appears to primarily open up shadow detail, but may also have an effect on highlights. DxO effectively describes it more as a single-exposure HDR tool, expanding the dynamic range, so be prepared to put on your denoising gloves to tackle shadow noise. You have to play with both Exposure Compensation and Smart Lighting, back and forth, to arrive at the best results. This takes time. And it’s not intuitive, at least to those of us accustomed to Lightroom. Simply put, with either of these Smart settings, I didn’t know what to expect—it’s like swinging blindfolded at a piñata and hoping for a hit and the hidden sweets. Fortunately, you do get something sweet in the end, even if you have to work at it.
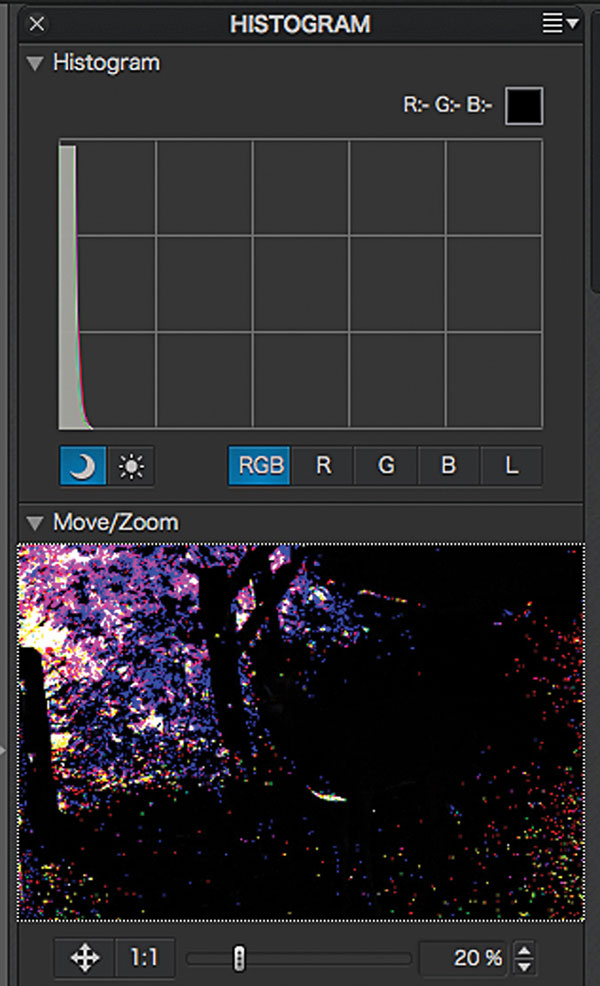

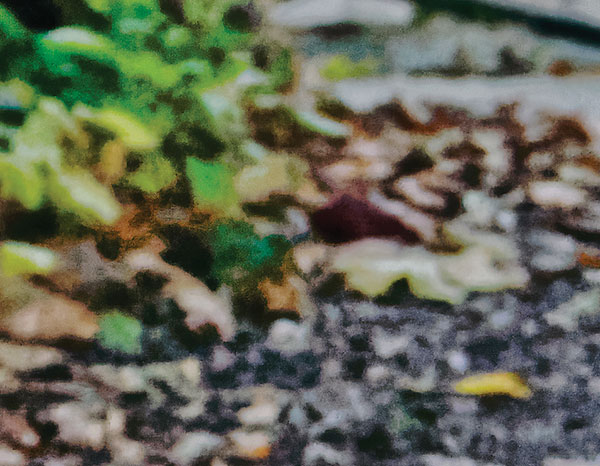
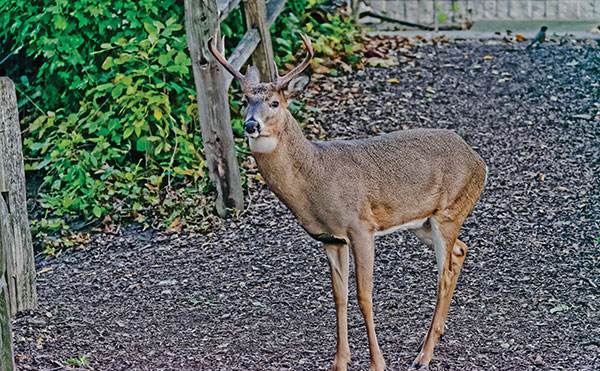
t it might be a good workout for the software. When I opened the files I basically saw black frames. Activating shadow clipping revealed some details (A), so I opted to try to bring them back to life in Optics Pro 9. Through a combination of various settings, I resurrected the deer, but bringing all that blocked detail brought out considerable digital noise (B). I opted for PRIME denoising (with default settings), which did an admirable job (C). Of course this is not a shot for the wall (D), but the ability to resurrect any details from a tosser like this is impressive indeed.
In A Perfect World
While DxO Optics Pro 9 brings marked improvements, there are still stability issues, and at times the program drags its feet. And Optics Pro continues to overlook certain features like watermarking and soft proofing, and lacks effective digital asset management. In a perfect world, there are a few other things I’d like, but I can make do.
DxO Optics Pro 9 is not Lightroom or Adobe Camera Raw; it has its own way of doing things, and the settings, while familiar on the face of it, do not necessarily correlate with those found in Adobe software. So be prepared to enter a different mindset when working in Optics Pro and you’ll find the results much more satisfying—often remarkable, in fact.
It all comes down to this: you can’t beat DxO’s denoising algorithms, whether you choose PRIME or even the more basic High Quality level. That alone is worth the price of admission. Granted, working in Optics Pro may mean having to add some finishing touches in Photoshop. But, at the end of the day, and provided you’re not in a rush, converting Raw files in DxO Optics Pro 9 is time well spent.

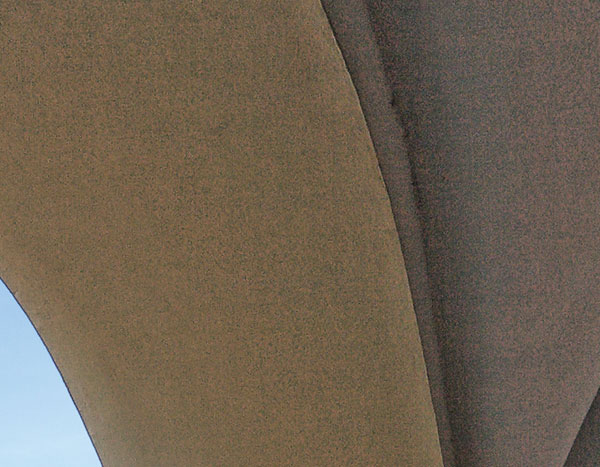

Older cameras often exhibit noise even at low ISO levels, most notably in areas where shadow detail is extracted. In this scene (A), shot in Prague with a Canon EOS 5D at ISO 100, I exposed for the bright outdoor lighting, leaving the passageway under the arches in darkness. Using DxO Optics Pro 9’s exposure tools I restored detail in this area, adding High Quality denoising to drop the mottled look. The cropped section shows the degree of noise in this region (B) and what it looks like with DxO denoising (C).
Contact And Price
For more information, contact DxO Labs at www.dxo.com.
Price (street): $299/Elite edition (supports a wider range of cameras/lenses); $169 Standard edition. Upgrades available through the DxO website at a cost of $199/Elite; $99/Standard.
Note: Check the website to see if your gear is supported for automatic corrections with DxO Optics Modules in either edition.
DxO Optics Pro v.9.1
As we went to press DxO just released the upgrade to Optics Pro 9. Besides adding export to Facebook (in addition to Flickr) and new camera and lens Optics Modules, Version 9.1 focuses largely on improving the denoising algorithms. According to DxO, “the result now is a bit less ‘smooth’ and will have a little more grain (the film-type grain), and will be a little sharper.” What’s more, “DxO Optics Pro v.9.1’s PRIME technology has been enhanced to obtain an even more detailed rendering, particularly at high ISO. Textures and details are better preserved, and noise is eliminated more efficiently.” That said, the differences are very subtle and PRIME export still takes an inordinate amount of time.
Select Specifications
I ran DxO Optics Pro 9 Elite edition on a 21.5” iMac equipped with a 3.1GHz Intel Core i7 processor, 16GB RAM, NVIDIA GeForce GT 650M 512MB. The operating system is OS X Mavericks (10.9). Here are some of the OS and system specs:
Operating System: Mac OS X 10.6 and higher; Microsoft Windows Vista and higher (32- or 64-bit).
Processor/Mac: Mac Intel only, 64-bit compatible (recommended: Intel Core i5 or higher).
Processor/Windows: Minimum: Intel Core 2 Duo, AMD Athlon 64 X2 or higher (recommended: Intel Core i5, AMD Phenom II X4 or higher).
Disk Space: 2GB minimum (6GB recommended).
RAM: 2GB minimum (8GB recommended).
Graphics: 512MB video memory.
To process Raw images larger than 20MP, a 64-bit operating system with 4GB of RAM is strongly recommended. To process Nikon D800/D800E Raw images, a 64-bit machine is required. A machine equipped with a 4-core processor is strongly recommended.
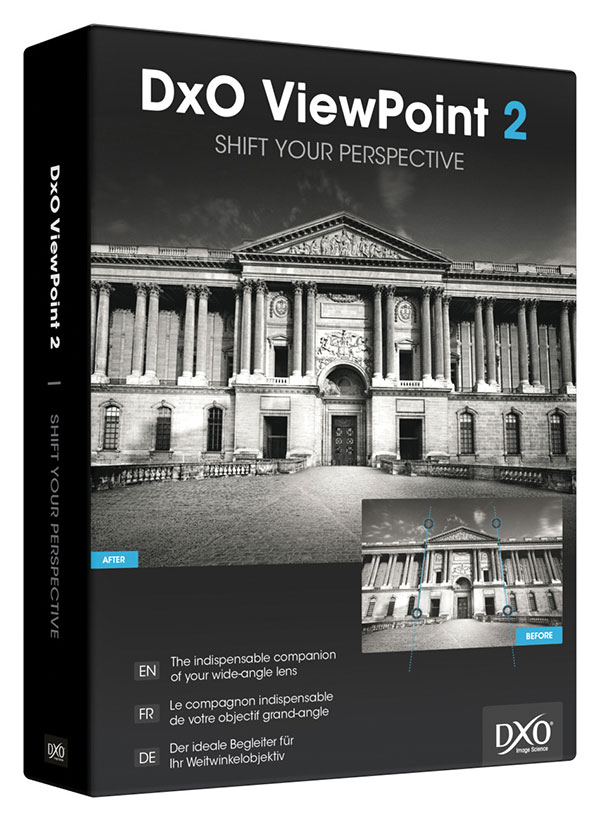
Update: DxO ViewPoint 2 & DxO Perspective
The updated DxO ViewPoint 2 has added several key improvements over the original release. ViewPoint primarily addresses images taken with wide-angle lenses, but it can also be used with telephoto shots, where keystoning (converging parallels that result from tilting the camera) is involved.
First, as an option, the new release now refers back to the original Raw file, extracting needed information to provide maximum benefit. Second, there is a new eight-point perspective control. This goes beyond the Force Rectangle and well beyond the Force Parallel tools, and makes it simpler when dealing with more complex perspective corrections by giving you four independent sets of anchor points. Anchor points identify lines that need to be aligned. And there is a “Natural” option, which maintains a bit of keystoning to give a scene a more native look when you’re looking up, for example, as opposed to squarely facing it.
DxO Perspective is essentially a scaled-down version of ViewPoint. It offers the full array of perspective corrections, including the new eight-point tool, but lacks the adjustment sliders to finesse the correction. Also missing is Volume Deformation. But most important, perhaps, Perspective only works as a stand-alone app and only on Mac, whereas ViewPoint 2 is both stand-alone and plug-in—for Mac or Windows. But Perspective comes at a scaled-down price of $19 (downloaded via the Mac App Store), compared with $79 for ViewPoint 2 (retail or DxO download).

With its uncomplicated interface, I’ve welcomed ViewPoint 2 as a means to gain greater control when correcting perspective distortion, and use it primarily as a Lightroom/Photoshop plug-in.


![]()
Get the Latest Photo Tips, News & Reviews from Shutterbug!
| Camera Reviews Other Reviews | Mobile Reviews Photography Reviews Columns | News | Features | How-To | Resources |
 © 2026 Shutterbug
AVTech Media Americas Inc., USA
All rights reserved