- REVIEWS
Camera Reviews 
More Reviews Mobile Reviews Photography Reviews - GALLERIES
- VIDEOS
- BUYER'S GUIDES
Crop & Frame For Impact
Crop & Frame For Impact
Find The Shot Within The Shot
by Jack Neubart
The moment you use the camera’s viewfinder to look at a subject, you are framing that subject. In essence, you are isolating that subject from the larger world surrounding it. And you are bringing the viewer into the scene you’ve defined in a way that focuses attention on that subject. It also means that at the same time you are framing the scene in the viewfinder, you are cropping out extraneous pieces of visual information. By that we mean you are getting rid of any peripheral visual elements that do not contribute to—or say something about—the subject (or center of interest) or the visual statement you wish to make.
Ready-Made Frames |
|
 |
|
|
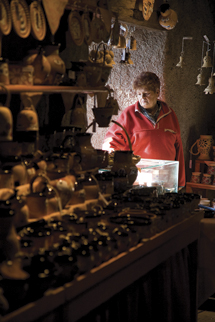
Sometimes we need to find something within the scene itself that we can use as a framing device. We might be too far away and working with a lens that is not long enough to isolate the subject in a meaningful fashion. We might find ourselves confronted by a lot of clutter that no lens could crop out effectively, no matter its focal length, or that a lens would have a problem coping with without perhaps introducing some unwanted artifact (such as converging verticals when tilting the camera to eliminate unwanted foreground). Or we might want to imbue the scene with a greater sense of depth. Keep in mind that this need not be a four-sided frame. For starters, we may use overhanging branches, trees flanking the scene, a doorway, or arch as a way to fill the frame.
 |
|
|
You could also use vignetting to frame a scene—generally either a black or white (neutral-colored) vignette would work best (colors could be distracting). Or you may wish to superimpose a frame using a plug-in. Here you have to be careful so as not to take an artistic work and render it as artifice. But for those of you interested in this approach, here are two plug-ins you might want to explore: PhotoFrame 4 Professional Edition (onOne Software, www.ononesoftware.com) and MagicFrames 3000 (Human Software, www.humansoftware.com).
 |
|
|
Define What Is And Is Not Important
Still other images may require one more step—cropping in post. Now as you view the image on your monitor, you may realize you need to trim the fat. As with a good piece of steak, some of that fat adds flavor; too much fat just spoils the experience. So you want to keep anything that strengthens your visual statement—what you are saying about the subject and its relationship to its setting—and remove those elements that have less relevance and thereby weaken the image. That could be anyone or anything crowding the subject, background clutter, a glaring hotspot that’s distracting—or simply too much empty space with nothing to contribute to the picture.
 |
|
 |
|
|
 |
|
 |
|
|
One cautionary note: you may find that the final image has been cropped so severely that there is little image left to work with—going from 12MP down to one or two, for instance. That small size may be fine for the web, but not for print publication or stock photography. (There’s only so far you can re-size an image before artifacts start to show.) And that long lens you’ve been eyeing looks mighty tempting right now.
 |
|
 |
|
|
Panorama And Square Format Cropping
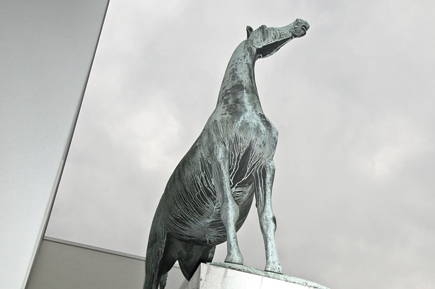
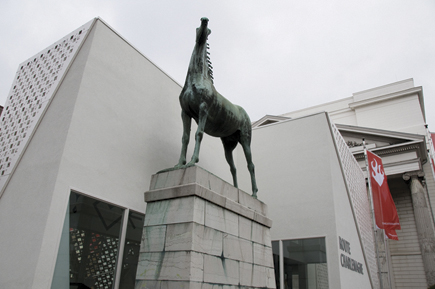
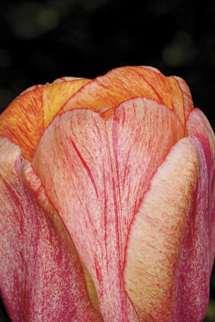
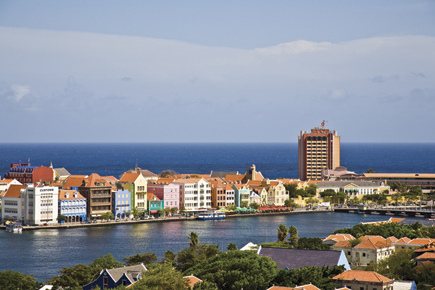
Sometimes we crop to refashion the image, giving it a different shape and feel. You can crop a horizontal to a vertical to give the image a sense of strength or make it more imposing. Conversely, you can crop a vertical to a horizontal to give it more of a relaxed or quiescent feel. Or you can crop either a vertical or horizontal to a square to reinforce a sense of radial symmetry in a flower or imbue the image with a certain quiet strength. And then you can take the image to the extreme and crop a horizontal so tightly so as to create a sweeping panorama, as I did in one shot of the Curacao harbor.
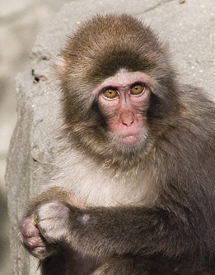
Add Focal Length—Via Cropping (But Be Careful Of Resultant File Size) |
|
 |
|
 |
|
|
So, keep the following in mind: frame the shot to focus attention on your subject. And crop the shot to make the strongest visual statement about the subject. As with any surgery, don’t unnecessarily remove the vital organs (don’t crop unnecessarily). Just shore them up (use related elements to advantage) so they do a better job of supporting the body—your subject and center of interest.


![]()
Get the Latest Photo Tips, News & Reviews from Shutterbug!
| Camera Reviews Other Reviews | Mobile Reviews Photography Reviews Columns | News | Features | How-To | Resources |
 © 2026 Shutterbug
AVTech Media Americas Inc., USA
All rights reserved