- REVIEWS
Camera Reviews 
More Reviews Mobile Reviews Photography Reviews - GALLERIES
- VIDEOS
- BUYER'S GUIDES
Capture One Pro Software Review: Phase One’s Raw Image Editor Is Now Easier with More Features
Capture One Pro is a top-echelon Raw image processor and editor, courtesy of the people behind Phase One cameras and backs. For this software review, I tried Capture One Pro, which is now on Version 11, on images shot with various cameras, ranging from Nikon to Canon to Phase One.
Testing was done with an Apple iMac operating under OS X El Capitan, with 16GB RAM and 500MB VRAM, and driven by an Intel i7 processor. To say I had no problems getting the software to do my bidding with this somewhat basic hardware configuration is an understatement. Capture One Pro performed almost flawlessly. This software is also available for Windows, and in several versions, including one specifically for Sony camera users.
“Nondestructive” Editing
The key to Raw image processing is “nondestructive” editing, meaning you can always start over or backtrack with no ill consequences. The fabric of the original file remains intact. This nondestructive editing differentiates such applications from pixel-level editors such as Adobe Photoshop.
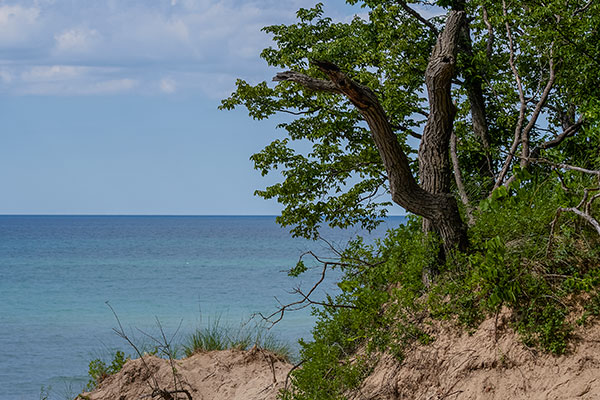
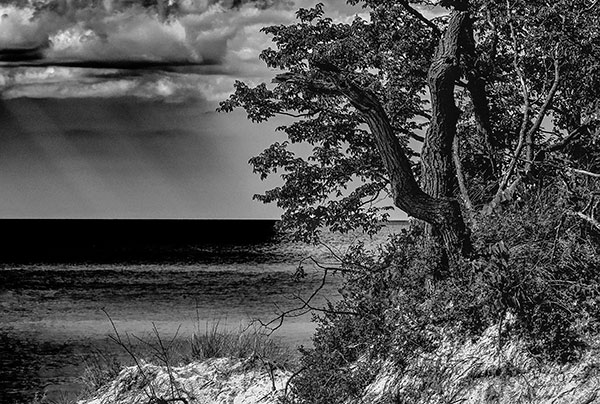
High-level Raw processors also let you generate virtual copies, or “Variants,” in Capture One parlance. In this way you can capture snapshots at various stages of editing or take these copies in entirely different directions. For example, one variation might be quietly monochromatic, while bold colors assault our senses in an alternative rendering. And the beauty of it is, you’re not generating real copies that eat up storage space. These are merely sets of instructions that take up a minimum of real estate.
New Enhancements
There’s nothing earth-shattering about Capture One Pro's new and improved features. Not to lessen the value of this software or its latest iteration, this is one application that evolves over time, without making groundbreaking developments from one year to the next. Of course, you may see it differently. However, I’m simply reviewing the software in terms of my ability to edit my Raw files competently, and even convincingly, which I feel this software has helped me achieve in a manner I could not do before in Adobe Lightroom.
For starters, the latest version of Capture One Pro is touted as offering a smoother, more user-friendly experience over previous iterations. That may be true, since I found myself taking to Capture as never before. (My most recent Capture experience dates back to Version 8.2, although I have used even earlier releases.)
Beyond that, sharpening tools have been enhanced with Diffraction Correction under Lens Correction and a Halo Suppression slider under the Sharpening tool. You do see a difference when correcting for diffraction with shots made at very small apertures. Does Halo Suppression help or hinder? It helps, in a subtle way. However, don’t take it too far or you’ll lose the gains in sharpening (view the image at 100%).
Other enhancements may go beyond the typical needs of our readers, focusing largely on tethered cameras and technical camera use, along with one that involves an optional editing console that pretty much addresses professional retouchers and commercial photographers. And Fuji users will no doubt appreciate improved X-Trans support.
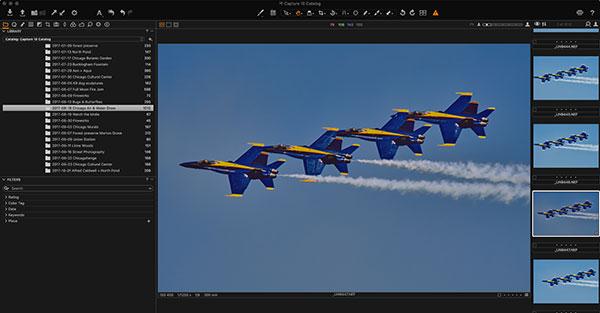
Managing Your Image Library
The first thing you have to do is decide how you’re going to work with Capture One Pro, in Catalogs or Sessions. Phase One explains that “Catalogs are designed as an asset management system for larger collections of pictures or permanent projects.” Or to look at it another way, Sessions is the old stratagem, whereas Catalogs is the more up-to-date library management chic within Capture—and, in my view, the way to go. You’ll need this for starters.
The next step is to bring images with similar themes, for example, together under one roof, into user collections such as Albums (a virtual group of images—virtual, meaning, they’re referenced, not duplicated) and Smart Albums (a filtered collection of virtual images based on selected search criteria).
Capture also provides a comprehensive image management tool set, including a rating system, keywording, and an extensive search engine. In short, Capture is the total package when it comes to image library management.
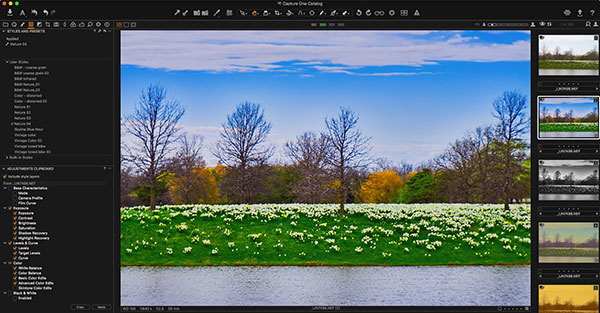
Upon launching Capture, you’re presented with a basic workspace that is efficient and practical. But, if you’re like me, you’ll want to customize and finesse your desktop, putting the most needed adjustment settings, or “tools,” at your immediate disposal and clearing the screen of unneeded elements. White Balance (WB), Exposure, High Dynamic Range, Black & White, Styles and Presets, and Clarity are just a few of the tools, each with its own group of settings. Click on an icon in the “tool tab” to call up a group of related tools. There’s also a “toolbar,” with another set of icons offering shortcuts.
A Few Words About Styles
Similar to Presets in Lightroom, Capture One Styles are designed to improve your workflow. What might be confusing to some is that Capture also has Presets. The difference is that a Style combines any variety of settings across any number of tools, and may include Presets. Simply put, it’s more comprehensive than a Preset alone. (The software comes with its own set of Styles and Presets out of the box. New Styles Packs have been introduced, tending to flavor the image subtly.)
You can stack Styles one on top of another to modify the effects of either and take the image further in one direction or the other. The order in which you stack Styles does matter, so play around with the stacking order to arrive at the best effect. You may, however, find that stacking has an unwanted effect, motivating you to backtrack and perhaps start over. I prefer to implement one Style per image, but that’s not carved in stone. Mousing over a Preset or Style temporarily updates the image to reflect the effect.
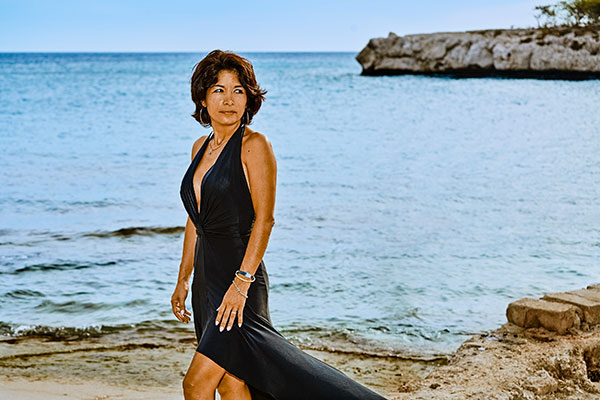
You can fashion your own Styles and Presets. It’s really quite simple. I’ve created numerous Styles for both color and black and white—often with dramatic effect. Before saving any Style, test it out on numerous images. Done correctly, a Style is often a one-click solution to image enhancement—although a few tweaks may be in order. If you’re only addressing a white balance or black-and-white adjustment, for example, then save that as a Preset under the applicable tool. Use Presets only after applying a Style, so the Style doesn’t accidentally overwrite the other settings.
Conclusion
You don’t have to be a rocket scientist to wend your way through Capture One Pro’s editing tools. They are largely intuitive and in some cases go well beyond what Adobe Raw has to offer. Of course, one or two do require more effort to master, but if you’re moving up from a previous version of Capture, the learning curve is minimal at best.
One thing you’ll notice immediately is that, whereas Capture does support numerous cameras and lenses, your favorite lenses may not be supported, or the updated versions of those lenses may lack profiles. You may be able to find a workaround in a related lens profile. For instance, most of my Tamron lenses are not covered, and that goes for all my Tokina glass. (I’ve contacted Tamron regarding this omission.)
One thing I’ve always admired about Capture is the option to analyze the image file for chromatic aberration. This is so much easier than trying to manually adjust individual sliders in Adobe Raw in an effort to deal with the problem. There’s also a separate slider specifically to address purple fringing, something lacking in Adobe Raw entirely, at least by such simple means. These corrections go a long way toward making up for the lack of lens profiles, though not entirely.
I was going to discuss my favorite Capture tools, but there are so many that I’ll have to limit that discussion to just a few. Notable among these is the Color Editor, which is a finely finessed HSL (Hue, Saturation, and Lightness) adjustment. Here you have a color picker (aka eyedropper) that lets you selectively edit certain hues and tones. You really have to experience these settings to fully appreciate them. All I know is, I’ve used them fairly extensively. Further adjustments are made through either or both the Tone Curve (“Curve,” in Capture) and Levels tools. Even here Capture goes the extra mile to give you tighter control over the image.
Local Adjustments is another one of my favorites. This tool gives you a choice: making adjustments, healing, or cloning in a layer. Up to 16 layer masks can be used with each image (more would be nice), and you can copy one layer mask to another. Not all settings are available under this panel. For instance, you can use the Tone Curve on individual layered adjustments, but not Levels; the Color Editor, but not the Color Balance tool; nor can you use the Black & White tool settings. Frankly, I would like to see these excluded settings applicable to Local Adjustments as well. FYI: There’s a separate tool for cleaning up dust and other small spots, without adding layers, but I sometimes resort to healing or cloning when this spotting tool fails to correct the problem.
I spent many weeks fully immersing myself in Capture One Pro and I found that this software exceeded my expectations when processing my Raw files. That said, I want even more from this software (see sidebar, “My Capture One Wish List”). Is all this enough for me to make the switch from Lightroom? Let’s just say that I’ve imported much of my library into Capture and am using Lightroom less and less. The Styles and Presets I’ve created in Capture have opened my eyes to new possibilities and new dimensions where I dared not take my images before—and to do so efficaciously and convincingly.
Pricing
Capture One Pro 11 (street): $299 (upgrade from Version 10: $99), via electronic download. Subscription plans available. Sony version sold separately. For Mac and Windows. Styles Packs for Capture One Pro are available at the Phase One e-store: phaseone.com/styles-store. Each Styles Pack is priced between $49 and $69.
My Capture One Wish List
Here’s what I’d like to see in a future release…
• A Dehaze filter. It helps ameliorate the effects of haze and would be a welcome addition to Capture One. I’m sure Capture could make this an even more effective tool than we see in other Raw editors.
• A drag tool, such as used in Lightroom, for HSL and tonal adjustments, which would make it easier to target specific tones and colors and adjust as needed, without always resorting to sliders.
• A Custom WB option in the drop-down list. Currently, you can set a Custom WB, but it’s only shown transitorily. Change the setting and it’s gone, so that you have to repeat the step. Undo is not always a reliable option.
• Contrast filters for black and white. A little added tonal control couldn’t hurt.
• Automatic keystone and level corrections for all Raw files the way Lightroom does, not just proprietary files.
• A History panel, so you can easily backtrack editing for each image. Undo applies globally, and can lead to confusion when working on more than one image or variant.
• And, of course, more lens profiles would be appreciated. Some lenses have been out for several years, and Capture is still playing catch-up.
Jack Neubart (jackneubart.com, Instagram: @pixelperfexion) has authored numerous books and articles on photography over the years.


![]()
Get the Latest Photo Tips, News & Reviews from Shutterbug!
| Camera Reviews Other Reviews | Mobile Reviews Photography Reviews Columns | News | Features | How-To | Resources |
 © 2026 Shutterbug
AVTech Media Americas Inc., USA
All rights reserved