- REVIEWS
Camera Reviews 
More Reviews Mobile Reviews Photography Reviews - GALLERIES
- VIDEOS
- BUYER'S GUIDES
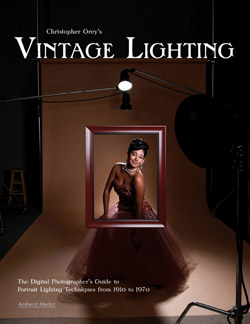
Book Excerpt: Christopher Grey’s Vintage Lighting: The Digital Photographer’s Guide To Portrait Lighting Techniques From 1910 To 1970
Portrait photography began to come of age around 1910, as did the motion picture industry. The stuffiness of Victorian Age photographs gave way to a more relaxed style, although it’s difficult to say it was relaxed in a contemporary sense. Smiles were still unusual and poses were quite prim.
The movies changed from “peep show” Kinetoscopes to multi-reel features (the breakout movie was 1915’s The Birth of a Nation). Actors in films began to get credit for their work, sparking the birth of movie stars.
Whether you were photographed on a movie set or in a studio, you would have almost certainly been photographed by skylight, window light, sunlight or a combination of the three. Although powered light was available, film was somewhat insensitive to it, owing to the spectral differences between film (largely blue sensitive) and incandescent light (very little blue in its spectrum).
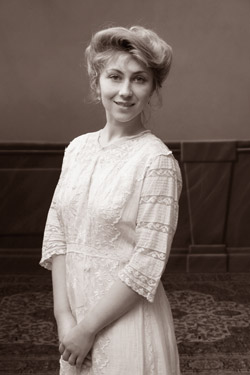
I wanted to show a few variations of Edwardian imagery and how they might be created and controlled. I also wanted my samples to have a little extra life in them, hence the smiles from my model.
By the way, backgrounds in the early years were either plain walls, carpet, wallpaper or fabric—anything that might be available. Painted canvas backgrounds were found in the most successful studios.
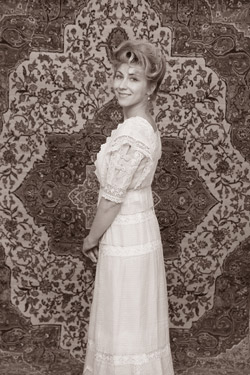
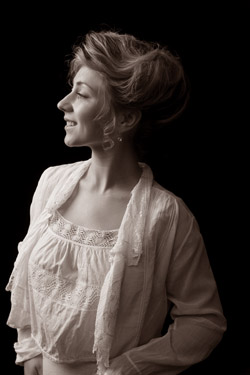
My first idea was to emulate skylight. I used two medium softboxes and aimed them toward the ceiling, angled slightly to bounce the light toward the model, effectively turning the ceiling into a very large softbox. I used a carpet from the studio floor for the background, clamping it to a long rod and hanging it from a pair of Manfrotto Autopoles.
As early photographers frequently did, I posed my model right next to the background. As you see, she’s almost lost within the pattern of the carpet.
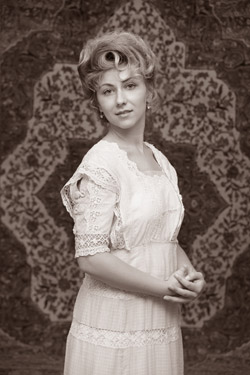
The solution was to move the model toward the camera. This change in position brought her closer to the lights, changing the intensity of the light falling on her, which required another meter reading. The move also meant the background would photograph darker and be out of focus. The pattern in the carpet became a frame for her, and the image was much more charming.
Early photographers would regulate the skylight with a system of louvers. By doing so they were able to create highlights and shadows.
I removed the camera-right softbox and placed it at camera left, slightly behind the model. This box was powered +1⁄3 over the other to produce a graceful highlight on her side. I used a black bookend to keep light from falling on the background.
Notice how light from the ceiling softbox gently fell on her, creating shadows typical of soft, overhead light. While it is not what one would consider contemporary, it looks authentic, and that’s the key to successful retro photography.
Dark or black backgrounds were often used. I’ve always liked the drama of black and wanted to replicate an antique photo I have in my personal collection. The image I have appears to have been lit by a large window, with no other apparent light, and the woman’s hair tonally merges with the background. It’s the only aspect of the shot that I wanted to change, so I opted to add just enough light to get some shadow detail.
I put the two medium softboxes in their original positions, aimed at the ceiling. A third softbox (2x3 feet) was placed at camera left at the height of the model’s face.
Once she was metered, and with the dome of the meter aimed at the light, I powered the two softboxes down to 22⁄3 stops below the main. The adjustment proved to be just enough to add very minor detail to the shadows.
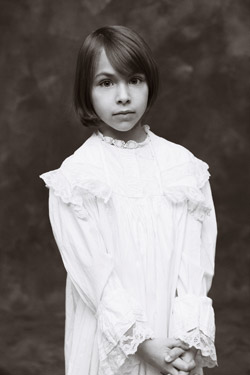
I have been asked on more than one occasion to duplicate the look of an ancestor’s photo on a living relative. In one instance, a wedding gown had been passed down through several generations, and my client wanted to duplicate a photo she had of her grandmother who was shown wearing the dress. The dress fit her beautifully, and I was able to reproduce the look quite nicely. The lighting was similar to this, as I recall, with a little more contrast. The point is that, by studying the work of others, we prepare ourselves to confidently handle any client opportunity.
For those of you who photograph children, you may wish to buy a few Edwardian or Victorian nightshirts, or replicas of them. It’s a great look. Also, the use of such props (available through antique stores as well as some contemporary prop houses such as www.elenacollectionusa.com) may prove to be a great value to your studio, as it will likely be something that your competition does not offer. If you’re the only photographer to offer it, it’s worth it to spend a few bucks for props.
Christopher Grey is the author of Master Lighting Guide For Portrait Photographers, Creative Techniques For Nude Photography, Christopher Grey’s Advanced Lighting Techniques, and more. He lives in Minneapolis, Minnesota.
Amherst Media titles are available wherever books are sold, all photo retail stores as well as Amazon.com and AmherstMedia.com. Their books are also available as eBooks on Kindle, Nook, iPad and others.


![]()
Get the Latest Photo Tips, News & Reviews from Shutterbug!
| Camera Reviews Other Reviews | Mobile Reviews Photography Reviews Columns | News | Features | How-To | Resources |
 © 2026 Shutterbug
AVTech Media Americas Inc., USA
All rights reserved