- REVIEWS
Camera Reviews 
More Reviews Mobile Reviews Photography Reviews - GALLERIES
- VIDEOS
- BUYER'S GUIDES
Photo Bag Review Roundup: The Best Dry Bags to Protect Your Camera Gear
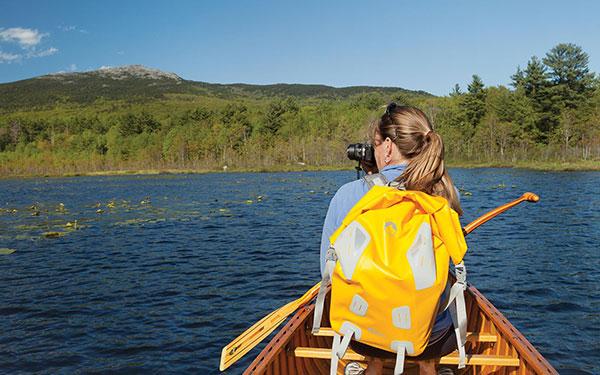
We were in a zodiac boat in a bay of Pitt Island, a small island that is part of the Chatham Islands, six hundred miles east of the South Island of New Zealand. It was December, summer in the southern hemisphere, but the islands are far enough south that even in their summer, it was cold.
We were having a grand time photographing the wildlife, the sea surging against the Bull kelp on the rocky wall that was too steep to call shore. Those of us who were paying attention were marveling at the zodiac driver’s skill in keeping us close enough but not bumping into things.
Over a thousand miles away, a storm had been kicking up the seas for days.
The zodiac driver’s radio crackled and after the “OK” she told us to “Hang on, we’re going back” and spun the rubber craft around. When we left the bay, we saw why. We were faced with seas that were now over six feet high (the sidewall/hull of a zodiac is maybe eighteen inches high) and we had to go straight into the wind from the north, a wind that was a lot stronger than it had been when we’d left the ship an hour and a half before.
I stuffed one of my cameras inside my parka, and tried to shield the other from the spray, splashes, and wind-driven rain. The experience was not unlike being hunched over on the side of a kiddie wading pool, while an evil person threw ice-cold water at my back from a five-gallon bucket. Oh, and all the while, a crew of other evil people were treating the wading pool like a bucking bronco, trying to throw me off. If the results of falling into the water hadn’t been so dire, it would have been a ride worthy of Disneyland.
Back on the ship, the camera that had been inside my parka worked just fine once I had dried it off. The other one? Well, let’s just say that when you’re pouring water out of the camera and the lens, there really isn’t a whole lot the repair department back at Canon Professional Services will be able to do for you.
Which is how I came to research the subject of dry bags.

Dry bags come in various flavors, but we can make an initial cut/division by sorting those meant to survive submersion from those that are not. Yes, a submersible bag will be “drier” but you can’t get something for nothing. Generally, the opening will be harder to deal with (try unzipping a submersion-proof zipper in ten degree weather, with glove liners on, using fingers stiff from the cold and from you being on the shore for two hours. Not fun.)
Then there are the “fold top” bags where you close the seal then fold the top down several times and clip it shut. They won’t survive submersion, but they will keep everything dry short of a dunking and can be/are a lot easier to open when your hands are cold.
And finally there are the “waterproof” bags that don’t have a weather seal closure but depend on you to fold the top or otherwise keep water from splashing in. They have waterproof fabric or plastic to deal with splashes but don’t have a waterproof closing method.
Last up are what I call “freezer bags,” which might in some instance be actual freezer bags, but are mostly clear plastic (and usually a thick, tough plastic at that) bags with weather sealed closures, that you can stash your wallet, cell phone, or compact camera in. I’m looking at something big enough to put a DSLR or two in, with lenses, and keep them working through rough seas, not a freezer bag.
There is another way to differentiate these bags and that is how they are carried. We have three main groups; satchels, back-packs, and clutch-purses.
A satchel is just that; think gym bag or duffle bag, something with handles but if it has a shoulder strap, it is a shoulder strap. Backpacks you carry just like you would your camera hiking bag, with two straps. The “clutch” bags have handles but are so small you can simply grab on and carry it.
Lowepro
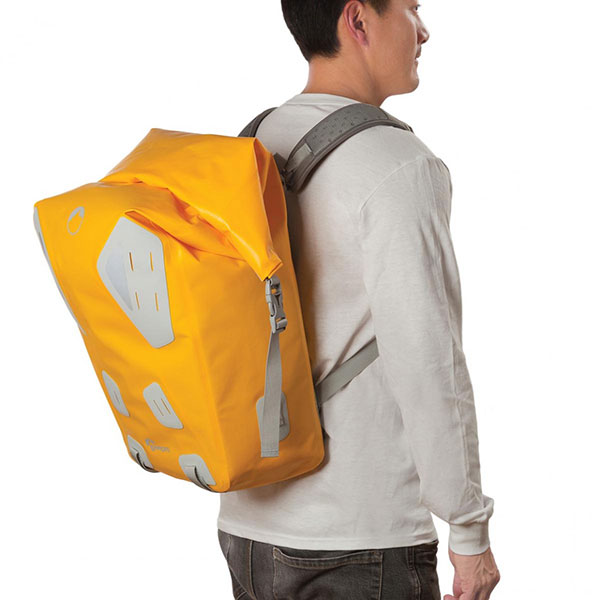
Lowepro sent me a Dryzone Backpack 40L, their forty-liter pack, to test out. This is a rolltop backpack, but the buckles are different. Instead of buckling to each other, they buckle to an anchor on the side of the bag. Each anchor has a tension strap, so you can roll it tight, then cinch it down to make it as compact (and waterproof) as possible.
Lowepro rates it as an IPX-6 bag, and is proof against splashing and high-pressure water from any angle. This is a brilliant bag. The rolltop makes it easy to get in and out and to seal it, while being a backpack makes it easy to carry. The external bag is made of a very heavy-duty synthetic, and it is tough and slick. The insert, which has dividers and can be removed as a bag on its own, should you want to. It is only moderately water resistant but that’s not the idea. The inner bag comes out so you can clean the various parts of it as-needed, and as effectively as possible.
The inner bag does not take up all the space available inside, so if you want to add another, albeit small, normal bag, or a big freezer bag for extra gear, there is room. The Lowepro Dryzone Backpack 40L has slotted patches on the exterior so you can lash on extra pouches if you find you need more room than forty liters provides.
Made in an eye-searing shade of yellow, you are not going to find it difficult to locate on the beach, or in the zodiac.
Advantages: Easy to use, roomy, easy to open and shut. As a backpack, easy to carry when you need both hands, but still small enough to be handed-off, one-handed to crew or helpers.
Disadvantages: One color to choose from. A bit heavy and bulky to pack in luggage.

Watershed Bags
Next up is Watershed. I had a chance to see this brand on display at a big trade show, and all I can say is: wow! First of all, they make bags in a vast array of sizes and shapes, including bags they had on display that you could have lived in, let alone out of.
Watershed is interested in submersibles, that is if you could get them under water. The seal is a very strong freezer-bag-like seal. It is such a strong seal that you need two hands to get it open. Also, you have the option to add an inflate/purge valve. The valve lets you inflate the bag once it is sealed. I can see this being a boon for someone using a kayak. Put the gear in, lash it down, then inflate it.
If you do roll over, the bag actually adds buoyancy. This is also used by certain groups who swim onto unfriendly beaches at night. They’ll inflate the bag when they get close, and float their gear through the surf. That is more than a bit beyond our needs, but I tested their Chattooga bag, a satchel-style duffle big enough to hold two DSLRs with lenses, plus extra gear.
The Watershed approach to water sealing is to make a Ziploc-type seal that you have to twist and wrestle apart. Once you get the “touch” it isn’t too bad but be prepared to look silly, wrestling with your new bag on the couch until you get it open and find the trick. The simple, but harder, approach is to put a finger or two through the loops on either side of the seal and pull straight apart.
Watershed’s Chattooga bag has a carry handle plus enough locations to clip on the provided shoulder strap to make your head swim. If it had any more -- and they are durable, attachment points -- you could skydive with it lashed to you. Or, you can use them to lash it to your boat, kayak, whatever.
Watershed can also provide an internal bag plus padded dividers for the bag, so if you want to be a bit more civilized than simply using a bath towel stolen from the hotel or cruise ship as padding, you can use the Watershed dividers. Arrange them (they use hook-and-loop fasteners) inside the padded bag, inside the Chattooga, and when you are done your gear is dry and padded.
And, if your plan is like mine, ride the zodiac to shore, take the camera gear out and leave the bag on shore with the rest of the now-superfluous gear. Watershed offers bags in bright colors so you can find your gear when you get back and sort it out from that of the other photographers bags and gear.
Advantages: The Chattooga is sealed like no-one’s business. It has plenty of strap locations, you can get padded dividers, and you can carry it like luggage.
Disadvantages: It is heavier than others, especially with the optional padding. It’s also bulky, and getting it into your luggage for the flight to your expedition location can be a bit of a hassle.
Sea to Summit Bags
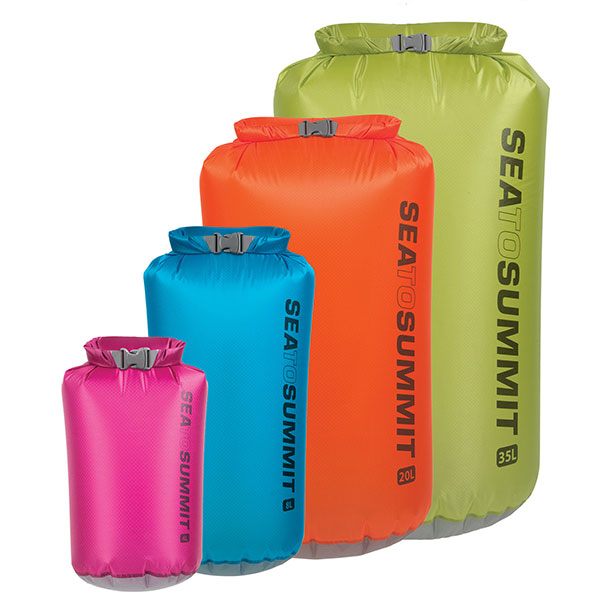
Sea to Summit sent me a pair of their 20-liter fold-top bags to test: the Big River and the Ultra-Sil. They are both plain and simple bags, no padding, but they do have lash/strap points on them, so you can attach a shoulder strap or lash them to your craft.
The Big River has the thicker fabric and the wider seal of the two. Sealing is simple; you press the two sides of the top against each other, and roll them down, (the label recommends three folds) until you can then bend the two ends of the fastex buckle system together and buckle it shut.
Sea to Summit is very clear on this; these are not submersible bags. However, they are sealed against pretty much anything except submersion. How could I tell? If you don’t get enough of the excess air out of either of the bags before you roll the top down, you can’t roll the top down far enough to clip it. It seals well enough that air doesn’t escape and you can’t compress the bags to vent the air. If you have too much air in it, you have to unroll, squeeze and vent, then re-roll, until you get it right.
Advantages: Both of these are light and compact. You can fold them into the bottom of your suitcase and not notice. They seal more than well enough against the elements but if you anticipate submersion, they might not be good enough.
Disadvantages: No padding.

Simms Fishing Products
Simms Fishing Products make a full range of bags, satchels, clutch and backpacks, so I tested one of their backpack models, the Dry Creek Z. It is a 25-liter, submersible backpack with a sealed zipper and interior mesh pockets.
The zipper is an amazing bit of engineering. Big, sealed, with a “T” handle pull tab, and it takes a goodly amount of force to get it to move. You aren’t going to be un-zipping this one-handed, while checking your phone.
It has two shoulder straps as it was meant to be carried as a backpack. There is also a mesh of strapping, strong cords on the back, so you can secure a coat if it is too warm or other gear that can be allowed to get wet but might be too bulky to go inside. Alongside the cords are two slot patches where you can thread straps through to lash the bag down or on, or attach another carry strap. On the top is a carry handle so if you want or need to carry lit like luggage, you can.
Inside, it has two mesh pockets, one of them zippered but no padding. No big deal, we can handle that.
Advantages: A backpack designed for times when your hands are full. Solid, dry, with plenty of room and exterior storage. The internal pockets allow for storage of documents and flat gear you don’t want rattling around in the bottom of the bag.
Disadvantages: No padding, the zipper takes two hands to use, the surface is a bit slick when wet but there are plenty of handholds. A bit heavy and bulky enough to be a consideration when packing for the trip.

Tips for Using Dry Bags
A moment to discuss how bags are used, at least in my experience. You pack your camera gear for the trip to the shore or while going on a zodiac expedition. To get in the zodiac, you either wear the bag, or you hand it off to one of the crew in the boat, while you clamber in.
Once in the zodiac, if you want to use your camera, you have to get into the bag. So, it has to have a carry strap or straps, maybe a shoulder strap, so you and the crew member can handle it. It has to be easy to get into so you don’t miss a shot. (You can get both hands on it in the zodiac, it just takes practice.)
Once on shore, you probably can leave the bag so you put your photo gear on, drop the dry bag with the crew, then on your return to shore, re-pack for the return to the ship. I don’t kayak, so I’m not expecting submersion. And if I do, I’m more worried about me than the camera gear.
At first blush, the Chattooga, Simms backpack, or Lowepro may seem like overkill. Dry overkill, but for most uses, and a tad heavy. But, combined with the Sea to Summit bags, any would make a great combo.
I’d use the Simms/Chattooga/LowePro if I couldn’t leave empty gear on the shore (like an over-island hike to another pick-up point) but I’d use the Sea to Summit on a zodiac expedition. Easy to get into and put back, waterproof enough, and so light and compact I can pack it and not notice. I’d just have to score a towel or two from the ship, to pad the bag.

Testing Dry Bags
The question that we now face is simple: how do you test a dry bag? First of all, you don’t test it with cameras inside. I can tell you from experience that wet cameras are expensive-to-fix cameras. (And often “more expensive to fix than replace” cameras.)
So instead I went down to the nearest Salvation Army store and bought a stack of romance paperbacks. (The looks you get, buying a near cubic foot of romance novels are more than strange. Sort of a mixture of confusion and wariness. Doing it as a middle-aged man is just asking for an extra dollop of pitying looks.)
Your first thought might be to load the bag with books, fill the bathtub and try to drown the bag. As fun as that might be, it isn’t a realistic test. Consider my zodiac ride. If the boat had capsized, the last thing I’d be worried about in the thirty-five degree water would be “are the cameras all right?” Not the first question I’d be asking. I’d be, along with the others, trying to right the zodiac, get in, and get the motor started. So, submersion is not the test. What I did instead was pour water on them from a bucket and after pouring, threw more water on them.
In the summer this might be entertaining. But starting this test in the middle of winter, in the Midwest, just makes it hypothermia-risking work. It is also a test they all passed. No amount of pouring and throwing of water onto or at the bags got the books inside the least bit damp. Your camera gear is safe from the water in any of these bags.
In the middle of the testing, I went on a cruise around South America. I packed the Sea to Summit Ultra-Sil. Rolled up, it is so compact you could just about stuff it in a pocket, and have it handy if you needed it. I took it along more as a “what if” than actual need, as this was to be a civilized cruise.
I did need it once on an excursion to the Atacama. I took it more for the expected dust protection than water, but while we were there, it rained. It rained in the Atacama, which hadn’t happened during the previous 40 years so you never know when you’ll need a dry bag.
From now on, one of the Sea to Summit bags is standard gear, on all my travels. They are compact enough that I’ll never notice them until I need them.
In other arenas I have done testing that made the observers wince and some even had to leave, the abuse was so heinous. I couldn’t just leave the bags damp and the contents dry.
I had to find a non-submersible test that worked them harder. I stepped up to a garden hose. By now the weather had turned warmer and I didn’t risk hypothermia while abusing bags. Still, they stayed dry.
I left the bags out in the backyard during a couple of thunderstorms and still the paperbacks were dry. Overnight dew had no effect but I think the neighborhood critters might have provided an extra test. Left in a row at dusk, by dawn they were scattered around the yard, dragged to their new locations, and still the contents were dry. I needed something more. And found it.
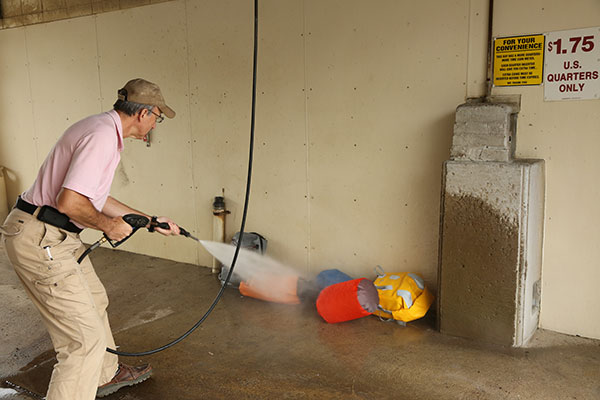
Did you know that you can, for the mere cost of a dollar and seventy-five cents, have four minutes of merry entertainment chasing an array of dry bags stuffed with books around the cleaning bay with a high-pressure car washing wand? And, that dry bags keep their contents dry under such circumstances? All of them. On both occasions.
All I can conclude is that my previous expedition trips that had led me to be so cavalier were fun but not fully informative. The trip that cost me a camera body and lens (and not cheap ones, either, ouch) have brought me to appreciate the value of a good dry bag.
From now on, when I’m in faraway, wet, places, there will be at least one dry bag going into the zodiac with me. Which one? Here’s the plan: the Sea to Summit Ultra-Sil goes into my regular camera bag, as always-there insurance. If I have a camera, I have a dry option.
The Sea to Summit Big River goes into my luggage. If I travel, I’ll always have a dry bag with me. Then, it is simply a matter of which heavy-duty bag of these three I take on the expedition, packed in with the Big River. That’s right, I’m never being without a dry bag and in some instances I could have three of them with me.
Losing expensive camera gear can do that to you.


![]()
Get the Latest Photo Tips, News & Reviews from Shutterbug!
| Camera Reviews Other Reviews | Mobile Reviews Photography Reviews Columns | News | Features | How-To | Resources |
 © 2026 Shutterbug
AVTech Media Americas Inc., USA
All rights reserved