- REVIEWS
Camera Reviews 
More Reviews Mobile Reviews Photography Reviews - GALLERIES
- VIDEOS
- BUYER'S GUIDES
5 Great Photo Tips for Travelers: How to Capture Eye-Catching Images on Your Next Trip
There’ll always be an opportunity to make a photograph. What makes that photo more than simply a record of a place, what will turn it into a creative image, is how you deal with the opportunity—and sometimes how far you stretch it.
In my previous column, I talked about techniques I use to go beyond the simple capture of a scene. Here are some additional ideas and techniques you might want to try.
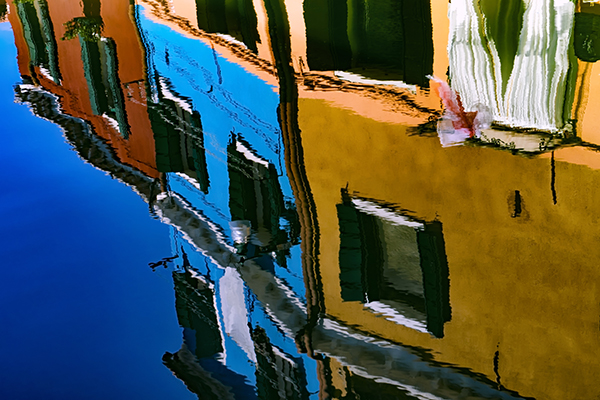
1. Reflections
I use reflections in two ways: the subject and its reflection in the image; and an image that’s only the reflection.
Every reflection is an opportunity to make creative choices. How much subject reflection do you want in the picture? How do you want to frame the reflection? How much attention do you want to be paid to it?

It’s fairly easy to use reflections in your photos; wherever there’s water, there’s opportunity. No matter where I am, at home or halfway around the world, if it rains I’m likely to be the first one out taking photographs. The world becomes a much more expressive place when even a lowly puddle can be a creative graphic element of composition.
2. Multiples
Oftentimes a literal interpretation isn’t enough for me. I want something more creative, so I’ll set my camera in multiple-exposure mode and see what that idea can do for my subjects—which could be flowers, or architecture, or cars, or you-name-it.
Essential ingredients for multiples are a zoom lens and a tripod with a ball head. I move the camera and zoom my lens between exposures in small, defined, regular increments.
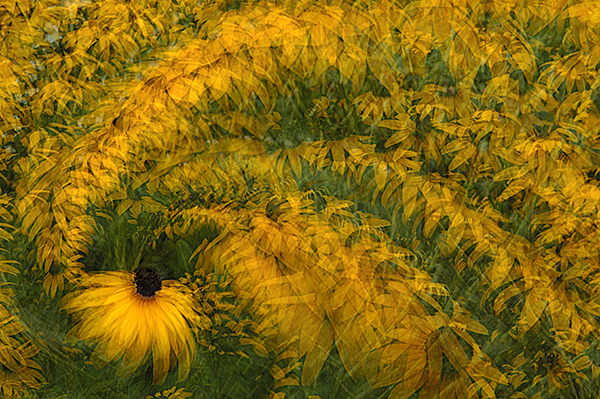
I think of multiple exposures as part technique, part experiment because I’ll get different-looking results depending on the subject, the number of exposures, and the degree and direction of the movement of the camera. At their most successful, they’re eye-catching expressions of color, texture, and implied motion.
3. Starbursts
The formula is easy: first, a bright, single-light source that stands out against the surroundings; then, a small lens aperture—say, starting at f/16 and getting smaller.
Starburst images work best in the low-light conditions of the blue hour, twilight, and sunset, when the most popular single source—the setting sun—or the glowing lights on bridges, piers, ships, and decorative displays offer their best and brightest. A check of your results on the camera’s LCD will show what you’re getting and if you need to adjust your aperture for more pronounced or dramatic results.

Of course, the combination of small apertures and low-light conditions makes a tripod essential for starburst photography.
4. The Late Show
I loved a location in Paris, but I first saw it in daylight when it was crowded with tourists and locals, which made for some good photos, but wasn’t what I really wanted: the place itself, with its architecture and ambiance the subject rather than the activity on the street. So I came back after dark and took a three-exposure HDR to capture the range of tones and contrasts and the dimensionality of the scene.
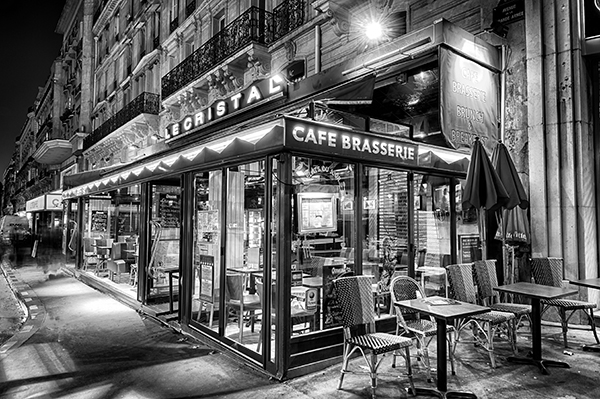
I converted the image to black and white because I was inspired by Brassaï and his book, Paris by Night. I felt also that taking away color allows light, shadow, texture, tonality, and pattern to become all the more prominent and dominant. There’s a different visual narrative without color.
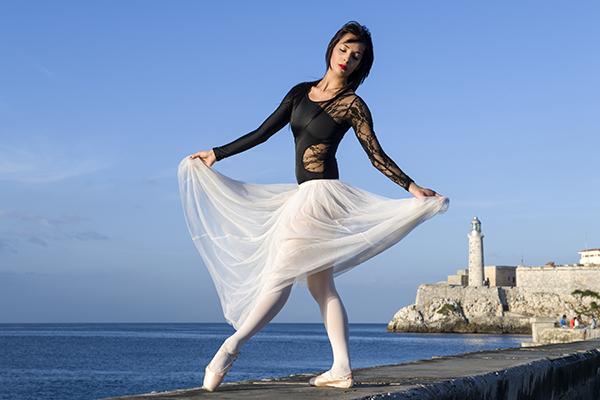
5. Sense of Place
I had two ballerinas as models for a workshop in Cuba, and when I photographed them on the Malecón in Havana, I made sure to include Morro Castle in the image. (See one of those images at the top of this story.) Had I shot with just the sea as background, it could have been a photo taken anywhere. With a place reference, people who know Havana will know where the dancer is, and they will also make the connection to the role dance plays in Cuban culture.
Sense of place photos happen when you look beyond an initial scene to include something significant to the location. With that in mind, they’re easy to do. Going to be in New York City? A Yellow Cab in the background is all you need.
If you decide to put any or all of these ideas and techniques to work, be sure to add, subtract, combine, and improvise to make the photographs your photographs.
A selection of Deborah Sandidge’s world photography is at deborahsandidge.com, along with cinemagraphs, photo tips, and a schedule of upcoming workshops, photo tours, and seminars.


![]()
Get the Latest Photo Tips, News & Reviews from Shutterbug!
| Camera Reviews Other Reviews | Mobile Reviews Photography Reviews Columns | News | Features | How-To | Resources |
 © 2026 Shutterbug
AVTech Media Americas Inc., USA
All rights reserved