- REVIEWS
Camera Reviews 
More Reviews Mobile Reviews Photography Reviews - GALLERIES
- VIDEOS
- BUYER'S GUIDES
Rogue FlashBenders: Positionable Reflectors With Added Flexibility
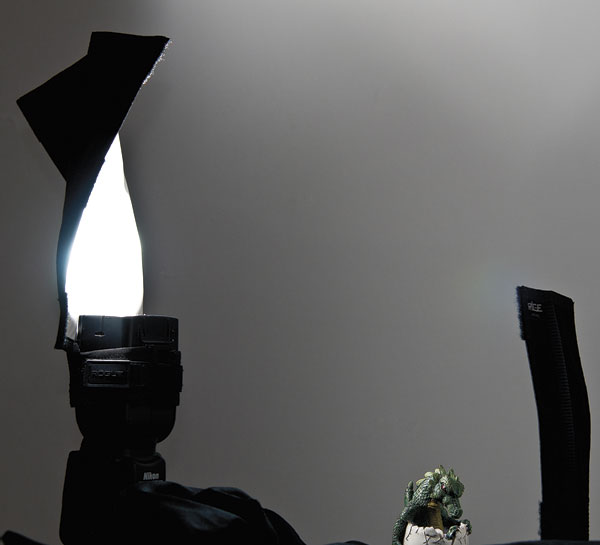
Many of us use the speedlight’s built-in kicker panel to add catchlights to the eyes and thereby give the subject a more animated look. Regrettably, this built-in device plays a marginal role in filling in shadows. So we turn to much larger, more functional bounce panels, and although they offer distinct advantages, these third-party panels may not be as flexible as we’d like. Enter Rogue FlashBenders from ExpoImaging (www.expoimaging.com). These panels quite literally lend a unique twist to speedlight photography.
Courtesy of ExpoImaging
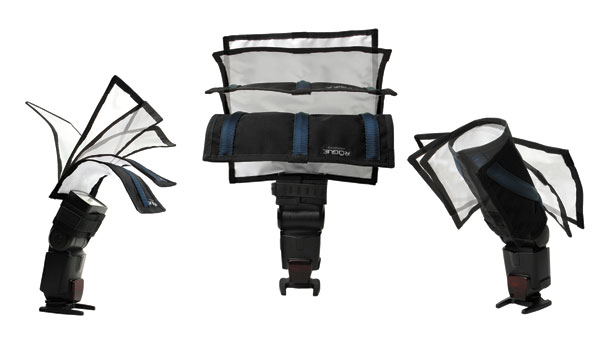
FlashBenders do not require an accessory to mount them onto the flash. Instead, a permanently attached band with hook-and-loop material wraps around the flash head. To ensure a snug fit, the band is elastic along part of its length. That also means they should fit practically any shoe-mount flash on the planet.
Initially, Rogue FlashBender panels were introduced in three sizes. You could say that the two larger panels have more bounce to them, although the smallest one, surprisingly, has quite a kick to it. The smallest FlashBender was primarily designed to serve as a kicker panel for basic fill (it’s the only one they actually call a “bounce card”). But it also serves to flag, or block, stray light when you use the supplied matte black panel attachment.
Fill Light With Twins
All Photos © Jack Neubart
The large FlashBender is fairly sizable, measuring 10x11” approximately, and weighing 6 oz. The next size down (what they call “small”) measures 10x7” and weighs 3 oz. The bounce card mentioned earlier is a mere 5x9” and weighs 2 oz when you add the weight of the attachment flag panel.
Each reflective panel is white PVC, with black Cordura nylon backing. ExpoImaging notes that the fabric used is “durable, washable, spectrally neutral matte white material that efficiently reflects 86 percent of the light when used as a reflector.” But that’s not entirely what distinguishes these products.
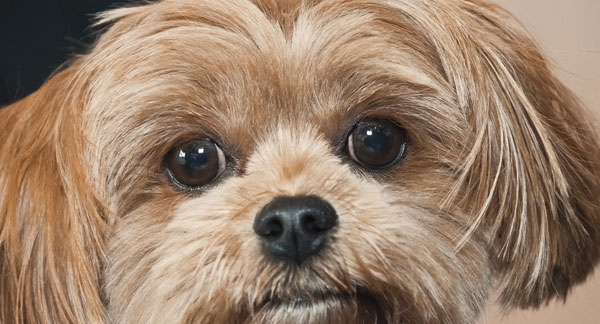
Catchlights In A Dog’s Eyes
“Positionable Reflectors”
ExpoImaging calls them “positionable reflectors.” As ExpoImaging’s Erik Sowder explained: “the original design concept was inspired by watching photographers struggle with getting their light modifiers to ‘behave,’ to get the light how they wanted it. (So we) designed a reflector that would not only allow you to manipulate it quickly and easily, but one that would stay in position.” And that’s the key—holding its shape.
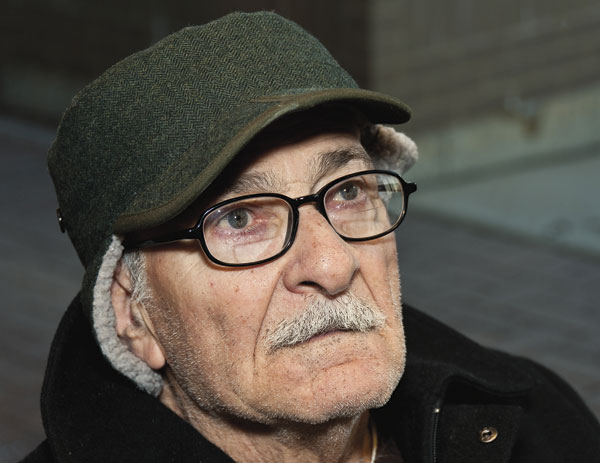
FlashBender Close-up Portrait
FlashBenders incorporate flexible metal rods to help you redirect the light reflected off the panel. The rods can be bent forward or back and twisted around—all within limits, of course. For example, the FlashBender can be used flat for fill, with the flash head aimed into a white ceiling or an adjacent white wall. But if the ceiling or wall is too distant, or if you want the FlashBender light to be more than an incidental light source (in other words, to use it as the main light), or you want to feather part of the light, you can shape the panel accordingly. Keep in mind that these are rods, not wires, and do have their limits.
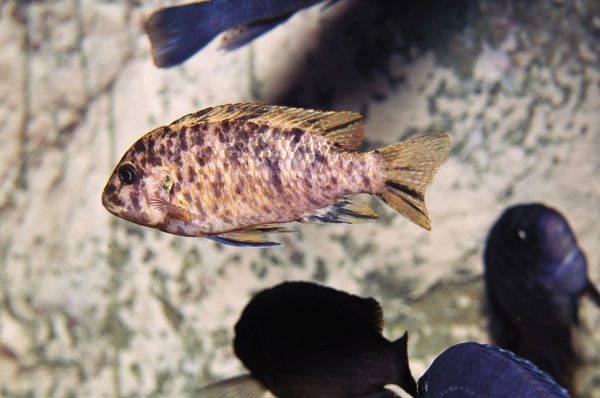
Aquarium Photography With On-Camera Flash
Each FlashBender has additional hook-and-loop material at or near the corners (also midway along the edges on the largest panel)—all on the reflective side of the unit. That’s what lets you add the flag panel on the FlashBender bounce card/gobo. The purpose is to allow you to flavor the light to suit your needs with optional accessories, when they become available. A Rogue Grid has already been added to the lineup, but that operates in a different fashion (which is why it’s not a FlashBender). The grid can be attached to a FlashBender panel that is shaped as a snoot.
There is something to be said for bending the light of a shoe-mount flash to your needs. With the large and small panels, you can “scoop” the light so that you lose less and use more, making the reflected light more efficient. By “scooping,” I mean bending the top of the FlashBender toward the front and pinching the corners inward toward the subject. This is more easily done with the largest panel, as it features three rods, as opposed to two on the small FlashBender. The bounce card has only one rod in the center.
Multiple FlashBender Tabletop
One additional trick I’ve developed is “taping” the ends of the attachment band together to form a support stand. This approach works best with the bounce card and small panel. In this fashion the FlashBenders operate as stand-alone reflectors, or as gobos to block extraneous light from camera or subject.
One thing I need to point out is that you shouldn’t use the largest FlashBender with any speedlight that does not have a lockable detent position when the head is raised for bounce lighting. Owing to the metal rods, this panel is heavy enough so that just a nudge may be sufficient to drive the head back down to its default position. Still, you should be able to use the two smaller panels with no difficulty.
FlashBender Flexibility

I can’t say how durable FlashBenders are in terms of years of use, but I have folded the two bigger panels when I needed to store them (it’s possible without bending the rods). And I’ve bent and twisted the rods every which way countless times, short of intentionally trying to destroy them. Even with continued use, the panels themselves are good as new. And the hook-and-loop material and elastic band remain fully functional.
I found the Rogue FlashBenders to be literally and figuratively a very flexible speedlight accessory. I’ve used all three panels in combination in a multi-light tabletop setup that proved much more convenient than having to pull out monolights and set them up on stands with umbrellas or softboxes. The FlashBenders allowed me to create a much more compact set, using the mini-stands that came with the speedlights so that I could simply position them where necessary on the table surface. Most of my tests were done with the camera in Manual mode and always with TTL flash, using the Nikon D300 and one or two SB-900 flash units.
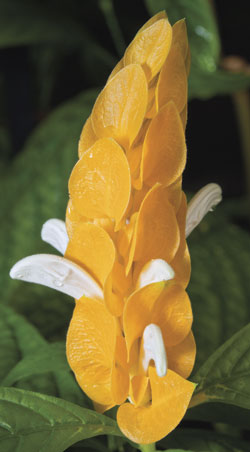
Flower Close-up: Lollipop Plant
FlashBenders in combination with speedlights may not be the ultimate lighting solution in every situation. They proved to be a more neutral reflector than silver panels and more resilient and efficient than the built-in kicker panel on your shoe-mount flash. Granted, the light can be harsher than expected. Still, it’s far less harsh than direct flash. In the final analysis, these Rogue FlashBenders can go far in delivering a definable quality and quantity of light without breaking the bank.
Output And Efficiency
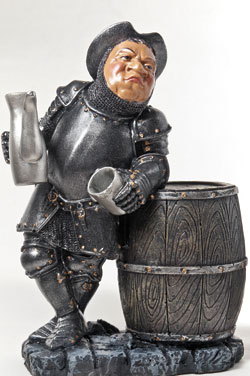
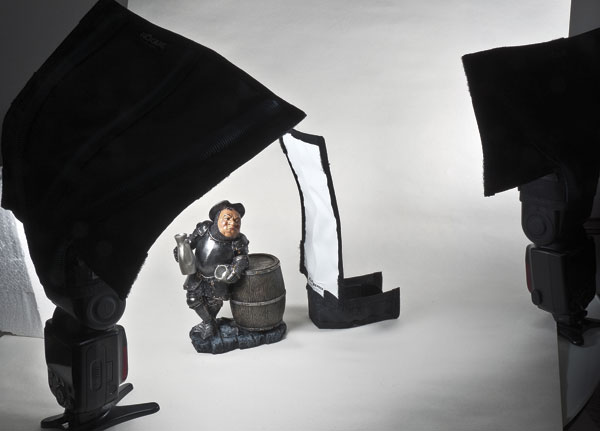
Regarding light efficiency and shadow intensity, I made several tests with bounce lighting off a white ceiling of average height, and compared results. The Nikon D300 camera was on a tripod level with the subject (a small resin sculpture) situated on a white backdrop. The SB-900 flash head was aimed up toward the ceiling at maximum tilt, off-camera, positioned to the left of the subject. Here are my findings at ISO 400:
• Open bounce lighting (unaided): f/6.3 (indistinct shadow)
• Bounce with supplied SB-900 diffusion dome: f/7.1 (discernible shadow, but very soft)
• Bounce with large Rogue FlashBender: f/13 (a distinct, harder-edged shadow)
• Bounce with small Rogue FlashBender: f/10 (a distinct shadow but marginally softer)
• Bounce with diffusion dome plus large Rogue FlashBender: f/9 (more distinct shadow than with dome alone but softer than with FlashBender alone)
When compared with unmodified ceiling bounce, the FlashBender panels deliver a gain of roughly one to two stops, with quite discernible shadows and added contrast, the depth depending on which panel is used.
Rogue FlashBenders: Prices
• Large Positionable Reflector: $39; Small Positionable Reflector: $34
• Bendable Bounce Card/Flag: $29
• The three-piece set is available in kit form for $104. Inquire at: www.expoimaging.com.


![]()
Get the Latest Photo Tips, News & Reviews from Shutterbug!
| Camera Reviews Other Reviews | Mobile Reviews Photography Reviews Columns | News | Features | How-To | Resources |
 © 2026 Shutterbug
AVTech Media Americas Inc., USA
All rights reserved