- REVIEWS
Camera Reviews 
More Reviews Mobile Reviews Photography Reviews - GALLERIES
- VIDEOS
- BUYER'S GUIDES
Profoto D1 Light And Asymmetrical HR Softbox 1.5x3: A Unique Light & Light Modifier
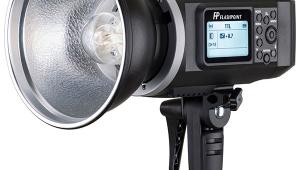
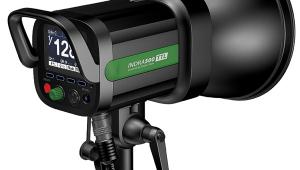
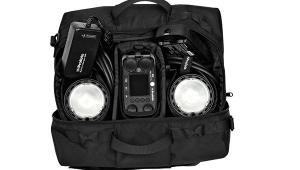
Recently I had an opportunity to test Profoto’s D1 monolight and their HR Softbox 1.5x3. To check out the combo the company sent along a Profoto D1 Air Kit that includes two D1 monolights, stands, umbrellas, and a case. I did not have the Air Remote to control the units from camera position.
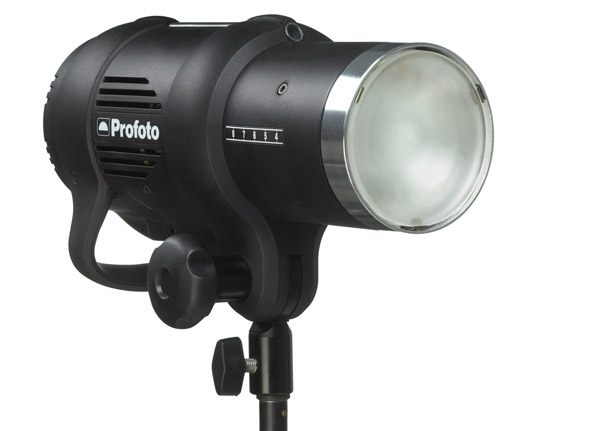


Photos Above Courtesy of Profoto
The lights have a rather unique look—instead of a protruding flash and modeling light, the Profoto lights have a cylindrical shape with one end capped by a protective frosted glass cover/integrated reflector. This design allows the use of the rather extensive line of Profoto light modifiers and reduces stray light.
The control panel on the back is pretty intuitive. Like most European units, full f/stops are in levels of 10 and partial f/stops are in tenths. For example, if you are at an indicated power level of 20 and decide you want a stop more of light, go to 30. If you desire a half a stop less, go to 15 on the digital readout. You change the output via the black round dial; simply turning it varies the power in half stops, push the dial in and turn and you get whole stops. The unit is fan cooled and even runs for some time after the lights have been turned off.
The D1 is a 500 ws unit with a six-stop range. One of the first things I do when testing lights is to see how accurately the units will go from stop to stop. I start at the lowest setting, take a flash meter reading, note the result, and then bump it up a stop to see if the resulting output measures a stop more on my meter. From the lowest power setting, I got f/2 at 10 feet. Bumping up a stop, I got f/2.8; f/4 came next, no problem. Then I got f/5 (not f/5.6), f/7.1 (not f/8), f/11, and then f/15 (not f/16). These deviations of up to 1/3 stop are pretty common. I have only tested one unit where the readings line up with no more than 1/10 stop accuracy.
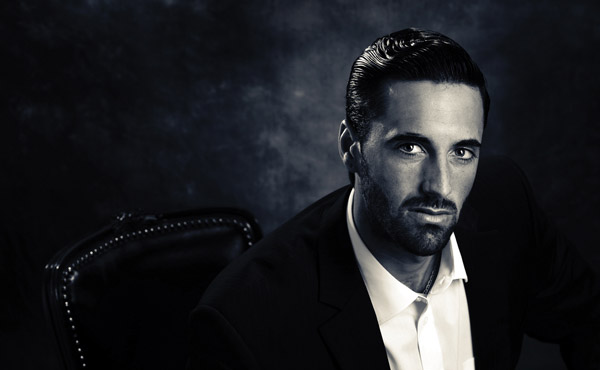
© Steve Bedell
To make sure my flash meter was reading accurately, I tested again with a light I know to be consistent, and it was. I then tested the second Profoto unit and found I got the exact same results and deviations as the first one. This is not really much of an issue in the digital age where we constantly evaluate each image and light change immediately, but being consistent can really help establish the ratios between lights. As mentioned, these units have the Air system built in, which allows the photographer to control all light output from camera position. I did not evaluate that system in this test.
The Softbox
After the output test I set up the softbox. Taking a look at its design, it’s quite unlike most softboxes I’ve used. Most boxes are square or rectangular. This box is rectangular, but unlike other softboxes that are designed to place the light source in the center, this places the flash off-center, thus the asymmetrical designation. Symmetrical places the light source dead center for either even light from corner to corner or a brighter center with gradual light falloff as you approach the edge. It will vary from one box to another depending on the manufacturer, the design intention, and whether or not an internal diffusion material is used.
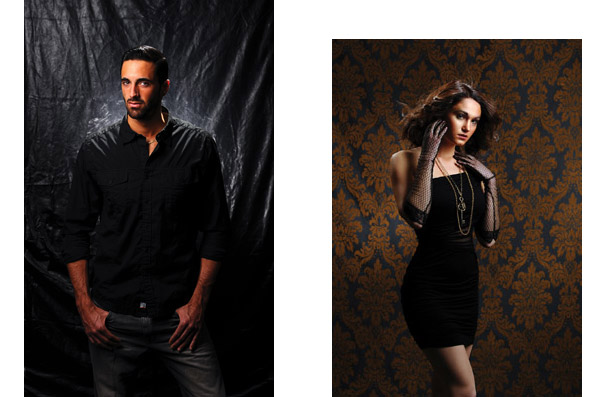
Photos © Steve Bedell
You need to attach the box to a speed ring before mounting it to the light. There are four metal rods already attached to the box and all you need to do is plug them into the speed ring. The interior of the box is highly reflective silver. You can add the interior diffusion baffle if you choose (I did) and then secure the exterior diffusion to the touch fasteners that line the recessed edge of the box. The recessed edge also allows you to add grids and masks. They also supply a long narrow counterweight that has touch fasteners on it. At first I didn’t know why it was necessary, but it aids in balancing things if you use the box in the horizontal position. The speed ring mounting system allows you to use the Profoto softbox on lights from many different manufacturers. After assembly, just take the big rubberized collar, slide it over the light, and tighten the clasp. Bang, it’s on and it ain’t goin’ anywhere. It’s a very fast and stable mounting system.
Once the box was on, I proceeded to see if I could discover just why the folks at Profoto figured this design was a good idea. The first thing I did was to take out my trusty flash meter once again and meter the light output. Placing my meter about a foot from the front of the box, I metered the output right in front of the light itself and then in other areas. What I discovered was a rather sharp light falloff coming from the section furthest from the light head. It immediately struck me how useful this intentional light falloff could be in portrait photography.

© Steve Bedell
Portraitists often block light striking parts of the image that are better left in shadow or vignette the image using a vignetter over the lens or in processing. Say you’re doing a three-quarter length portrait; you can aim the brightest light at the subject’s face and the light falls off at the hands just by positioning the light properly. And when I say properly, I mean as close as you can get to your subject without including it in the frame. Sometimes you might have to include the light in the frame and clone it out later. This happens because all lights and modifiers have a “sweet spot” built into their design, and as you move the subject further from the light, the smaller and more point-like the source becomes. So, while at 2 feet you may have a beautiful light quality, at 10 feet it’s just another small light.
The HR designation of the softbox indicates that it is “Heat Resistant,” meaning it can be used with continuous and video lights where heat builds up as well. Cooling flaps are built in top and bottom to let the hot air escape. And while I mounted the box in a vertical position with the brightest area to the top, it can be easily reversed or mounted sideways. I used the 1.5x3 version; a 2.3x5 larger model is also available.
I used this uniquely shaped box on several sessions and the more I used it, the more I liked it. It’s a valuable tool for portrait and commercial photographers because it allows for a fast light drop-off without resorting to vignetting or blocking the light with cardboard or other devices. The narrow shape gave me great control in making a perfect fit between my subject and the light.

© Steve Bedell
Pricing
• D1 Air 500 ws Kit: $2400 (street)
• Single D1 Air 500 ws unit: $1225 (street)
• Asymmetrical HR Softbox 1.5x3: $650 (street)
For more information and full specifications, visit Profoto’s website at: www.profoto.com/us.
Steve Bedell has been a portrait photographer for over 25 years. To subscribe to EPhoto, a free e-mail newsletter with tips for photographers, contact Bedell via e-mail at: sb@stevebedell.com. Also ask about his lighting DVDs.


![]()
Get the Latest Photo Tips, News & Reviews from Shutterbug!
| Camera Reviews Other Reviews | Mobile Reviews Photography Reviews Columns | News | Features | How-To | Resources |
 © 2026 Shutterbug
AVTech Media Americas Inc., USA
All rights reserved