- REVIEWS
Camera Reviews 
More Reviews Mobile Reviews Photography Reviews - GALLERIES
- VIDEOS
- BUYER'S GUIDES
Printing & Presentation; Mounting, Matting, And Framing Inkjet Prints; Tips & Techniques For Digital Print Presentation
Both fiber-based and RC photographic prints have been around for many years, and the materials and processes to mount and frame them are well understood. But if you are one of the thousands of photographers who have switched to inkjet printing you will need to be careful that the process you choose will be safe for your new work and preserve its beauty for as long as possible.
We spoke with several photographers who earn their living by selling matted and framed editions of their images, and researched the effect traditional mounting processes could have on inkjet prints. The good news is that many traditional processes work well with inkjet prints. There are those, however, that may not be as safe as you might imagine.
 |
|
|
Mount Board
Let’s start with the choice of mounting board. It should be acid free and stiff enough to keep the print from warping. Foamcore board is an excellent choice, as its Polystyrene core is both strong and light, but a standard 4 ply acid free mounting board like Crescent AFX is also acceptable.
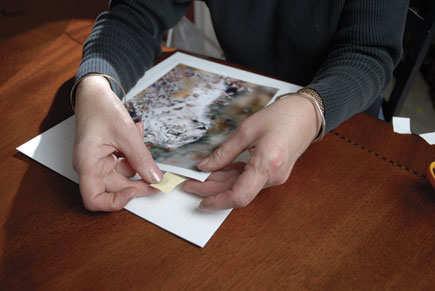
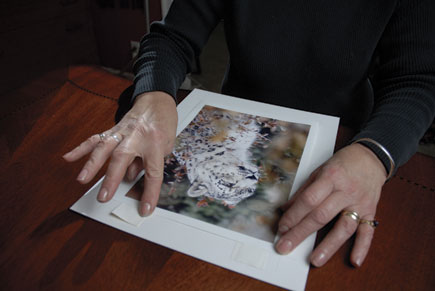
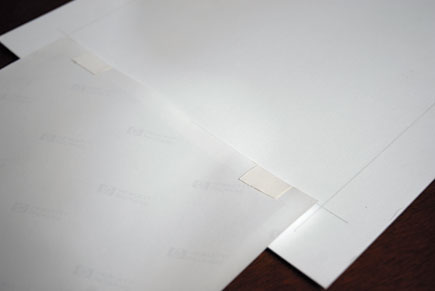
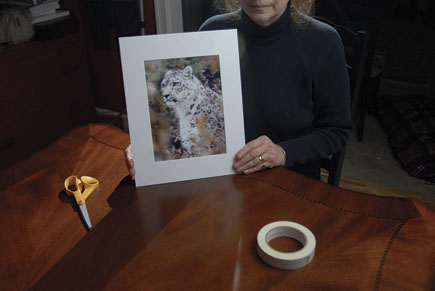
Smaller prints (less than 13x19”) can be easily attached to the backing board using T-hinges or clear polyester corners. To make a T-hinge take an archival mounting tape like Filmoplast P90 and cut it into 4 21⁄2” strips. Tape one strip to the back of each top corner, perpendicular to the top so that about half is showing above the print, adhesive side up. Next position the print where you want it on the mount board, and use your two remaining strips of tape to cover the tape you applied to the back of the print, forming the top of the T and attaching the print to the backer.
 |
|
|
This simple approach has the advantage of being safe, quick and reversible. The disadvantage is that your print may not lay completely flat, and in a humid environment may appear to be quite wavy. For those who insist on a perfectly flat image, more involved mounting is required.
Dry Mount?
Dry mounting has long been a standard way for traditional photographs to be mounted, and with care may be used to mount inkjet prints as well. Done properly the print will be totally flat, and the back will be protected from atmospheric gases. Keep the heat and press time to a minimum by using low temperature (185-190?) mounting tissues such as Print Mount’s Safemount tissue or Seal’s BufferMount. Some wide format prints from HP, Encad or Lexmark have been reported to have even lower heat tolerance, so using a product like Artcare Restore which meets the 150?, 30 second heat maximum of the most sensitive digital prints, is a good idea.
 |
|
|
Specially designed spray adhesives such as 3M’s Photomount or Vac-U-Mount can be used with inkjet prints, as can transfer adhesives like 3M’ 568 Positionable Mounting Adhesive. Care must be used in applying them properly for a strong bond or mounting problems, like bubbles or tunneling, can occur over time.
 |
|
|
Literally thousands of frame styles exist; frames are really a matter of taste. In general, metal frames are less expensive and easier to assemble than wood frames, and have no chemicals that might react with your print over time. Regular glass will give the print some protection from both Ultraviolet radiation and atmospheric gasses like ozone, but for maximum protection you should choose a UV blocking material like TruVue Conservation Clear Glass or a UF-5 type Plexiglas.
Gassing Out
Inkjet prints also present some unique problems, such as the gassing out phenomena, which causes images on some papers (particularly Epson Premium papers) to fog the inside of the glass. Epson initially recommended letting the prints air dry for 2 weeks before mounting and framing, but who has time for that? As an alternative, they recommend sandwiching your prints with an absorbent sheet of paper for 24 hours. If the paper is wavy after that it indicates a longer drying period is needed. Redo it with a fresh sheet of paper for an additional 24 hours. If your prints do fog the glass it’s easy to fix—just disassemble and wash the glass, and reassemble. No damage is done to the prints this way.
 |
|
|
We recently spoke with Charles Bush (www.CharlesBushPhoto.com), a photographer who runs digital printing workshops and sells his framed inkjet prints at art fairs. We asked him to share some of his real world experiences with us. He prints with an Epson 7600 on Somerset paper, which he finds holds up well under the stresses of the art fair circuit.
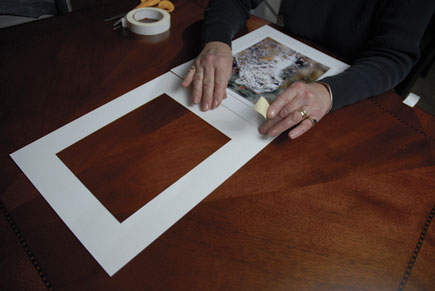
Bush recommends handling the paper with cotton gloves at all times, and has found that the Bienfang De-Roller is very useful for quickly taking the curl out of prints, although weighting or reverse rolling and placing them in a tube for 24 hours works as well. He has experienced the out gassing problem with Epson Somerset Paper, and has to follow a careful pre-drying procedure to avoid glass fogging. For matting he uses either Bainbridge or Crescent Alpha-Cellulose Conservation Matte board and recommends using 2-3 T-hinges, depending on the size of the print. He also uses PremierArt Print Shield, www.premierart.info, to protect the prints from UV and moisture. The 3M ATG tape is used to attach the double mattes and the backer, and he seals the back of the frame with a dust cover.
 |
|
|
Chris Maher and Larry Berman are photographers, writers, and web designers, specializing in image intensive photography sites. For more information visit their websites, www.BermanGraphics.com and www.InfraredDreams.com.


![]()
Get the Latest Photo Tips, News & Reviews from Shutterbug!
| Camera Reviews Other Reviews | Mobile Reviews Photography Reviews Columns | News | Features | How-To | Resources |
 © 2026 Shutterbug
AVTech Media Americas Inc., USA
All rights reserved