- REVIEWS
Camera Reviews 
More Reviews Mobile Reviews Photography Reviews - GALLERIES
- VIDEOS
- BUYER'S GUIDES
Photographing Birds At A Feeder: An Easy Setup In Your Own Back Yard
The only two places where photographers can consistently get superior images are at the nest or at a feeder. Finding nests can be a challenge, and when you do find one it may not be in a photogenic location. A feeder, on the other hand, will attract many different species of birds, and you can place it in an ideal location so the background is complementary and nothing in the foreground is distracting or interferes with the line of sight of the lens.
The Setup
I knew if I set up a feeder in my yard, I would have to be outside for prolonged periods of time to get good shots. That would be fine if I didn’t have other obligations, so I made it easy on myself. I set up the feeder just outside my office window. That way I could work and, when birds came to feed, I could easily photograph them from the comfort of a chair and without having to deal with inclement weather.
All Photos © Jim Zuckerman, All Rights Reserved
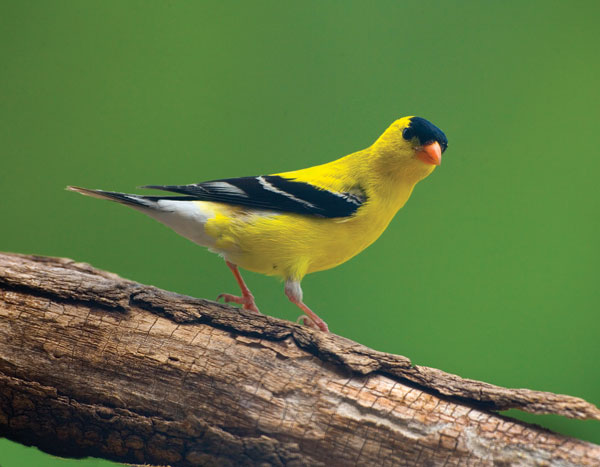
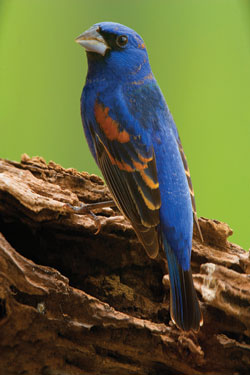
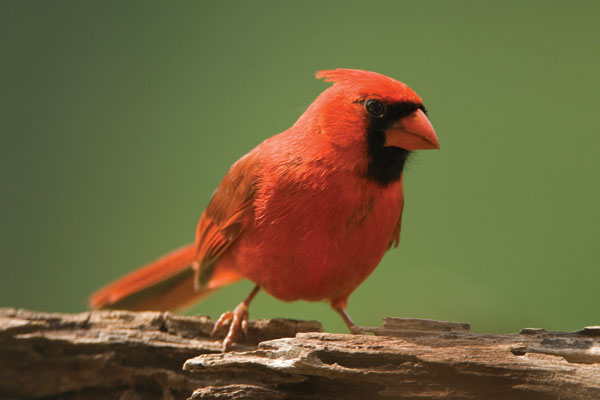
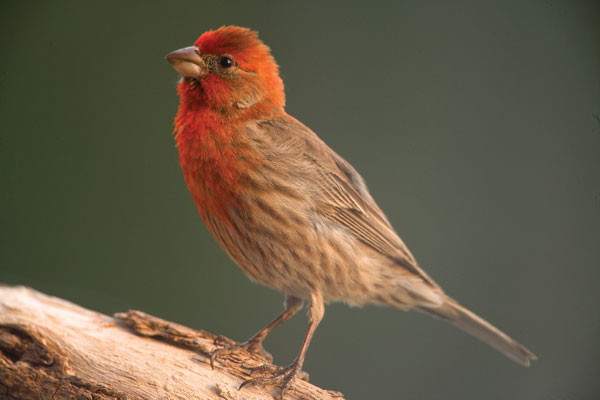
On my desk I placed a vehicle tripod mount (designed for shooting out the side window of a car or the roof of a safari vehicle) next to my computer, and on that I mounted a camera and telephoto lens. In figure A, you can see the 500mm f/4 lens and the proximity to the window. The feeder is about 8 ft from the camera, and you might wonder why I chose to use such a long lens. The reason is because the birds that would be attracted to the seeds in the feeder are fairly small. In order to fill the frame with them, I used the longest lens I had and sometimes it was too long. For small birds like sparrows, grosbeaks and goldfinches, I was able to get frame filling close-ups as you can see in (#1, #2, and #3). I also used a 300mm lens, and that worked out very well, too.

These pictures were taken right through the glass. I knew if the window were open, the slightest movement on my part would scare the birds away and they would be hesitant to use the feeder. Therefore, I kept the window closed, made sure it was clean, and if there were a degradation in image quality, I couldn’t see it.
In order to focus to 8 ft, I had to use an extension tube between the lens and the body. Because the tube doesn’t have glass inside of it—it’s just a hollow spacer—there is no degradation of image quality. There is a small amount of light loss, and there is also a reduction in the amount of depth of field. This is to be expected because the more you magnify a subject, the more depth of field you can expect to lose.
The Feeder
Feeders come in many sizes and shapes, and they are designed to attract different kinds of birds. For example, some birds, like cardinals, starlings and mourning doves will readily eat from a tray of seeds. Other birds, such as goldfinches, prefer to be perched on something vertical while they eat. More than one feeder with different designs will attract many species.
My first feeder consisted simply of a tray with a mesh bottom (so the rain water could drain out and not ruin the seed) and low sides to contain the seeds. Obviously, you want the pictures to be as natural as possible. To include the feeder in the photo makes it look like a setup—which it is, of course—but this won’t give you the kind of images you want. To eliminate the feeder from my shots, I put a small branch just above the seeds on which the birds can perch before they drop down to eat. Many times 1-2 birds will wait on this branch while other birds feed. In this way, I made the images look entirely natural.
When you buy seed, avoid getting mixes that have corn. The food that I use to attract a large variety of birds consists of sunflower and safflower seeds, chipped peanuts, raisins and mealworms. A good source of many different kinds of bird food is www.ebirdseed.com.
Exposure Strategy
There is always a battle between shutter speed, lens aperture, and ISO. You want to use a fast shutter to freeze the movement of the birds, but the faster the shutter the less depth of field you’ll have. If you close the lens down to a small opening so the bird is as sharp as possible, the shutter becomes too slow and you run the risk of getting less than tack sharp pictures. Raising the ISO in an attempt to have both a fast shutter and a small aperture often creates too much digital noise.
Remember that a telephoto lens is being used here, and with the increased magnification depth of field becomes very important. I don’t like when the eye of the bird is in focus but the chest feathers or even the beak is out of focus. The reason we love nature photography is because it can reveal such intriguing and captivating detail in beautiful subjects. A background can and often should be blurred, but personally I like the subject to be as sharp as possible.
The compromise I make is to use an ISO setting no higher than 400. This gives good picture quality and a decent amount of speed. Next, I choose a shutter speed. I don’t choose a lens aperture first because extensive depth of field is irrelevant if the picture isn’t sharp. I could choose f/22 and be happy with the fact that the entire bird will be in focus, but if the shutter speed ends up being 1/30th of a second, the picture definitely will not be sharp. I haven’t gained anything—actually, I’ve made a mess of things.
Therefore, it’s the speed of the shutter that has to be determined. The general rule for using shutter speeds with lenses (and particularly telephoto lenses) when you are not using a tripod is that the shutter should be the reciprocal of the focal length of the lens, or faster. In other words:
If you are using a 300mm lens, your shutter speed should be 1/300th or faster.
If you’re using a 400mm lens, the shutter speed should be 1/400th or faster.
This isn’t always possible, especially if you are shooting in dark situations. Nevertheless, it’s a good guideline to keep in mind. When I shoot birds, even though I’m on a stable support, I still try to abide by this guideline simply because of the magnification and the quick movements of my avian subjects.
When I use 1/500th of a second and ISO 400, in open shade the lens aperture is usually about f/5.6 or f/8. This isn’t an impressive amount of depth of field, but it’s the best I can do given the various factors I’ve discussed.
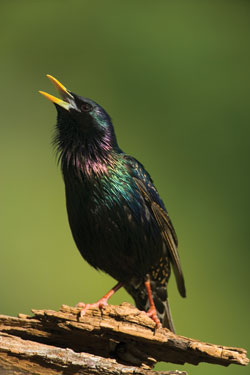
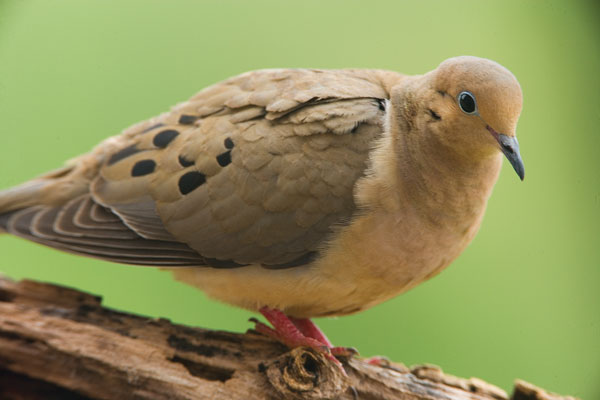
The European starling in (#4) was taken with an f/5 aperture, and the focus on this bird is pretty good. The male house sparrow (#5) was taken at f/4 and you can see how the tail became soft. This isn’t ideal, but it’s acceptable. The more you fill the frame with a bird, the more magnification there is and therefore the less depth of field you’ll get. I shot the mourning dove in (#6) with an f/8 aperture, but because I added a 1.4x teleconverter to the 500mm f/4 lens giving me 700mm of focal length, the additional loss in depth of field couldn’t be mitigated with the smaller f/stop. The small branch and the bird’s tail feathers are soft.
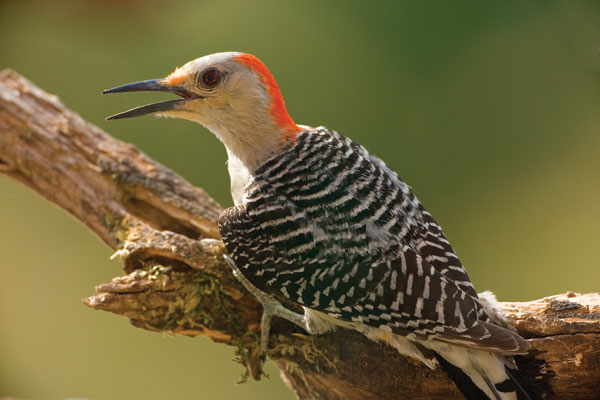
Sometimes I’ll experiment to see if I can get away with f/11 and 1/250th of a second, but I hate to go slower than that because I know the pictures will most likely be soft. Birds make very rapid movements with their heads, and when that is compounded by their singing or chirping—as the red bellied woodpecker (#7) was doing—a faster speed is best. This picture was taken at 1/500th of a second.


![]()
Get the Latest Photo Tips, News & Reviews from Shutterbug!
| Camera Reviews Other Reviews | Mobile Reviews Photography Reviews Columns | News | Features | How-To | Resources |
 © 2026 Shutterbug
AVTech Media Americas Inc., USA
All rights reserved