- REVIEWS
Camera Reviews 
More Reviews Mobile Reviews Photography Reviews - GALLERIES
- VIDEOS
- BUYER'S GUIDES
Output Options; Hitting The Big Screen
One of the most popular software areas recently has been DVD slide show creation programs. With the increased number of DVD writers it's becoming easier than ever to put your images on DVD for playback on computers and televisions. This is especially popular for sharing images with family members who may not have a computer or just don't want to deal with e-mailing images. This month I'll cover some of the options available and how to get your own slide show "on the air." (#1.)
 |
|
|
Getting Started
Before getting your photos ready and actually creating the slide show, it's
helpful to know what media you'll be using. Most applications support
the creation of a CD and many offer DVD support. Photodex takes this a step
further and also includes an option to post your slide show on their website
with their ProShow Gold product--very helpful if you want to share with
a large group of people.
Each format has restrictions on the size and quality of the image that can be
recorded and played. The most common and compatible of the CD formats is VCD,
which will give you 70 minutes of play time but has the lowest resolution. Photos
on a VCD disc are only 352x240dpi. The highest resolution you can get with CD
is the SVCD format which reduces the play time to 30 minutes but allows your
photos to be up to 480x480dpi.
DVD has made high quality available for slide shows. Photos in a DVD slide show
can be up to 720x480dpi, which makes for a much more impressive display. Along
with the higher resolution you also get the increase in play time--about
2 hours with the DVD SP format. If you don't already have a DVD burner,
but you've been considering one, I recommend getting a drive that supports
both DVD+R and DVD-R. The Sony and TDK drives are both excellent and support
both formats.
Putting A Show Together
I've been very impressed with ProShow Gold by Photodex $69.95; (www.photodex.com).
The software is easy to learn and has enough features to keep you playing for
months. Heck, if 280 different slide transitions don't keep you occupied
I don't know what will!
To get started, I copy all the photos I want to use into a new folder. Although
ProShow and most of the other applications support multiple file formats, I
convert all my images to JPEGs to start with. This gives me complete control
over the compression. I also re-size the images in advance. This helps in two
ways. First, the application doesn't need to re-size them, which slows
things down, and secondly it saves space.
Next, open ProShow Gold and click the New slide show button. Navigate to the
folder containing your images in the Folders list. ProShow Gold will show you
thumbnails of all the images. (#2.)
 |
|
|
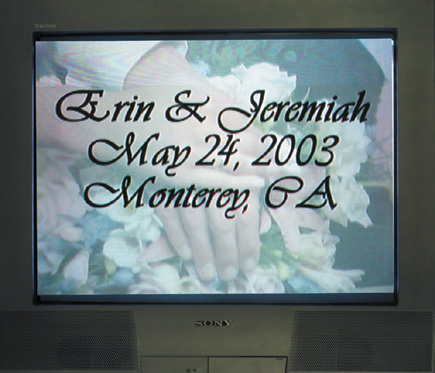
Start out by creating a title slide for your show. Select Show>Show Options
and click the Show Captions button. Titles can contain effects such as fades
and animation. If your images are in the right order (mine never are), it's
a simple matter to select them all and drag them onto the slide show bar. Otherwise,
you can drag them individually or in smaller sets of files.
By default, all the slides will use the same transition. You can change the
transition by clicking on the AB button between the slides. It might be boring,
but avoid using too many different transitions in your shows. I typically use
a simple fade transition--I want people to focus on the photography, not
the special effects. (#3.)
 |
|
|
One of the really cool new features is the "Ken Burns" style effects where you can have images pan across the screen or zoom in or out on an area. This adds a very nice touch to a normally static set of photos. (#4.)
 |
|
|
|
| |||||||||


![]()
Get the Latest Photo Tips, News & Reviews from Shutterbug!
| Camera Reviews Other Reviews | Mobile Reviews Photography Reviews Columns | News | Features | How-To | Resources |
 © 2026 Shutterbug
AVTech Media Americas Inc., USA
All rights reserved