- REVIEWS
Camera Reviews 
More Reviews Mobile Reviews Photography Reviews - GALLERIES
- VIDEOS
- BUYER'S GUIDES
Nissin Di866 Mark II: A Versatile Shoe-Mount Flash
The Nissin Di622 Mark II offered some notable improvements over the original Di622, but that flash didn’t offer the firepower of the Nissin flagship Di866 Professional. So I was curious and eager to see what the new Di866 Mark II Professional had in store.

Briefly, trademarks of the Di866 Mark II include wireless TTL-auto operation, a full-color, self-orienting (auto-rotating) display, and a sub-flash, all combined with extensive user control. Add to that a user-friendly package and you have a very inviting speedlight. (For previous articles on these products type Nissin flashes in the Search box at www.shutterbug.com.) While I reviewed the Nikon version here, the Di866 Mark II is also available for Canon and Sony (specifications vary slightly).
What’s New?
For starters, there is an enhanced wireless sensor with an 82-foot range, as opposed to 33 feet on the original. This I definitely needed to see for myself. Keep in mind that this wireless system is optical/infrared, so that range applies only to a direct, unimpeded line of sight between the triggering pulse and receiving (remote) flash. And outdoors is where it gets tricky, where the triggering pulse seems to dissipate in the ether or becomes discombobulated amid bright light sources, such as sunlight.
Also, the new flash sports a metal foot in place of plastic. That speaks to added durability. Beyond that, the sub-flash has been enhanced. While I don’t use it regularly, the sub-flash is nice to have. In the past, output on the Nikon unit went from full to 1/8. Now it’s down to 1/128, allowing you to better manage fill and secondary shadows.
The new flash now adds an on/off-switchable audible indicator to let you know that it’s fired when used remotely. Unfortunately, in multiple lighting setups, simultaneous beeps could be misleading, so check that the sensor blips are active to indicate a ready state, and review the image on the camera’s monitor. Hopefully, manufacturers will figure a way to make the tones distinguishable on each flash, just like distinct ringtones on a mobile phone. Either way, the audible beep is really not much help when surrounded by ambient noise, especially at a considerable distance outdoors.
A few things have not changed. First, the flash has no automatic or manual adjustment for sensor size in the camera. The GN and zoom range match full-frame coverage angles. Second, the zoom range begins at 24mm but only extends to 105mm. I would have preferred a longer zoom range, comparable to or approaching Nikon’s SB-900 series. Also, there’s no macro (minus tilt) position, making it more difficult to fully illuminate nearby subjects with an on-camera flash.
The Interface Tells All
Undoubtedly, user-friendliness speaks volumes for the Di866 Mark II, as exemplified by the interface. The colorful display is highly readable, even for eyeglass wearers like myself who don’t always don their spectacles. And it’s straightforward. There are six key functions denoted on the LCD Main Menu, including Custom settings, each identified by a color-coded icon. I would even say this display adds an element of fun.
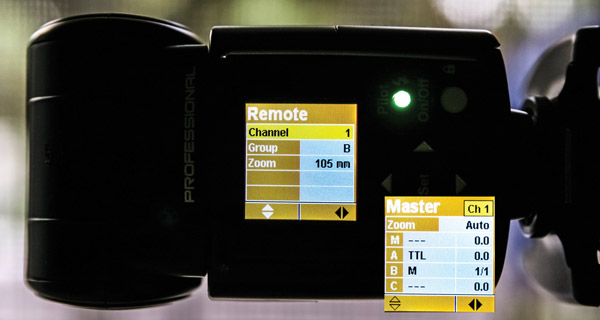
The full-color display reorients itself when the unit is tilted, making it easier to read at any angle. This screen shows TTL wireless Remote mode (inset: Master mode).
The screen itself is not touch-sensitive, despite appearances (maybe next time), but it’s configured to minimize on-board controls. Aside from the indicator/test and on/off/awake buttons, there is the Set button to select a function or lock in any setting, surrounded by four cursor keys, which are used to navigate or change settings. Nothing cryptic or elusive about this interface.
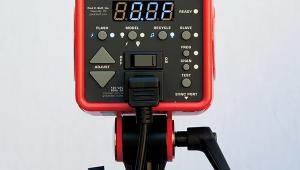
When you turn the flash on, the LCD presents the last-used settings. If the camera was not switched on or everything is idle for a time, the Di866 Mark II enters standby mode, switching the display off (note the flashing green LED). The display turns back on as soon as it senses activity on the flash or camera. A flashing red LED indicates that the capacitor is recycling (or charging initially).


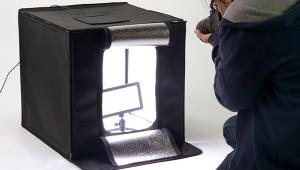
I photographed videographer Daniel Izui employing a Di866 Mark II seated in the camera’s hot shoe. With the main flash head (in TTL mode) aimed at the ceiling, I employed the same Manual exposure settings (ISO 200, f/5.6, 1/125) but varied sub-flash output (shown, left to right: sub-flash off, 1:8, 1:1). We selected the 1/8 output rendition for the more natural look, in terms of the strength of the shadows and amount of fill on his face.
Photos © Jack Neubart
I’d recommend starting at Custom settings for distance preference (feet or meters) and auto-shutoff time (default is 30 minutes, distinct from 30-second standby/sleep). Here you’ll also find My TTL (an overriding exposure bias that applies to all TTL flash exposures) and modeling (which I have not found effective owing to the ultra-short duration). The Di866 Mark II supports firmware updates, but, with no updates to report, I was unable to test this feature.


I made these exposures with the Nikon D300 in Manual mode (ISO 400, f/4.5, 1/15). The key difference is that I added the Di866 Mark II to the mix (in TTL mode) for the second shot. Not only did the flash fill in the foreground, but using flash resulted in better overall color balance and a more natural feel in this photo made at dusk. AWB used (unmodified) in both shots.
Photos © Jack Neubart
Given that all controls are electronically governed, a really neat feature is the settings lock. Simply press the On/Off button (don’t hold it or you’ll shut the flash off), and the keys become immune to an errant finger. To unlock, hit the On/Off button a second time.


With the Di866 Mark II on the D300, I set the exposure to compensate for the bright backdrop (Venetian Hotel, Las Vegas) but reduced flash output (- 1 EV) so that the TTL strobe wouldn’t be overpowering. Compare with the ambient exposure (top/warmer-toned fountain) and note how the flash allowed me to create enough contrast to make the fountain stand out. Custom WB (off the white marble) was used to improve color balance in the fountain, while retaining the warm, inviting tones in the background.
Photos © Jack Neubart
Auto And TTL Modes
Operating modes begin with Auto, where i-TTL exposure takes over entirely, with no user input on the flash. However, if you want full flash control over i-TTL exposures, select TTL mode. You’re immediately presented with an easy-to-read exposure compensation value (controlled by the left/right cursor keys). If you’ve opted for Manual zoom (in place of Auto), the up/down keys on this screen change focal length. Exposure compensation overrides on the camera work in tandem with those made on the flash.
For i-TTL operation, the flash has to be physically connected to the camera (via the hot shoe or compatible TTL cable, such as Nissin’s Universal Shoe Cord SC-01). You can use any shooting mode on the camera for Auto and TTL settings on the Di866 Mark II, provided the selected camera mode supports flash activation.
To reach the nested screen with the next level of settings, press and hold the Set button for 2 seconds. This screen also gives you access to the sub-flash, so you can turn it on and set output—but only when using bounce flash. If set too high, the sub-flash may overpower the main flash head or simply dilute tonal values and even create disturbing secondary shadows. The sub-flash shunts power away from and reduces the effectiveness of the main flash.

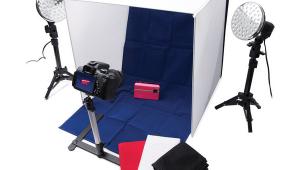
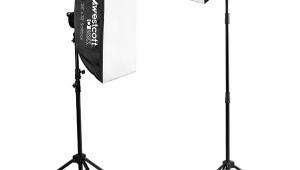
I created a still life with miniature peppers and tomatoes using a pair of Nissin Di866 Mark II strobes triggered wirelessly by the D300 flash in Commander mode (see setup shot). All this was done on a homemade sweep table with the main light aimed upward from below the set and fill from ceiling bounce. To create the sweep table, I used sheets of white Plexiglas™ secured atop an old music keyboard stand.
Photos © Jack Neubart
Manual And AV Modes
If instead of holding down the Set button, you simply press it, you’re brought back to the Main Menu, where you can also choose M/AV mode (Manual or Aperture Value-governed flash employing the Di866 Mark II’s built-in flash sensor). Press Set to select either. If you simply navigate over to the icon, after a few seconds the nested screen pops up for the mode previously selected (already in memory: M or AV).
Frankly, I’m not crazy about this arrangement and would have preferred dedicated icons for M and AV. (Nissin—do we really need an Auto mode on this flash?) Manual and Aperture-Priority camera shooting modes are usable with M/AV. The
sub-flash can be activated and controlled in either mode.
Wireless Modes
As with its predecessor, the Mark II offers three wireless sync modes: i-TTL, SD, and SF. SD and SF modes are accessible via the M/AV settings and are found in the nested settings screen. SD wireless slave syncs the off-camera Di866 Mark II to a Master i-TTL pre-flash (by ignoring that first blip). SF wireless lets you slave sync to any manual-output flash, including studio strobe.
TTL wireless mode (via the beacon icon on the Main Menu) has the advantage of letting you set the Di866 Mark II to M (Master) or R (Remote/slave sync). This wireless mode can be used with Full Auto, Program, Aperture-Priority, Shutter-Priority, or Manual shooting mode set on the camera. My wireless operations were mostly in this mode.
I could have used one Di866 Mark II (seated in the camera’s hot shoe or connected via TTL remote cord) to act as Master and trigger an off-camera (remote/slaved) Di866 or other compatible TTL flashes. Instead, I opted to use the built-in flash on my Nikon D300 in Commander mode (see your camera’s manual for operating instructions). This let me use the two Nissin strobes I had as remotes.
The Di866 Mark II can operate on up to four channels. The reason for assigning different remote flashes to different channels is so they don’t fire at the same time. For instance, you might want to light separate elements that will later be composited.
When set to Master, the Di866 Mark II can control up to three remote (slaved) groups (A, B, C). Each group can consist of one or several flash units. The Master flash can be set to +/- 3 steps in 1/3-step increments in TTL mode. Or set it to Manual, from full to 1/128 output. Reduce output on the Master flash as a fill light from the front, or nullify its output so it contributes nothing except a triggering pulse.

I photographed this commemorative sculpture in downtown Arlington Heights, Illinois. To create the impression of floodlighting, I set up two Di866 Mark II flashes at roughly 15 feet from the camera, one above and to the right, the other in front as fill, triggering them with the built-in flash in Commander mode. The ISO 1600 exposure (f/4.2, 1/60) centered on capturing the dusky sky and building in the background.
© Jack Neubart
The Master flash also controls how the remotes respond: TTL or Manual, in the increments noted. The Di866 Mark II as Master can remotely switch off Groups B and C electronically (not physically) so they don’t contribute to the exposure while they remain powered on (Group A always contributes). (Note: keep in mind that some triggering systems, such as Commander mode on the D300, only control Groups A and B.)
Just so you know, the wireless remote sensor is located behind the front panel, beneath the Nissin Digital logo. The sensor angle is approximately 100 degrees. To ensure triggering, aim the panel toward the triggering pulse. (Indoors, nearby surfaces can be used to bounce/reinforce the signal.)
In The Field
I first wanted to check out the performance of the sub-flash. Videographer Daniel Izui (www.danielizui.com) was generous enough to pose for this test series. I bounced the main head off the ceiling (in TTL mode) and added the sub-flash for just enough fill without harsh secondary shadows.
In Las Vegas, I employed the flash on-camera with a variety of subjects, including architectural elements surrounded by a blaze of lights. I find myself using Manual mode on-camera with TTL flash extensively for the control these modes offer, in this case to capture both subject and ambient background.
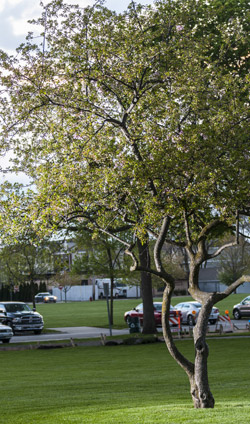
I wanted to test the limits of the wireless sensor. I set up one Di866 Mark II on a light stand, with the remote sensor pointed in the direction of the camera’s built-in flash (in Commander mode), the flash head twisted toward the tree. At first, the flash failed to fire—because sunlight was glinting off clouds in the eastern horizon and interfering with the signal. So I chose another tree, positioned the flash and myself to avoid strong light sources, and the flash fired successfully. The flash-to-subject distance was gauged at 92.5 feet, which exceeded specifications.
© Jack Neubart
I also used the Di866 Mark II in various wireless remote setups, both in my home studio and outdoors. The big test came when I set up the flash outdoors, roughly 90 feet from the camera’s triggering pulse (distance reading based on EXIF data), on an overcast day, at sunset. There was a direct, unobstructed line of sight between the trigger and remote sensor. The Nissin Di866 Mark II successfully fired in sync. Good thing, too, as it started to rain immediately afterward.
I was rarely, if ever, disappointed by the performance of the Nissin Di866 Mark II in terms of exposure and color balance. It has proven to be a competitive alternative to OEM flashes and at an inviting price. The real standout is this strobe’s user-friendliness. That alone is worth the price of admission.
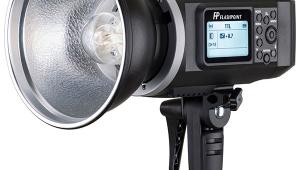
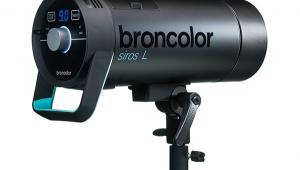
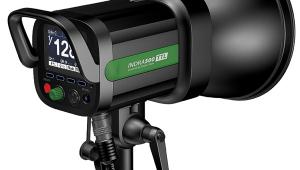
Nissin Takes Flash To The Extreme
Carrying a new moniker, the MG8000 Extreme ($629) has been introduced as Nissin’s ultimate flagship shoe-mount. What sets it apart from the Di-series is a quartz flash tube designed to resist overheating. Toward this end, the flash employs unique high-heat-resistant materials and an aluminum ventilation plate. In fact, the flash will deliver 1000 continuous pops at full power, is optimized to work with the Nissin Power Pack PS300, and comes with a dome diffuser. Additional features: GN 198 (in feet, ISO 100 at 105mm); full-color, auto-rotating display; sub-flash; TTL and Manual; and TTL wireless operation. For Canon and Nikon. Other specifications are largely identical to the Di866 Mark II.

The Nissin Di866 Mark II has a street price of $299, though prices may vary for Nikon/Canon/Sony versions. For full specs and more information, visit: www.nissindigital.com/di866mkii.html.


![]()
Get the Latest Photo Tips, News & Reviews from Shutterbug!
| Camera Reviews Other Reviews | Mobile Reviews Photography Reviews Columns | News | Features | How-To | Resources |
 © 2026 Shutterbug
AVTech Media Americas Inc., USA
All rights reserved