- REVIEWS
Camera Reviews 
More Reviews Mobile Reviews Photography Reviews - GALLERIES
- VIDEOS
- BUYER'S GUIDES
Mundane Imaging Tasks Made Easy
Navigating The Action Palette In Photoshop 6.0
|
Pop quiz: What's the keystroke to sharpen an image in Photoshop 6.0? If you said Crtl/Cmd+S you're wrong--that's the combination for Save. Don't start guessing wildly because this is a trick question. This elementary shortcut does not exist in any stock version of Photoshop, however it may be added manually. But don't stop there. Recent editions of Photoshop allow users to build shortcuts for practically any task the program could perform under the guidance of a mouse. Setting usable key commands in Photoshop used to require either hacking into the system registry--surgery that even George Clooney himself wouldn't perform--or the purchase of third-party software. The latter option was certainly feasible but it would cost you. |
|||
That all changed when Adobe unveiled a feature called Actions. It allows users to prerecord, store, and use functions on demand. If the theory sounds familiar, you may have used a similar feature in Microsoft Office Suite programs, called Macros. Just imagine all the time wasted doing the same tasks over and over again whenever you launch Photoshop. The monotonous repetition of everyday imaging can turn photographers old and feeble-minded well before their time. However, all this pointing and clicking can be culled down to the keystroke of choice once the proper action is applied. Curiosity |
|||
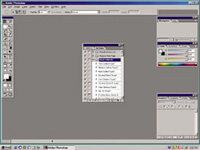
Much like real-world property sales, desktop acreage comes at a high premium. Adobe techs moved Actions in the same window as History to curb urban sprawl of functionality. Just find the History window and click the Actions tab (or click on Window menu/Show Actions). This opens a palette of stock sets that come with every copy of Photoshop. Expand each action by clicking on the triangle next to the title. This reveals each action in the set. For even greater macro capability, each action can be broken into its individual values. For instance, if Save is the final step in an action, expansion will show the file format to be used, byte order, destination folder, etc. The same level of information is available for every task that can be saved to an action. Sounds excessive? Don't be nervous if this is becoming too involved. Using this feature is as simple as operating a tape recorder. Along the bottom of the Actions palette is menu of visual tools: Stop, Record, Play, Create New Set, Create New Action, and Delete. It only takes a few minutes to start building shortcuts--no matter how simple or complex--for your everyday work. |
|||
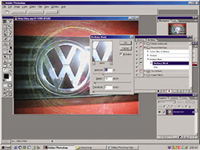
Experimentation The first field requires that you name the action. This is equivalent to naming a file, because your computer will actually save this action in your Photoshop directory. Keep this short and descriptive since it will be appearing in the very small Actions window. Name it "Sharpen." The next drop-down menu asks where to save the new action. The choices will be limited to whatever subfolders reside in the computer directory's Actions folder. It is best to create a personal subfolder before creating any custom actions since it allows for better grouping and organization. Next, select the keystroke that will initiate this new action. Though this is completely optional, keystrokes are essential to proficient use of any program. Action key commands are limited to the "F" Keys (F2, F3, F4, etc.) combined with Shift and Control-Command. Since Sharpen is a commonly used filter, give it a keystroke of F2. For memory's sake, give similar actions similar keystrokes. You can later create a similar action for Unsharp Mask using Shift+F2 since it's so closely related to the Sharpen filter. |
|||
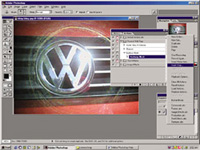
The Color menu is strictly optional. It's intended to assist users who prefer to use the Actions window in color-coordinated Button mode--strictly a visual aide. Once these fields are completed, click the Record button. At this point the Sharpen title appears in the Actions window and Photoshop tracks your mouse's every click. Click on Filter menu/Sharpen/Sharpen. Click on the Stop button (in the Actions window) once your image has been adjusted. Just to be sure it worked properly, click Control-Command+Z to undo the last sharpen and press F2 to redo it. Start patting yourself on the back because you've successfully created an action. |
|||
Full-Blown Addiction |
|||
For instance, one of the most common tasks performed (adding a drop shadow to a flat image on a white background) used to be a time-consuming process. The routine is familiar. Select the white space. Invert the selection. Copy. Create a new layer. Paste the selection on the new layer. Open the Drop Shadow dialog box. Set parameters for the drop shadow. Click OK. Even master Photoshoppers could take a couple minutes trudging through this step by step hell. Now, just record it once and the ritual is whittled down to selection and a keystroke. Starting to see the value of Actions now? But sometimes uniformity is not useful. As photographers we take a certain pride in eyeballing our work as a form of quality control. This is very attainable when working with this function. Say, for instance, you create an eight-step action for building web site buttons, but want to control the text that appears on each one. Just record this new action as you build the first button. Expand its view in the Actions palette. Highlight the step that inserts text, click the Actions palette drop-down list and select Insert Stop. Now, whenever you run this action, it will stop at the Text dialog box and allow you to input any desired wording. Use a slimmed down version of this to create dialog boxes that launch with a single keystroke. |
|||
While we're on the topic of web design, online developers will be pleased to know that even ImageReady (bundled with Photoshop 5.5 and 6.0) comes with an Actions option. This speeds the process of uniformly optimizing web-quality images by tenfold. Once multifunctioned actions are mastered, speed freaks will likely gravitate to the ultimate level of efficiency: Photoshop 6.0's Batch command. This powerful function allows you to unleash actions on entire folders (and their subfolders) at a time. Click on File menu/Automate/Batch to bring up the Batch dialog box. This allows you to select the action to be used, the location of the files to be altered, how they will be saved, etc. Click OK and go make yourself a cup of coffee. Depending on the speed of your computer's processor and available memory, workloads that used to take weeks can now be performed in minutes. |
|||
Users should practice and test this function extensively before using it for professional-quality work. Although it can be extremely helpful, one minor oversight in your action's design can ruin hundreds of images at a time. Know Your Dealer Numerous special-interest sites allow visitors to post custom-built actions packets for other users to take for free. Although many of these files, built by graphic designers, are intended to modify text, copious image enhancement packets are available as well. Just aim your web browser at sites like www.actionxchange.com or http://planeta.terra.com.br/informatica/pluginhead/ to find daily updates from benevolent Photoshop gurus. |
|||
Files are usually posted in .zip format, so be sure to have a good decompression program like WinZip (Windows) or Stuffit (Mac) before taking the time to download new actions. You are ready to use new actions once they are saved to your computer and decompressed. Launch Photoshop, click on the Actions palette drop-down list and select Load Actions. This will launch a dialog box, allowing you to navigate and select your new .atn files. Likewise, the action files can be transferred to other machines. This comes in particularly helpful when working away from your regular computer. Just save these tools to a disk and take them wherever you go. Many sites offer tutorials on building highly specialized actions and installing/debugging posted actions. It may require a small time investment to become accustomed to this newfound functionality, but if you find yourself performing the same task more than once a day, it's time to start building actions. |


![]()
Get the Latest Photo Tips, News & Reviews from Shutterbug!
| Camera Reviews Other Reviews | Mobile Reviews Photography Reviews Columns | News | Features | How-To | Resources |
 © 2026 Shutterbug
AVTech Media Americas Inc., USA
All rights reserved