- REVIEWS
Camera Reviews 
More Reviews Mobile Reviews Photography Reviews - GALLERIES
- VIDEOS
- BUYER'S GUIDES
Let It Snow, Let It Snow!; Digitally, That Is
All Photos © 2004, Howard Millard, All Rights Reserved
Did you miss photographing the last heavy snow? Or perhaps you are not too fond of shooting outdoors in cold weather. Now you need a photo with snow falling. Don't despair. It's rather easy to add snow digitally to any photo, color or black and white, with programs like Adobe Photoshop (CS and earlier), Elements, or other image-editing programs. Furthermore, you can stop the snow in midair, as you would with a 1/125 second or greater shutter speed, or you can blur it a bit, giving it a slight motion trail, all in the cozy comfort of your home or office. You can even control the size and direction of the snow. There's no need for warm clothes, gloves, an umbrella or long underwear. All you need are a few minutes with your keyboard and mouse (or graphics tablet).
First, select the photo. Often, a slightly dark image will work well, but you
can use normal exposures, too. Light or high key images, however, are less successful
because their light backgrounds don't let the snow stand out. As to subject
matter, this effect works with a wide range, from landscapes to cityscapes to
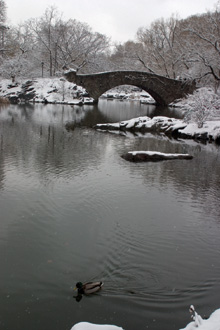
portraits to evergreens, or holiday ornaments. I found that digital snow effectively
enhanced landscapes that I had shot in the days after the snow fell, while it
was still on the ground but not coming down.
Here are the ABCs of how to add snow to your picture. Always work on a copy
of your original.
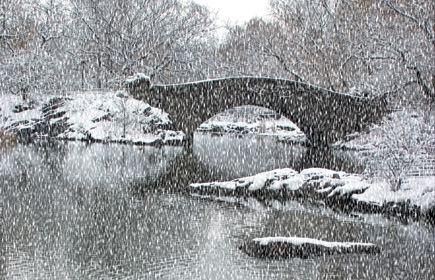
A. Open your chosen photo, #1, in Photoshop, Elements, or other
image editor. Working in Photoshop CS, I started with a picture of a bridge
in Central Park taken after a snow with the Canon Digital Rebel and the Canon
17-55mm lens.
 |
|
|
B. Make a copy of the image by choosing Image>Duplicate.
Save it to your desktop.
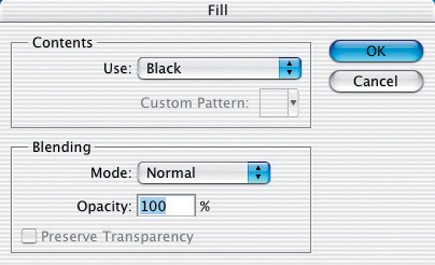
C. Working with the copy image, fill it with black by choosing
Edit>Fill and the color black, #2. The image will now be totally black, #3.
 |
|
|
 |
|
|
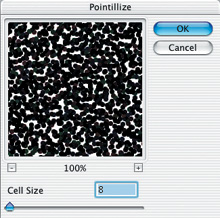
D. Now it's time to get out the snow machine. Choose Filter>Pixelate> Pointillize, #4. For a high resolution image like this one (6x9" at 300dpi, 14MB file size), choose a Cell Size in the Pointillize filter dialog box of 5-8. A setting of 5 will create a moderate snowfall, while an amount of 8, shown here, looks like fairly heavy snow.
 |
|
|
E. The Pointillize filter creates subtle colors, which, of course, are not seen in snow. To remove the color, choose Image>Adjustments>Desaturate. Now, the image on screen should be pure black and white, resembling heavy snow falling at night, #5.
 |
|
|
|
| |||||||||


![]()
Get the Latest Photo Tips, News & Reviews from Shutterbug!
| Camera Reviews Other Reviews | Mobile Reviews Photography Reviews Columns | News | Features | How-To | Resources |
 © 2026 Shutterbug
AVTech Media Americas Inc., USA
All rights reserved