- REVIEWS
Camera Reviews 
More Reviews Mobile Reviews Photography Reviews - GALLERIES
- VIDEOS
- BUYER'S GUIDES
How to Check & Correct Your Autofocus: Tips for Fine-Tuning AF to Get Sharper Images
It’s time to sharpen up your pix. Modern DSLRs generally rely on what’s called phase difference autofocusing: basically, a rangefinder scheme updated with new technology. But as I described in the May 2018 issue of Shutterbug, this technology uses a second optical path within the camera, independent of the lens-to-sensor path used to make the photo.
Well, when there are two of anything, they’ll never be identical—excepting protons, electrons, and other elementary particles! Given manufacturing tolerances and the routine punishment you visit on your camera, it’s possible that these two paths are slightly different. Sure, your autofocus oughta focus. But it could be off.
Manufacturers are aware of this problem and often give you a way to “tune” or “microadjust” the autofocus. The adjustment is generally buried among endless camera menus, but a quick web search will tell you if your equipment has this capability.
Shutterbug readers are always keen to get the best technical performance from their gear, so if tuning up your DSLR’s autofocus is possible, why not? You can find plenty of accessories—ranging from $5 to $60 and more—that will help. But before you go to trouble and expense, here’s a way to swiftly determine whether you’ve really got a problem.
Think about it: How can you know if your autofocus is really producing the crispest image? You could just tape a newspaper to the wall, make a photo (using autofocus), and see if it’s sharp. Better yet, have a range of targets and see which is most sharp, so that—in case the autofocus is off—you’ll know whether your camera is focusing too near or too far.
The simple way to do this is to spread that newspaper on the floor and shoot it from an angle—say, from a tripod five or 10 feet away. One of the lines of type is going to be sharp, and if it’s not where you focused—well, start digging in those camera menus.
Rather than dirty my floor tile with newsprint, I designed a simple focus target to make this process easier. Below is the free, downloadable target I created for you to try out on your own. Click on the image to open a full resolution version of the target, and then right click to download it. Then just print it out and lay it down at a distance from your camera that’s roughly 25 to 50 times the lens focal length.
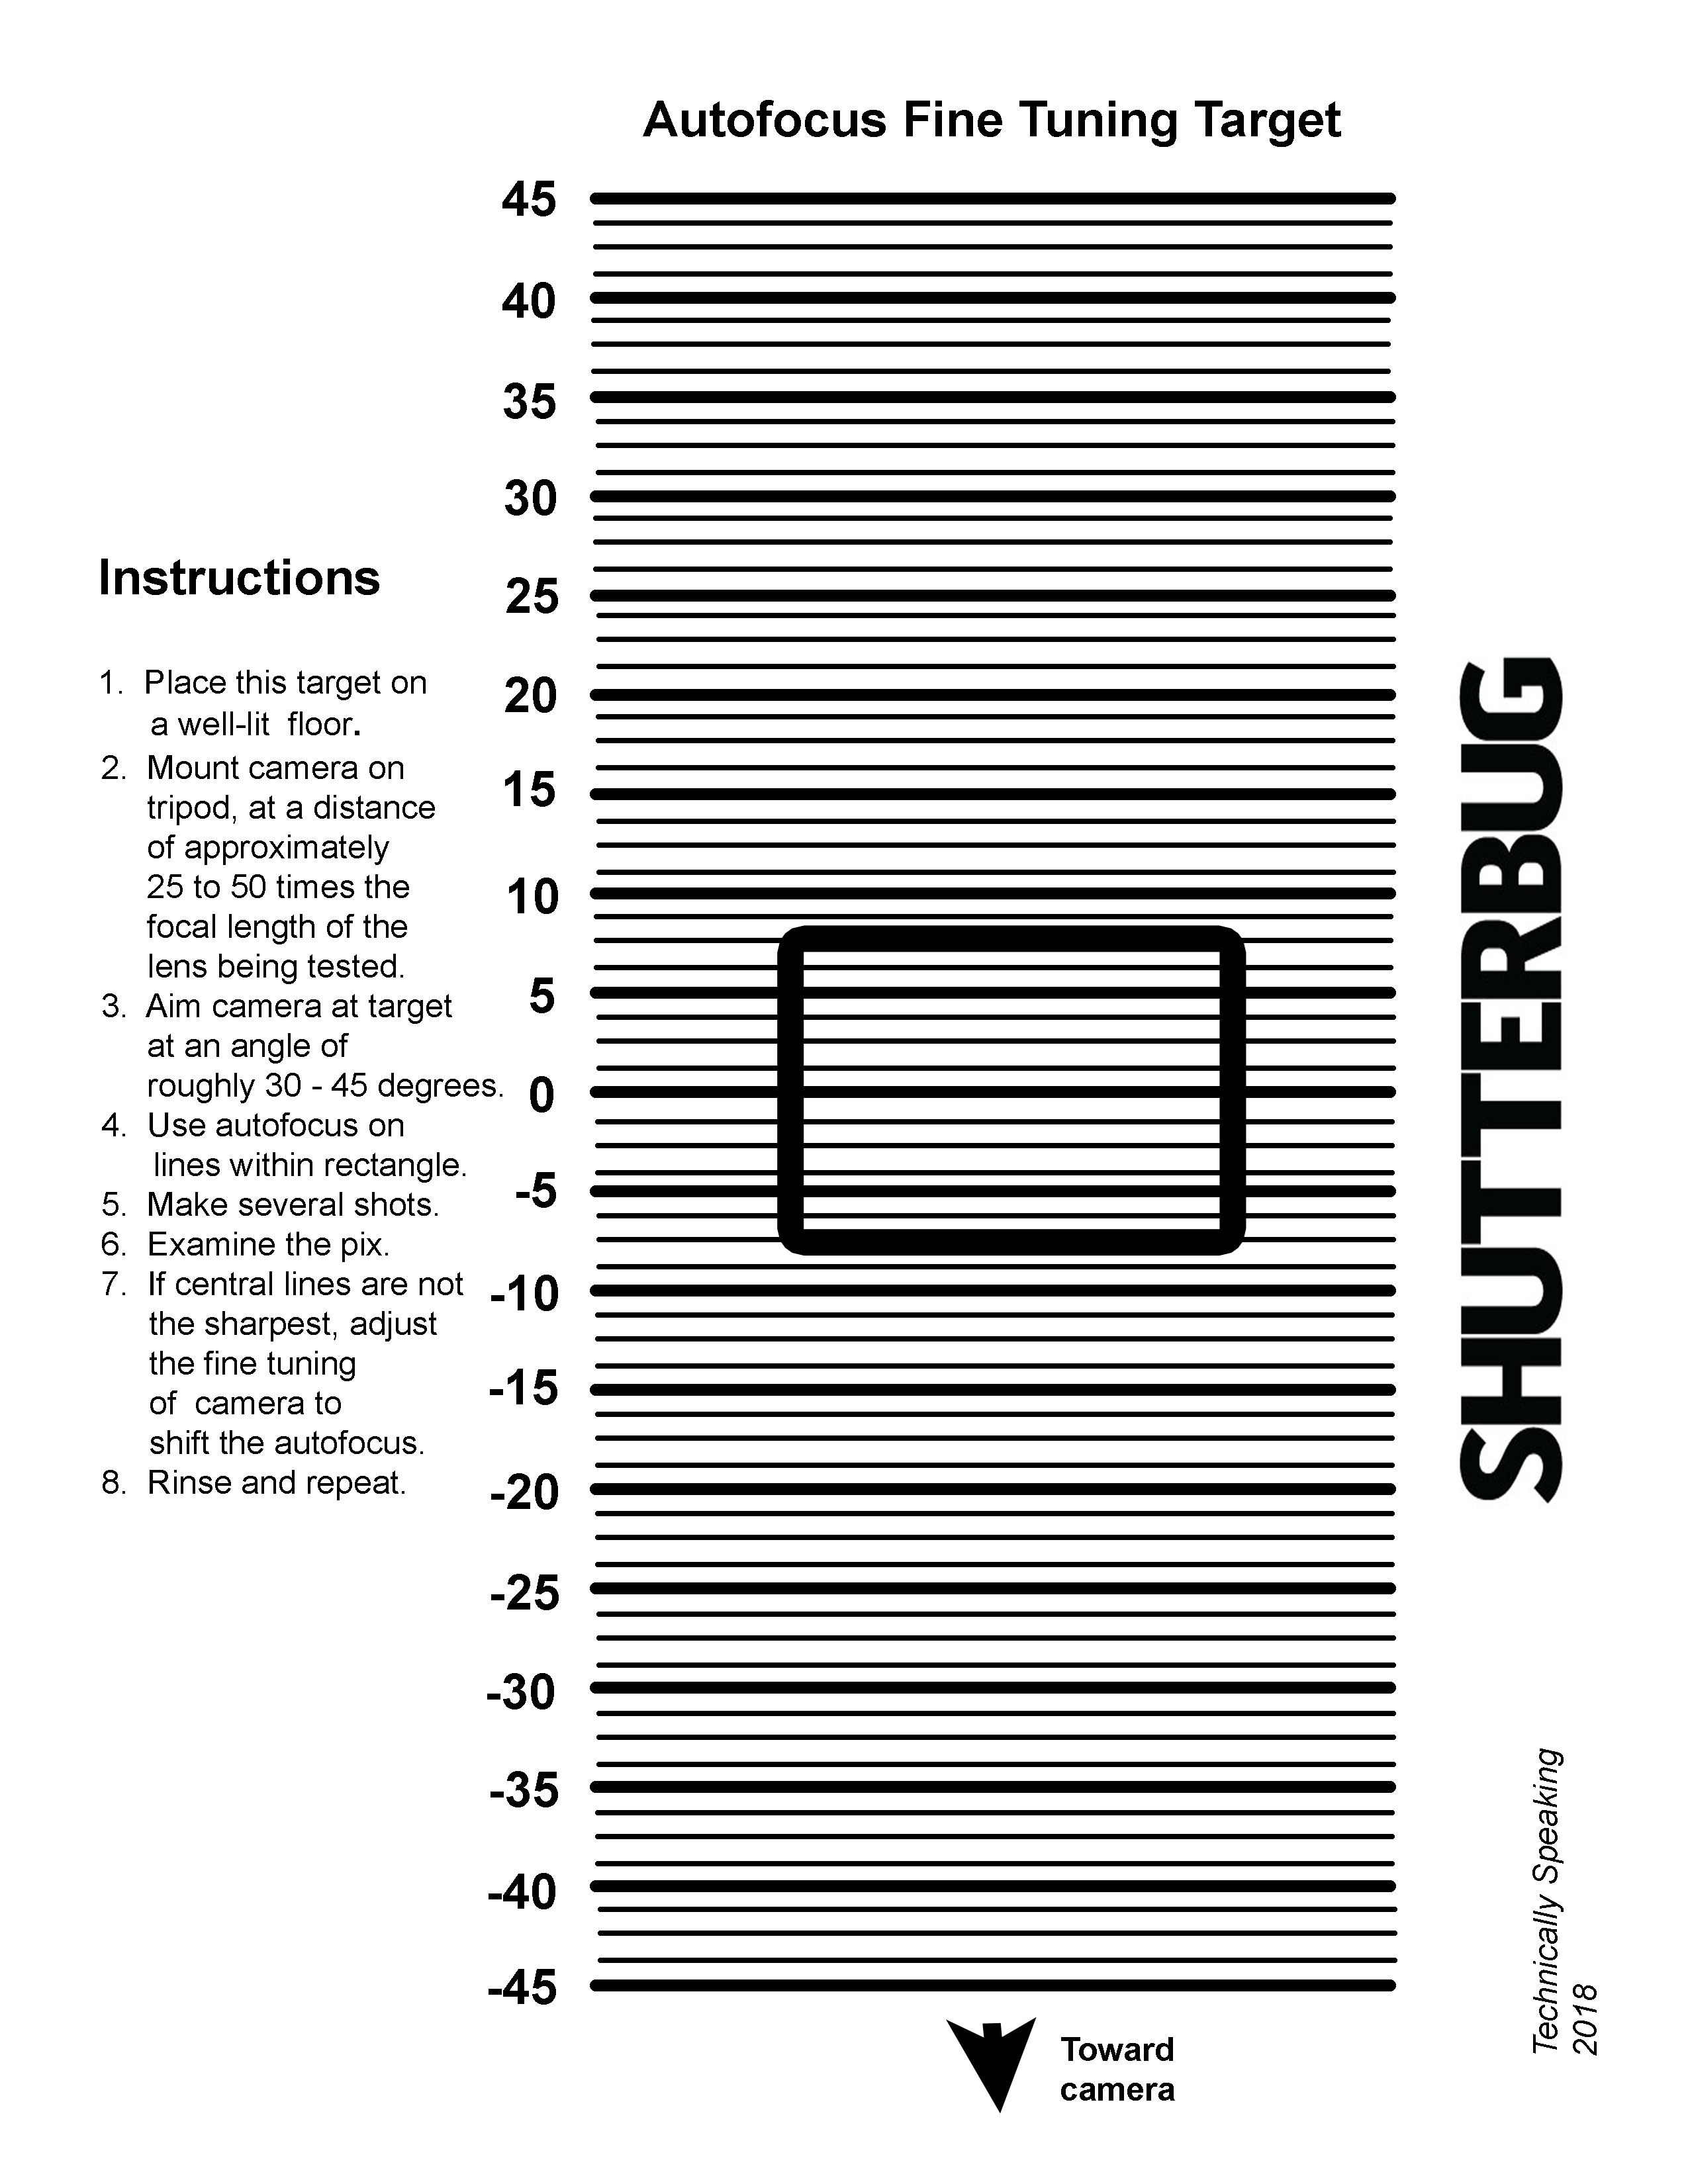
I chose to test my Nikkor 85mm f/1.8 lens, which I often use for portraiture. Autofocus for longer lenses is more critical, given their shallow depth of field.
I laid the target about eight feet in front of my tripod, which was tilted downward so that my camera’s field of view was centered on the rectangle. Starting with my lens grossly out of focus, I activated autofocus. When it was locked in, I took several shots.
A few caveats: This procedure works best for fixed-focus lenses, although you can certainly try with your zooms. Be sure your camera is solidly mounted and take care to trip the shutter with either a cable release or the self-timer. Shoot with your lens wide open, and have plenty of light on the target. This last point is important.
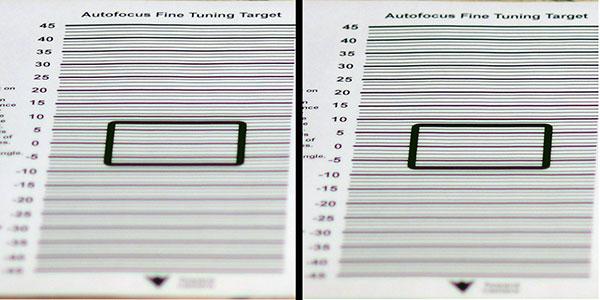
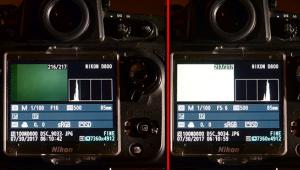
I didn’t expect much of a problem from my trusty Nikon D800. After all, it’s as reliable as doggy love. But when I inspected my test images, I was stunned—yes, stunned—to see that the sharpest target lines were about three inches beyond where I had focused! I sank into my easy chair, swallowed a Valium, and contemplated the meaning of life.
After that, I consulted my user manual (not an easy thing for a male) and figured out how to fine-tune the autofocus for this lens. Not hard, but slightly different for every camera. You can see the improvement in the figure, above.
Is this a big deal? After all, it was only about a 3% error, and inconsequential in most shooting situations because depth of field would more than hide it. But when you’re working in low light at long focal lengths—not an uncommon circumstance—you might be thankful to have spent the hour or two it takes to check things out, and possibly give your camera a tune-up.
Seth Shostak is an astronomer at the SETI Institute who thinks photography is one of humanity’s greatest inventions. His photos have been used in countless magazines and newspapers, and he occasionally tries to impress folks by noting that he built his first darkroom at age 11. You can find him on both Facebook and Twitter.


![]()
Get the Latest Photo Tips, News & Reviews from Shutterbug!
| Camera Reviews Other Reviews | Mobile Reviews Photography Reviews Columns | News | Features | How-To | Resources |
 © 2026 Shutterbug
AVTech Media Americas Inc., USA
All rights reserved