- REVIEWS
Camera Reviews 
More Reviews Mobile Reviews Photography Reviews - GALLERIES
- VIDEOS
- BUYER'S GUIDES
Getting The Most From Macro Mode
All Photos © 2004, Jon Canfield, All Rights Reserved
Many of us enjoy macro, or close-up photography. The ability to extract small details from a scene, whether a single flower, an abstract pattern from some common item, or detailed images of small items for online auctions, is the forte of many digital cameras. SLR style cameras have special macro lenses, some of which allow you to get larger than life reproduction, and many of the compact digital cameras offer a Macro mode that is optimized for close-up, if not true macro captures.

Basic Techniques
For the purposes of this article, we'll focus on the compact digicam.
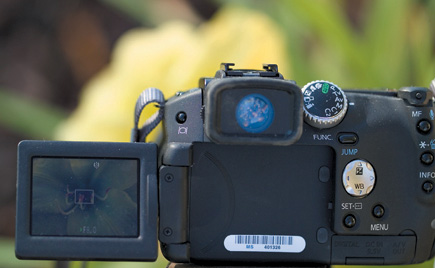
I'm using a Canon PowerShot Pro1 for the examples here, but most compact
cameras have a close-up mode. Usually, this is represented by a flower icon
on the mode selector. This mode optimizes the camera for use when only one to
three inches away from the subject.
The actual steps may vary from one camera to the next, so be sure to check your
manual if you need specific directions. To get started, select the Macro mode
and set your camera to auto exposure. If your camera has an auto-flash feature,
you'll want to turn this off for best results--more on that in a
bit. You'll also want to use the highest quality mode your camera supports
to take advantage of the detail typical of macro photos. Finally, use the lowest
ISO setting possible in order to keep noise to a minimum.
Since macro photography usually requires more depth of field to get the maximum
of the image into focus, exposure times are generally longer than normal. Every
increase in f/stop doubles the length of exposure. For example, an image shot
at f/5.6 might take 1/30 second, while increasing this to f/11 (a two stop increase)
would require a 1/8 second--too slow for a sharp image when hand holding
your camera. Mounting your camera on a tripod will prevent blurry images and
allow you to have more of the image in focus, giving you the best results.
 |
|
 |
|
|
You'll also find it much easier to compose and focus your shot using the camera's LCD display rather than the viewfinder. This is one area that the compact cameras have a big advantage over the DSLR, which doesn't have a live preview. Many of the higher end digicams, such as several of the Canon, Nikon, Olympus, Sony, and Konica Minolta models offer swiveling LCD displays, making it possible to compose your images regardless of where the camera is positioned, something you'll appreciate when the alternative is lying on the muddy ground!
Composition
When your goal is a close-up that really stands out, minimizing clutter and
distraction can make the difference between a successful photograph and a so-so
image. Often, by repositioning the subject you can eliminate everything that
might compete with your subject matter and increases the apparent detail.
 |
|
 |
|
|
What about those times where repositioning the subject isn't an option?
If you have the option of setting the aperture, you may be able to throw the
background objects out of focus enough to avoid the major distractions. Another
method that I've used with success is to bring my own background. Dark
poster board works very well to isolate the subject, while a light colored background
can help isolate and reflect light back onto the subject.
This same technique can be used to great advantage for photographing items for
online auctions. Using a simple backdrop such as a sheet or piece of velvet
will make your item stand out in comparison to other similar items.
|
| |||||||||


![]()
Get the Latest Photo Tips, News & Reviews from Shutterbug!
| Camera Reviews Other Reviews | Mobile Reviews Photography Reviews Columns | News | Features | How-To | Resources |
 © 2026 Shutterbug
AVTech Media Americas Inc., USA
All rights reserved