- REVIEWS
Camera Reviews 
More Reviews Mobile Reviews Photography Reviews - GALLERIES
- VIDEOS
- BUYER'S GUIDES
Fujifilm GFX 50S Review: We Go Big with Fuji’s Medium Format Mirrorless Camera

(Editor’s Note: You can see our initial hands-on impressions of the Fujfilm GFX 50S here.)
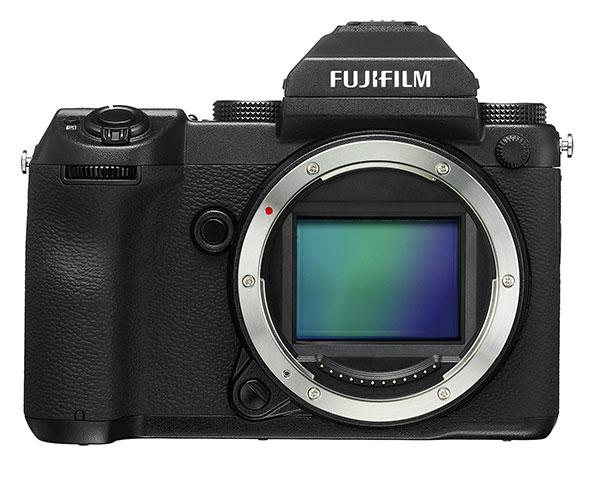
While it might seem unusual that a camera can be both mirrorless and have a medium format size sensor, that’s exactly what Fujifilm has created with their new GFX 50S. The 51.4MP CMOS sensor size is 43.8x32.9mm, 1.7x the size of the sensor in a full-frame DSLR; the body is decidedly mirrorless, lacking a pentaprism finder and replacing it with an EVF and a tiltable rear LCD.
In all other respects the GFX 50S is a thoroughly modern camera, presenting the user with a relatively lightweight camera that feels firm in hand with accessible controls and options that will satisfy the most fervent menu-driven photographer while offering fairly smooth manual control and override options as well.
File Size/Sensor Size
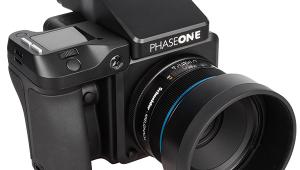
Yes, the medium format sensor in the GFX 50S is physically larger than so-called “full frame” cameras, yet pixel count and resultant file size is rivaled by a few DSLRs such as the Canon EOS 5DS/R. There are larger sensors and higher-resolution outputs available in pro-level medium format camera systems such as those from Phase One, and certainly in similarly expensive interchangeable digital back models, which are aimed squarely at the high-end commercial photography market.
But large file size and pixel count is not an end in itself. Before considering this or any other such camera you have to first ask yourself whether 146MB image files are of real use to you. If they are, keep in mind that cramming a bazillion pixels into a “small” sensor has consequences, as we found out in the past and that resulted in a slight halt or slowdown in the megapixel race among DSLR makers.
True, full-frame sensors and advanced image processors cover some of the resultant blemishes, but reasonable people agree that any flaws in an image file (shake from mirror bounce, degradation when going too high in ISO settings, etc.) are only magnified when pixels are squeezed in and pushed beyond their limits. So, today, if you want big image files, a larger sensor will generally be a better bet.
The GFX 50S is not a casual buy at $6,499 (body only). Yet, if large file size for big prints is your aim and working with a camera that in many respects will be immediately familiar to you if you’ve previously worked with a full-featured DSLR or mirrorless, then it might be right down your alley.
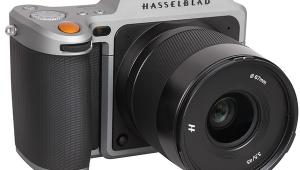
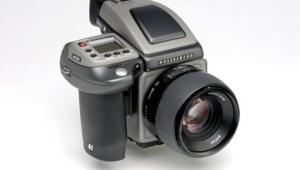
In any case, it’s in the vanguard of what might become a new breed of medium format cameras that marry large sensors and high resolution with a smaller form factor, the latter being a side benefit of the mirrorless class. Hasselblad’s compact X1D medium format model is already in the game: can other makers be far behind?
Test Specs
I recently had a short test run with the Fujifilm GFX 50S and supplied GF 63mm f/2.8 R WR lens. I photographed indoors and out using both auto and manual controls working through the rear LCD and EVF finder.
I shot with Raw+Fine JPEG format and processed the Raw (RAF) images in the current (2017) Adobe Camera Raw and Photoshop CC. In this report I’ll concentrate on field experience rather than a laundry list of specs, which you can easily find on numerous websites, including Fujifilm’s.
Note: I did not test the video options on the GFX 50S as that’s not my cup of tea: I also did not test the Wi-Fi with the Fuji app as I was much more interested in the big file output of the RAF images.
Camera Setup
Each of us has a preferred way of working, and while habits are made to be broken, you can pretty much take this camera out of the box, cruise through the options using the Menu, choose among them using the four-way control dial, and get to work. The camera has dual SD card slots so you can load for bear and count on about 400 full-res shots (Fujifilm specs) with a fully charged battery.
Those who anticipate taking more shots during a session or day in the field, or who use one of the many auto-bracketing options (ISO, film simulation, white balance, and dynamic range), and/or often use continuous advance (3 fps in this camera) might consider carrying along a charged spare.
Here’s how I set up the camera. I am a big fan of Auto ISO and set the camera to a max of ISO 1600, which meant that I could use various combinations of aperture and shutter speed in a wide variety of lighting conditions without having to always fidget and guess about the ideal ISO for each scene.
Maximum “native” ISO is 12,800 with a push to 102,400 available. I made a few tests at ISO 16,000; while I cannot see using such high sensitivity very often, it gave a pleasing and usable result, albeit with a fine-grained film look, yet with better than expected color, reasonable contrast, and no apparent artifacts.
There are a myriad of white balance options, including the usual suspects as well as custom settings (locking in a balance for, say, your studio lighting), three different fluorescent options, and even an underwater option: shooting Raw (RAF) makes all that less important as you can adjust easily enough in processing. My choice was Daylight outdoors and Auto for mixed lighting indoors.


The nice thing is that the live view LCD will give you a preview of the cast as you work (as well as the effects of your exposure choices), plus you can nuance the settings with a white balance shift via the toggle control on the camera back. The point is that the touchscreen LCD is truly “live view” and interactive.
Focusing Controls
The next step was the focusing setup. I worked with Manual (the “M” option on the focusing mode dial) and with the touchscreen autofocus target set up using the back LCD—one tap on the screen in your target area makes for quick AF work. You can select a target area or a specific point in the AF setup menu.
You can also move the focusing target area around the frame with the toggle control on the body with the thumb of your right hand. When shooting in manual focus mode I learned to press lightly on the shutter button to get an AF reading then tweak by turning the focusing ring on the lens.
Viewing
I must admit that I am not a big fan of EVF viewfinders, having been spoiled by the bright and crisp view through an optical finder, and for the most part remain unconvinced; with some cameras it’s like watching TV from a nose-length away. The high-res EVF on the GFX 50S, however, finally proves that you can actually see a good rendition of what you are framing plus use it for manual focusing if you desire.
There was no EVF smear when moving the camera rapidly from side to side, and although sitting here pointing the camera at my monitor does show flicker, that’s what happens when you point any electronic finder at any electronic screen. As to focusing through the back LCD, experience has taught me that this is the least dependable of fine focusing methods with any camera, although the touchscreen method mentioned above gives you a leg up.
Hyperfocal Distance Focus
When shooting I often use hyperfocal distance to set up depth of field to see what aperture will encompass near to far distances, then set the aperture and compose accordingly. Rare and usually confusing on zooms, I would expect a fixed focal length like the 63mm f/2.8 I worked with during this test to have a depth-of-field scale on the barrel: it did not.
There is, however, an electronic depth-of-field scale available on the LCD and EVF that adapts to the focal length in use, but this meant I had to check it in the finder rather than just setting it on the lens and getting to work. Old habits die hard, I guess.
Screens and Display Options
When working down low or overhead the tiltable screen offers a definite advantage. It goes 90 degrees downward for a classic medium format waist-level view and while the upward tilt is limited to about 45 degrees it is nonetheless helpful. The screen does not articulate side to side.

Display options are an important consideration, and you can set up a full information display, which does not overly intrude upon the image, for both LCD and EVF; or get rid of any screen info and just have the image alone; or show a histogram; or even evoke the Menu for quick settings and adjustments, all via the DISP button on the camera back. When working with the GFX 50S I often chose full view without information because I still had a display of important settings available on the top plate LED, a nice and functional design touch.
The rear 3.2-inch LCD is “active” (read: touchscreen). I already mentioned the tap focus feature, but in smartphone style it allows you to swipe side to side through images and pinch in and out to zoom during playback; tap and drag for AF area selection; flick up and down for a histogram view; and “double tap” for an enlarged live view: in short, very handy. Overall the screen is bright and has a clarity that was both pleasing and helpful; the degree of articulation is helpful for positioning the camera in bright light as well as for unique POVs.

Exposure Settings
As to exposure settings—patterns and modes—the methodology is not much different than making them on an advanced DSLR or mirrorless: you set up Program by locking the control knobs and lens to the red “A” setting, and can Shift in that mode by turning the command dial. For shutter priority set the shutter speed dial to the desired speed and leave the lens and left-side dial (which doubles as an ISO selector) at the “A” mark; for aperture priority set the shutter speed dial to “A” and rotate the aperture on the lens.
Lightly press the shutter release and you will be notified of the ISO that is being used (if you set Auto ISO, as I do) or you can set ISO on the left-hand dial or by pushing in the front command dial once and turning the wheel. In short: basic stuff and easily changeable in the field. As mentioned, if you have worked with an advanced DSLR or mirrorless camera, operating the GFX 50S will be well within your comfort zone.
Other Matters
Space precludes going over the many interesting options in the Menu, but suffice it to say that they are legion and that delving into them in depth will keep any techno-photographer well amused. Frankly, I prefer to shoot in Raw and then have at it with post-processing and concentrate on shooting rather than making settings as the light changes on the scene.


You can set Film Simulations like Velvia, Astia, and Acros, as if anyone but old-timers will get the references, but they are presets with, respectively, rich saturation, neutral colors, and monochrome; grain effects; highlight and shadow tone rendition (curve bumps up and down); sharpness, noise reduction, and so forth.
Of course there are perhaps more commonly used settings, such as sRGB or Adobe RGB color space, but those you just set and forget and don’t fiddle with when shooting. Thankfully there are no “Scene” modes and the like.
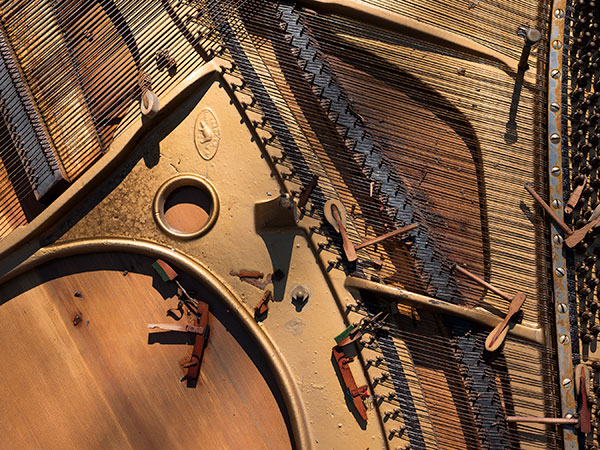
One other setting of note is the dynamic range. One thing you will see rather quickly (and that I certainly noticed in my images) is that the GFX 50S has a very wide dynamic range (Fujifilm says 14 stops). You can vary the range if you desire, but I kept mine at the default of 100. This produced images that had a rather remarkable tonal range and hue differentiation, a definite benefit of the larger sensor, high resolution, and the malleability of the RAF files. You can also set Shadow and Highlight Tone, which I did for high-contrast images (see captions).
Conclusion
I usually judge a camera by the shooting experience, and, of course, results, rather than on specs alone, and while the latter on the Fujifilm GFX 50S are impressive indeed, my overall impression is that this is a “photographer’s camera,” one that can be taken in hand to make really fine high-resolution images that can easily translate into large prints that are crisply sharp and tonally pleasing.
The layout and options available allow you to get as engaged as you like via the controls and many imaging options available, or you can set it up so that you can shoot quickly and spontaneously when the spirit moves you. The weight, balance, and ease of making settings lets you forget about all the other jazz and get into making images with the image effects you desire. As mentioned, the electronic depth-of-field scale is a step in the right direction, although why it’s not etched on the prime lens itself is puzzling.
I carried the GFX 50S with me all day long on various shoots and it never felt cumbersome or burdensome. The solid right-hand grip is well thought out and all controls are right at hand. The menus are comprehensive, well organized, very legible, and accessible via the LCD or EVF.
The EVF of the GFX 50S is very good as EVFs go, and the touchscreen LCD is large, bright, and informative. Moving from one shooting scenario to another is easy once familiarity with controls is gained. Image quality is excellent, especially when large prints are the aim, and processing, including fairly major crops and shadow, highlight, and hue nuances, reveals that the RAF files have a resonance and malleability that one expects from a high-end sensor and processor. Indeed, the image quality is at times startling and rarely disappoints.
True, the price of the Fujifilm GFX 50S is steep for many, but this is a breakthrough camera that redefines the larger sensor format in a way that moves up expectations of what a digital camera can produce, both in shooting ease and highly pleasing image quality. It may bode the future of digital cameras, and if the GFX 50S is any indication, it is exciting indeed.


![]()
Get the Latest Photo Tips, News & Reviews from Shutterbug!
| Camera Reviews Other Reviews | Mobile Reviews Photography Reviews Columns | News | Features | How-To | Resources |
 © 2026 Shutterbug
AVTech Media Americas Inc., USA
All rights reserved