7 Ways Shooting Film Will Make You a Better Digital Photographer
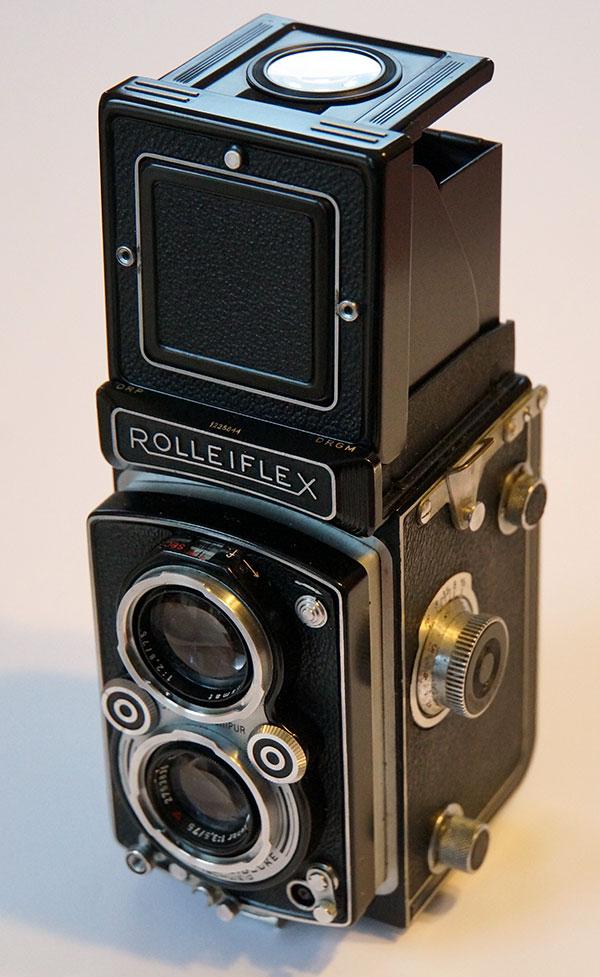
I’m hardly what you’d call a Film Dinosaur. Over 98% of the images I shoot are captured digitally. But, after I recently ran a dozen rolls of Kodak Tri-X 120 through some ancient medium-format roll film cameras, and had it developed, scanned, and printed on Fuji Crystal Archive photographic paper, I’m a much better digital photographer because of it.
Maybe this is why most photography schools and college photography programs still think it’s important to include courses on shooting film. Yes, it’s slow and labor intensive compared to digital, but I promise that if you try it, you’ll not only have an immense amount of fun, but also learn much that can be directly applied to the digital picture-making process.
Why Shoot Film?
Many of the things you can learn by shooting film, especially medium format 120 roll film in a manual-exposure-only camera, are the result of slowing down the entire process of taking pictures.

Here are the seven most important lessons I learned about photography while shooting film:
1) Increases Precision
You’re forced to consider and control each of the variables individually, including f/stop and shutter speed selection and to focus manually with precision.
2) You Shoot Less But Capture More
You’re limited to a small number of frames per roll, so you have to compose carefully, wait for the perfect moment to take the picture, and make each shot count.
3) Improves Awareness
You don’t have the instant feedback of viewing the captured image on an LCD, resulting in a more deliberate approach and an enhanced awareness of lighting and framing that’s very beneficial when you resume shooting digitally.
4) Helps You Better Understand Exposure
Using a separate handheld exposure meter for a while will inevitably give you a clearer understanding of such things as exposure latitude, and the effects of choosing different combinations of apertures and shutter speeds.
5) A More Visceral Yet Disciplined Experience
Shooting film on an old twin-lens reflex, single-lens-reflex, or roll film rangefinder camera lets you experience the process of creating photographs on a more visceral level. And shooting on film with a more demanding, less “responsive” camera can help you acquire the kind of photographic discipline that’s often lacking in today’s digital age where the number of frames at your disposal is essentially limitless and sophisticated auto-exposure and autofocus systems let you operate on autopilot.
6) Adds a Timeless Quality
When you shoot classic portraits on roll film you have that indescribable feeling of creating something for the ages. And yes, the camera, the process, and experience you have when creating an image does directly affect the character and feeling of the images you capture.
7) Puts the Focus on the Photographer, Not the Camera
Yes, the person behind the camera is clearly the most important element in creating timeless images. But photography is a technologically based art form, and the experience the photographer has in creating those images, and even the type of camera used, is also embedded in the resulting photographs. Acquiring a visceral appreciation of these differences and employing them in your approach to your subjects can definitely help to enrich your digital images going forward.
Examples
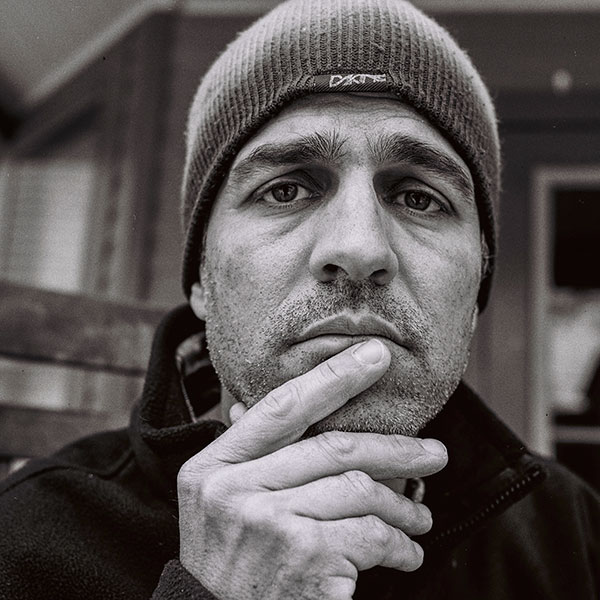
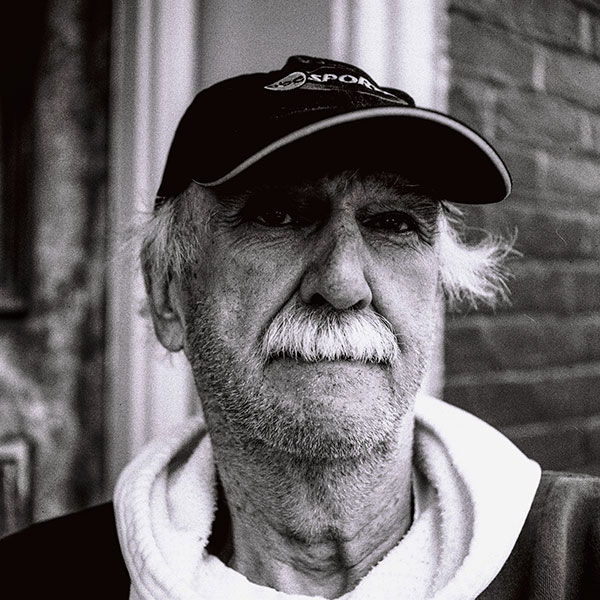
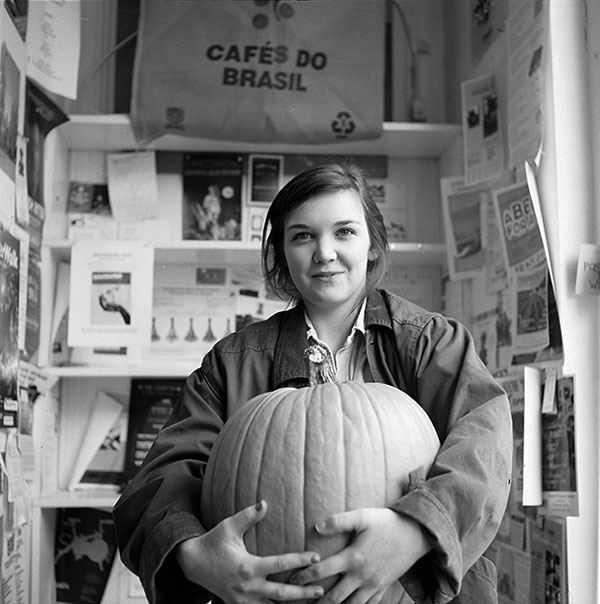
As you can see, the portraits included in this story, which I shot on 2-1/4-inch black-and-white roll film, have a different character, feel, and gravitas not present in those that are typically captured digitally in black-and-white.
Which Roll Film Camera Is For You?
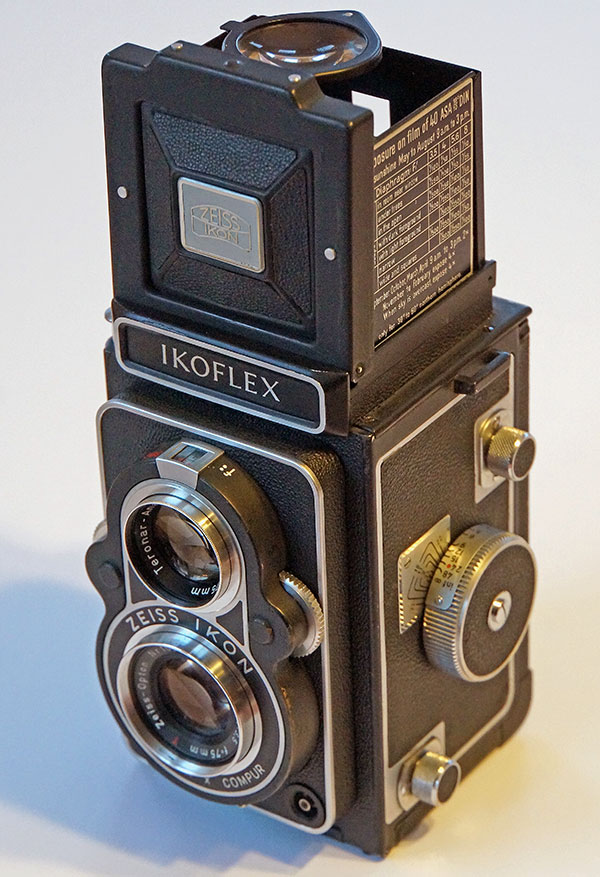
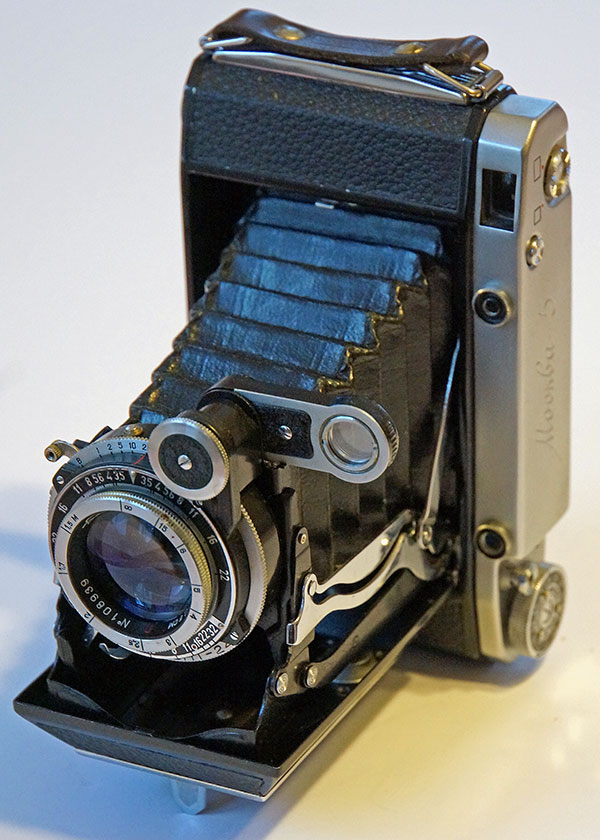
There are a wide variety of cameras available that use 120 roll film. If you have access to a good quality example in working condition that provides a full range of shutter speeds and apertures, that will be your obvious choice. If you don't, take a look at the captioned camera pictures in this article and the source list at the end. Twin lens reflexes (TLRs) are relatively simple and rugged, and have no moving mirror so you can shoot at slower handheld shutter speeds.
Their waist-level viewfinders are a plus for shooting portraits and street scenes discreetly, but the viewing image is reversed from left to right, which makes following action challenging. In such cases you can use their built-in direct vision (non-optical) frame finders, but you’ll get considerable vertical parallax error unless you shoot at distances longer than 10-12 feet.

Good quality twin-lens reflexes are generally available on eBay at prices ranging from $100 on up, but the most desirable ones start at about $200 plus shipping. The problem with buying cameras on eBay is that many of the cameras you buy will require servicing and repairs before you can use them reliably in the field.
Since CLA (cleaning, lubrication, and adjustment) on a TLR can easily run $100 or more, even if no parts are required, it’s something you have to factor into the equation. Comparable cameras purchased from dealers are typically more expensive but the difference may be well worth it since they’re generally checked and serviced before they’re sold, and usually come with a warranty.
Necessary Accessories
Any 2-1/4 twin-lens reflex with a normal (75mm or 80mm) normal lens, or a similarly equipped medium-format SLR or rangefinder camera is an excellent choice for general shooting. However typical non-interchangeable-lens TLRs and rangefinder cameras only focus down to about three feet, so you may want to add a close-up lens to get frame-filling head-and-shoulders portraits.
Most of the TLRs listed above (except Ikoflexes) have an internal bayonet flange around the lens that lets you mount a Rolleinar 1 R1 (series 1 size bayonet) close-up lens set. It incorporates a parallax-compensating Rolleipar prism into the lens that goes over the viewing lens, and a separate close-up lens that bayonets in place over the taking lens.
These sets are of excellent optical quality, will get you down to about 18 inches with a 75mm of 80mm lens, and run about $70-120 on eBay or from photo specialist retailers. For Ikoflexes, the push-on Ikoprox 1 that goes over both lenses performs similarly and costs about the same.

Getting the Right Exposure
An exposure meter is a necessity when you’re shooting with a manual medium-format film camera. Some Rollei, Yashica, Minolta and Ricoh models have built-in meters, and they’re OK so long as they’re working properly.
Just remember that selenium meters typically have a very wide acceptance angle, so it’s best to take close-up readings. You can also use your digital camera as an exposure meter.
If you go for a separate hand-held meter make it a Gossen or Sekonic battery powered meter rather than a selenium type. They’re available used at bargain prices (I paid $29 on eBay for a mint Gossen Super Pilot) and they have an adjustment screw so you can zero them out to read accurately.
Since you’re going to be shooting at a more leisurely pace anyway, using a tripod is a good idea if you want to exploit the hi-res potential of your roll-film classic. Any tripod is better than no tripod when shooting at shutter speeds of 1/60 sec and slower, and by all means use the one you’ve got. Personally, I pack a Davis & Sanford Traverse, a sturdy travel tripod that extends to eye level, is reasonably stable, and very compact and portable.

Film Options
Roll film in the 120 size is readily available in a variety of color print and black-and white types, but I suggest you shoot real silver-halide black-and-white for the full retro experience. I used Kodak Tri-X Professional 400 for all the portraits on these pages, and it’s available at a mail order street price of under $25 for a five-roll pack.
Kodak also offers Portra 160, 400, and 800, a C-41-type color negative film that can be printed in black-and-white, and Kodak Tmax 100 and 400. Ilford lists HP5 Plus, Delta, and XP2, all ISO 400, FP4 Plus (ISO 100), and Infrared SFX (ISO 200).
In the U.S.A., Fuji offers Fujicolor PRO 400H color negative, and Neopan ACROS 100 in black, and white. Most well stocked camera stores in larger cities have 120-roll film in stock, but you can order it online from any of the larger photo specialty retailers such as B&H and Adorama.
Developing, Scanning, Cropping, Enhancing and Printing
Unless you’re a dedicated film fanatic you probably don't want to take the time and effort to do all of this the traditional way. Fortunately, a Google search for “black and white film developing and printing” will bring up a list of dozens of labs that will process, scan, and print 120-film on real silver-halide or inkjet photographic paper. Most are set up to do it by mail, but if you live in a major city like New York, Los Angeles, or Chicago you have the option of dropping the film off and picking up your finished prints and negatives.
You can also have your film processed, then scan it and print it yourself. Suggestions on scanners for 35mm and medium-format film: Epson Perfection V600 Photo Scanner (street price: $199.99) and the Epson Perfection V850 Pro Scanner (street price $853.99). Both are flatbed units that will scan at up to 6400 dpi. As for printers, higher-end units that use pigmented inks and ink sets that provide a range of black and gray inks yield prints with better tonal gradation.
My Process
Here’s the procedure I used to achieve excellent black-and white prints comparable to those I made back in the day in my own darkroom:
I sent my Kodak Tri-X 120 to University Camera in Iowa City, Iowa, a traditional camera store that does a lot of film processing, and will process most types of black-and-white film in 35mm and 120 sizes in Kodak D-76 or HC-110. Once they processed and scanned the film and emailed me the image files I imported them into Lightroom 5.7 where I cropped them, adjusted the exposure, contrast, highlights, and shadows, removed a few minor imperfections, output them as TIFFs, and emailed them back to University Camera for printing. A few days later I received the prints via USPS Priority Mail.
University Camera processes film by hand to archival standards, scans the negatives on a Fuji SP3000 scanner with a high luminance LED light source, and prints them on a Fuji Frontier 570. While the Fuji Crystal Archive II paper they use is a color paper, not true black-and-white, the prints, available in sizes from wallet to 12 x 18, look very good indeed and are available in glossy or luster finishes.
To cut to the chase, if you want a to have an unparalleled creative learning experience that will definitely enhance your skills as a digital photographer, get hold of a medium-format film camera and 10-12 rolls of 120 black-and-white and start shooting! You’ll be glad you did.
Good sources for used medium format cameras
National Camera Exchange, Minneapolis MN 1-800-624-8107
KEH Camera, Smyrna GA 1-800-342-5534
B&H Photo-Video, New York NY 1-800-894-9707
Adorama, New York NY 1-800-223-2500
Recommended camera repair companies
Pro Camera, Charlottesville VA 434-979-1915 One of the best I’ve encountered, and they can repair exotic cameras and also do cosmetic repairs if needed.
United Camera Repair, Rock Island IL 1-866-488-8227 Repairs to a high standard on a wide variety of cameras and they stand behind their work.
Extra bright viewing screens for upgrading cameras of all types and formats
Maxwell Precision Optics, Decatur GA 404-317-6825: Probably the best and brightest focusing screens available anywhere.


