- REVIEWS
Camera Reviews 
More Reviews Mobile Reviews Photography Reviews - GALLERIES
- VIDEOS
- BUYER'S GUIDES
Digital Tools For Low Light Photography: Post Exposure Image Enhancement
In addition, even though digital sensors have evolved and surpassed film with respect to dynamic range—the amount of detail that you can record in the bright highlights and deep shadows within a single photograph—it doesn’t come close to what we can perceive with our eye/brain combination. Nevertheless, there are techniques you can employ in post-processing that allow you to push the technology to the limit, and compared to what we could do just a few years ago, it is truly unbelievable. Here we’ll use the tools found in Adobe Photoshop, Lightroom and Elements, but you’ll find similar tools in other software image-editors as well.
The Fill Light Slider
When you shoot in Raw format, you must process the picture files in a Raw converter. There is a tool in Raw converters that I consider one of the great advances in photographic technology. It is the fill light slider, and it allows you to open up the shadows in a picture, thus revealing detail that was either dark and muted or simply invisible because it was underexposed.
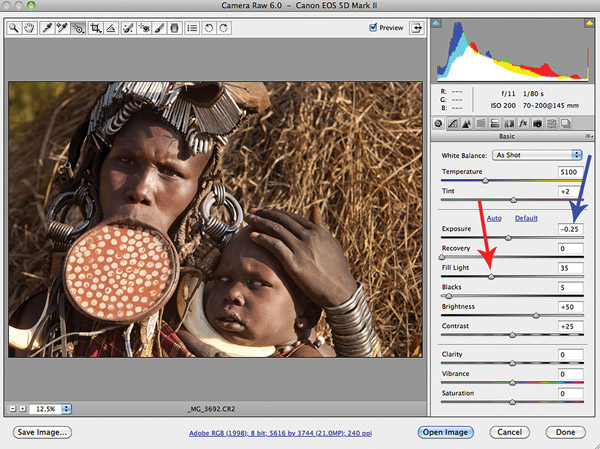
For example, compare images (#1 and #2), a portrait of a Mursi woman from Ethiopia wearing the traditional lip plate. The original capture is (#1). Notice how deep the shadows are, so deep they obscure details. Even though I took this picture about 20 or 30 minutes after sunrise, the lighting was quite harsh from the low angled African sun. While high contrast is fine in many photographic situations, the ideal is usually to reveal as much detail as possible. We certainly want to show the detail and texture that we can see with our eyes.

All Photos © Jim Zuckerman

Photo (#2) is the result of moving the fill light slider to the right until the shadows opened up. Figure A is a screen capture from ACR (Adobe Camera Raw), and the red arrow shows you how far I had to move the slider to get this result. Shadows that seemed hopelessly dense suddenly reveal the detail that had been hiding. The fill light slider affects mostly the shadows, but the highlights can be slightly lightened as well. To counteract that, I moved the exposure slider to the left just enough to tone down the highlights. The blue arrow shows you the amount of movement—only a very small amount.
How far can you go in lightening shadows? Don’t you increase digital noise when you do this? The answer is yes, you do. However, you can mitigate the noise so it is basically irrelevant, allowing you to do amazing things as I demonstrate in the next example.
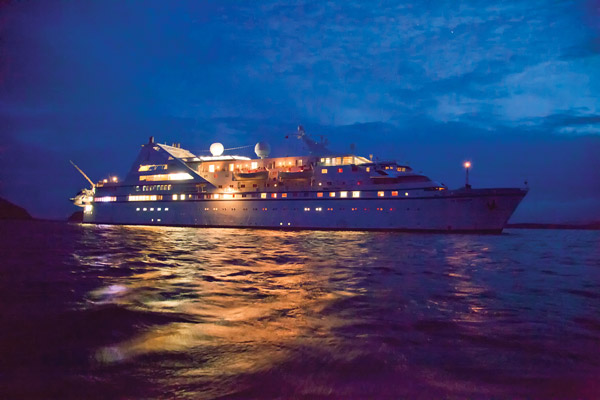
I took the picture of the ship I was sailing on in the Falkland Islands (#3), as I was on my way down to Antarctica. My group had gone ashore to photograph rockhopper penguins, and we stayed until dusk. On the way back to the ship, I thought the vessel looked beautiful in the late twilight illuminated against the dark, cobalt sky. To say the light was dark is actually an understatement. I could hardly see anything except the lights on the ship and their reflection in the surface of the ocean. I was in a dinghy bobbing up and down in the waves, and this meant that I was in an impossible photographic situation. I had nothing to lose, so I went out of my comfort zone and bumped the ISO to 6400. To be honest, I had never used an ISO setting this high before and I thought the images would be totally useless. Even with this setting, my shutter speed was only 1/5th of a second with my f/4 lens wide open. I thought there was no way this could be a sharp picture, and at the same time I was certain the noise would be so large and offensive that I’d trash the images when I got home—or sooner.

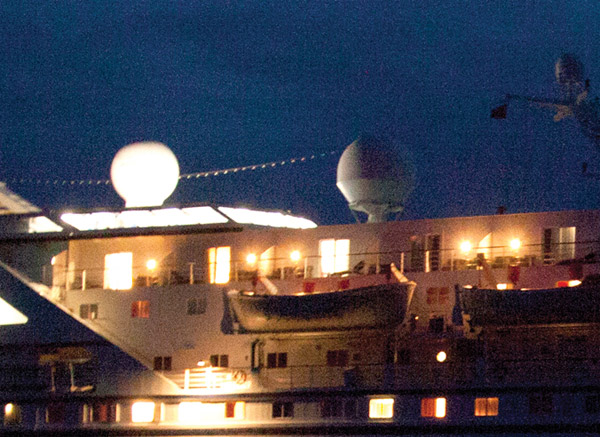
I was both right and wrong. The pictures all had horrible noise as you can see in a small portion of the image captured at 100 percent magnification on my monitor (#4). For my own sense of aesthetics, this makes the picture unacceptable. However, I was shocked that out of the dozen images I took, this one was fairly sharp. This was luck, not skill, because a 1/5th of a second exposure from a bobbing dinghy is a guaranteed formula for a blurred picture. Image stabilization would be of no help at all in a situation like this. I took the shots of the ship when we crested on a wave or when we were in a trough in an attempt to shoot with minimum motion.
Ok, so I had an underexposed picture of the ship with little detail, and the noise ruined the image even if I accepted the underexposure, which I didn’t.
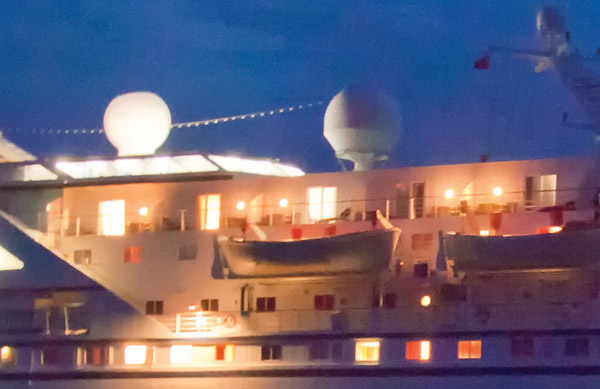
At this point I used the fill light slider to open up the shadows, and you can see in Figure B how far I moved it to the right. This provided incredible detail in the ship and in the water—much more than I could see with my eyes from the dinghy—but the digital noise became even more pronounced. In (#5) you can see that the price I had to pay for the additional detail was too much noise in the shadows, but the night sky, which now has great color and exposure, is so noisy that to make a print of this would be ridiculous.

Here is where the plot thickens. To save this image, I opened up Nik Software’s Dfine 2.0 (www.niksoftware.com) and I let the program loose on this shot. I used the automatic function, letting Dfine 2.0 do its magic. When it was finished, I applied it a second time, and look at the results in (#6). The picture is amazing. The noise is gone, the colors look great, and there is unexpected detail in shadows that were so dark one would assume there was no way to salvage those areas of the image. To drive home my point, study the screen capture of a close-up of the sky and the ship taken at 100 percent, (#7). You see no noise, and while the picture isn’t razor sharp, it’s quite acceptable, especially under the circumstances. The fact that it’s not tack sharp has nothing to do with using the Nik Software. That was caused by the extremely slow shutter speed.

To put this in perspective, the noise in this image is significantly less than the grain in ISO 400 color slide films of the past. Had I been forced to shoot at ISO 400, the shutter speed would have been 4 seconds (4 f/stops slower than ISO 6400) and that obviously would have produced an unrecognizable abstraction of the lights from the ship. If the ISO 400 film were pushed to 6400 (This is something I’m not sure is even possible. I’ve pushed film 3 f/stops in the past but never 4 f/stops.), the noise would be as large as cannonballs.
HDR
Much has been written about the technique of expanding dynamic range, and if you are very familiar with it and use it all the time, then this section will be old news to you. The reason I’m including it here is because it allows us to address low light and contrasty situations brilliantly. This can be considered a special effect, but HDR simply enables you to capture an image like you see it rather than losing detail in the highlights or the shadows because the digital sensor isn’t as sophisticated as our eye/brain combination.
If you haven’t explored HDR yet, you must. It’s one of the most incredible techniques we have in photography today, and you are really missing out by not using it.
The term dynamic range refers to the ability to capture detail in both the highlights and the shadows in a photograph. When we shot film, photographers were taught that you had to expose correctly for the highlights with slides, and you should expose correctly for the shadows and develop for the highlights (at least with B&W film) when shooting negatives. The reason for this was that film just couldn’t record detail in both areas of an image to provide a good exposure throughout the composition. In high contrast situations you often had to choose one or the other. Do you expose well for the highlights and let the shadows go dark, or do you give the shadows areas a perfect exposure and allow the light portions of the photograph to become too light or overexposed completely? That was the question with film, and it’s still the question in the digital realm unless you use HDR.
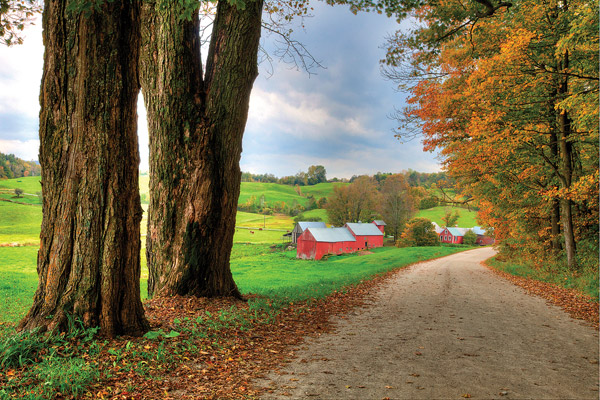
The way HDR works is this. You take usually 5 or 6 exposures of a subject or scene from a tripod using Manual Exposure mode, and you do this in 1 f/stop increments. The first exposure can be exactly as the meter dictates, for example, and then you take 4 more shots—2 exposures darker than the first and 2 exposures lighter. In the case of a farm in Vermont, Figure C, I made 6 exposures. I added an additional underexposed image to make sure I got all the possible detail in the sky. It’s important to use the same f/stop for each picture so the depth of field is identical in each frame (otherwise the final composite will have varying depth of field effects), and that means that the shutter speed must vary. Each of these images was taken at f/32.

Note that the lighting in this picture was diffused from an overcast sky, and that meant 2 things: First, the light level was low, and second, contrast was minimal. Even with the relatively low contrast, the sky was much brighter than the dark shadows at the base of the large trees on the left, and that meant that while I could see complete detail in every part of this scene with my eyes, the digital sensor was not going to capture it. If you look at each of the 6 individual photographs in Figure C, you can see that it was impossible to capture detail in all parts of the image with a single picture. Had I been shooting slides or simply taking a single exposure of the scene, I would have exposed correctly for the autumn leaves and let the sky become washed out.
The HDR software that assembles the composite of these images takes the best-exposed sections from each area of the scene. It builds a new image based on this, and in (#8) you can see the remarkable result. There is complete detail in every part of the image, from the darkest shadows to the brightest part of the sky.
Other software options for assembling HDR images are Photomatix Pro from HDRsoft (www.hdrsoft.com) and HDR Efex Pro by Nik Software (www.niksoftware.com), although more are available that I have not tried. With these programs you get the most control over contrast, color, gamma, white and black points and other subtle adjustments like shadow and highlight smoothing.
If your subject is not moving and you are shooting in low light situations or where contrast is a problem, HDR is the best-case scenario. You can use a low ISO, thus digital noise isn’t a factor at all. In the photo of the farm, the darkest shadows didn’t have to be lightened in a Raw converter. Instead, they were exposed correctly in one of the images that made up the composite, and that’s why you can maintain the highest quality in the final image.
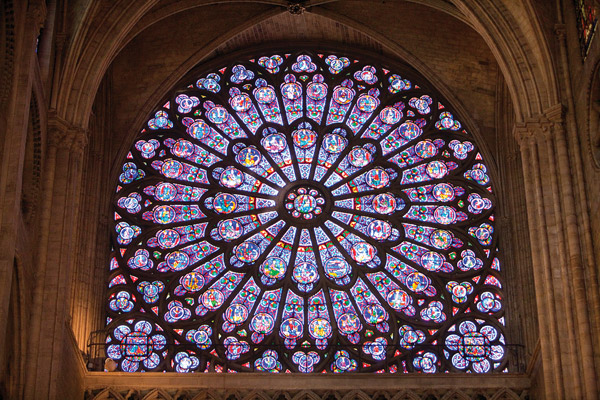
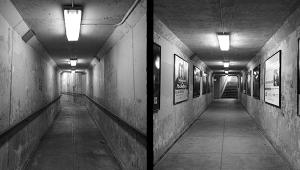
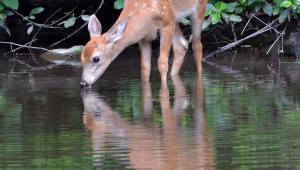
Photos (#9, #10, #11, and #12) are other HDR examples that exhibit the tremendous dynamic range similar to what our eyes can see. And that’s a revolutionary change in how we can now make images never before possible.


![]()
Get the Latest Photo Tips, News & Reviews from Shutterbug!
| Camera Reviews Other Reviews | Mobile Reviews Photography Reviews Columns | News | Features | How-To | Resources |
 © 2025 Shutterbug
AVTech Media Americas Inc., USA
All rights reserved