- REVIEWS
Camera Reviews 
More Reviews Mobile Reviews Photography Reviews - GALLERIES
- VIDEOS
- BUYER'S GUIDES
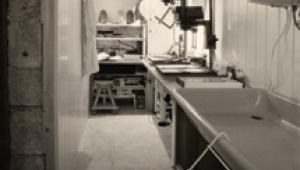
The Darkroom
From Color Prints To Color Copy Negatives
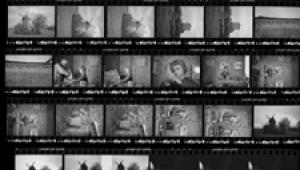
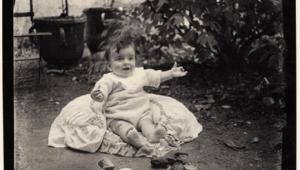
| Sooner or later you will want to make a copy of a color print. If you have the negative, it's an easy task. If you own a digital imaging darkroom (computer, scanner, and printer) it is still an easy task. However, if you have to do it the old-fashioned way, here are the instructions for doing the job in a conventional darkroom. Although it might appear to be a simple matter of loading your camera with a nice low contrast film and taking a picture of the original, I promise you, it is not that simple. The main problem will be a marked increase in the contrast of the image. You will lose some detail in both the highlights and the shadows. It won't be a pretty picture. The correct way is to use a technique that will lower the contrast of the copy film in order to preserve the tone values in both ends of the scale--the highlights and the shadows. The easiest technique which renders excellent results is to use a method of very accurately flashing the film. Since the amount of fog you want to impart to the film is down around a fraction of an f/stop, it isn't a matter of simply stopping the lens down a bit or stepping up the shutter speed. Instead, I use Kodak Neutral Density filters to control the fogging exposure. In order to be sure that I don't destroy highlight detail when I apply the fog, I intentionally overexpose the film for the basic exposure. Here's how it works. For lighting, I use two electronic flash units and shoot-through white umbrellas. I place the lights at about a 45° angle to the original image. I do not like to use quartz-halogen or other tungsten lights for color copy work. Their color temperature drifts too much throughout their life for my tastes. Although it probably doesn't matter much when shooting color negative film. Still, the 5000°K color temperature of the electronic flash units is a nice match for the daylight-balanced Vericolor film. By moving the lights further from the original you will tend to improve the uniformity of the illumination and eliminate hot spots. In any event, you will need a good light meter that will allow you to measure the intensity of the lighting. Depending on the size of the original, be sure to take enough readings to assure yourself that the illumination level is within 1/5 of an f/stop throughout the area of the original. In order to have a built-in color-balancing tool to assist when printing the color negative, I always place a gray step tablet next to the original in such a way that I can use it to help establish color balance. I can also easily crop it out of the final production print. Choose a step tablet that is close to the overall size of the original picture. ND Filter Preparation Try using these neutral density
filter settings as a starting point and modify them as your experience
indicates. Since Kodak doesn't make filters in those exact values, you will have to combine two different ones in order to make up the desired value. After combining the proper filters, they should be permanently placed in a metal filter holder. This will help to keep them from receiving excessively rough handling. Once mounted, the new sandwich should be correctly labeled and stored in the little envelope that the frame comes in. The new filter sandwich should last for the rest of your life if you handle it carefully. Original Preparation Do not attempt to clean the original unless you are very sure of what you are doing. With old, fiber-based photographs, film cleaners will frequently seep into the tiny emulsion cracks and cause a discoloration that will be permanent. Lighting Adjustments If you are using a right-angle sensing accessory for your light meter, be sure to use the proper correction factor. Gossen Ultra-Pro meters require a correction factor of 3.0 when used with their right-angle accessory. Adjust the lights so that illumination measurements taken at the surface of the original are within +/- 1/5 f/stops. Be sure to measure all four corners and the center. Moving the lights back will tend to reduce hot spots and improve uniformity. Using diffusion softboxes or umbrellas will also improve uniformity of illumination. Be sure to turn off all room lights to eliminate stray reflections. Windows can also produce this effect so they may need to be covered. Whenever possible, remove any glass that might be covering the original. If you must shoot through the glass, it will be necessary to drape the front of the camera in black (cloth or tape) to eliminate reflections. Also, be careful of the camera stand that might be reflecting in the glass. If the original has texture to its surface (such as an oil painting), you may need to adjust the angle of the lights very carefully, and/or use polarization over the lens and/or lights to eliminate the spectral reflections. Alignment Adjustment If you are copying an original that is hanging on a wall, it will hang on a slight angle that might be different from the angle of the wall. In any event, it needs to be checked against the angle of the film plane in the camera. The proper tool for this is called an "inclinometer." You can get such a tool from Edmund Scientific Co., 101 E Glouchester Pike, Barrington, NJ 08007; (856) 573-6879. Alternately, you might be able to use some type of carpenter's leveling tool from your local hardware store. Gray Scale Use By later observing in the copy print the very lightest and the very darkest steps of the gray scale you will be able to know if you have captured the image at the optimum contrast level. If you have shot bracketed fog levels you will be able to select the exposure that produced the best contrast range. The gray scale also helps to establish color balance when you are ready to print the copy negative. By observing the lightest gray steps in the copy test print, you will be able to detect the presence of any improper color balance and correct the printing filter pack. Of course, you should crop out the gray scale in the final copy print. Making The Exposures If you are in doubt about the exact contrast level of the original, and therefore not sure of the exact ND filter to use, you might want to make several bracketed shots using different ND filters to produce different fog levels. Do not bracket the basic image exposure established by using ISO 12 for a meter reading. Some technicians like to throw the camera slightly out of focus during the fog exposure to ensure that they will not be taking a picture of the texture in the surface of the white matte board. If the white matte board is perfectly smooth, this shouldn't be necessary. Process the film in a standard C-41 process and print in a normal manner. It is likely that such a copy negative will require slightly different enlarger filter settings than a "regular" negative since it will be very overexposed. If you'd like more help with making color negatives from original color prints, or if you'd like information on working with the new, digital imaging, darkroom tools, you can send me your questions via e-mail at: editorial@shutterbug.net or write to me care of Shutterbug. Kodak makes several different
gray step tablets: They also make Neutral Density
filters in several different physical sizes and density strengths. Here
is a list of the ones you will need: Kodak Metal Filter Frame: |


![]()
Get the Latest Photo Tips, News & Reviews from Shutterbug!
| Camera Reviews Other Reviews | Mobile Reviews Photography Reviews Columns | News | Features | How-To | Resources |
 © 2026 Shutterbug
AVTech Media Americas Inc., USA
All rights reserved