- REVIEWS
Camera Reviews 
More Reviews Mobile Reviews Photography Reviews - GALLERIES
- VIDEOS
- BUYER'S GUIDES
Corel’s PHOTO-PAINT X4; A Windows Photo Editor
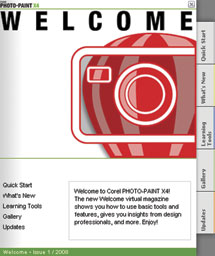
In just about any discussion of photo editors for Windows, Corel’s PHOTO-PAINT is widely considered to be the high-end competition to Adobe’s Photoshop. Earlier this year, Corel released Version X4 (Version 14) of PHOTO-PAINT. This version ships with numerous new features. The most obvious change to PHOTO-PAINT is the addition of the Welcome Screen that displays when opening the program (#1). The Welcome Screen contains tabs for Quick Start (opening and acquiring images), What’s New, Learning Tools, a Gallery, and downloading Updates.
 |
PHOTO-PAINT X4 also has an option that makes it easy for you to find new features (#2). By clicking Help>Highlight What’s New>Since Version, you can add an orange highlight to features that have been added or improved upon since the version you selected (you can go as far back as Version 9).
 |
|
|
In addition, PHOTO-PAINT X4 also has a new “Straighten Image” feature (#3), which can be particularly useful when working with scanned images, since originals are often moved slightly when closing the cover of the scanner. The Straighten Image tool uses a series of grids; you can customize both the gaps in the grids, and the color of the grid lines, to suit your photo. Then, the image can simply be rotated into position.
 |
|
|
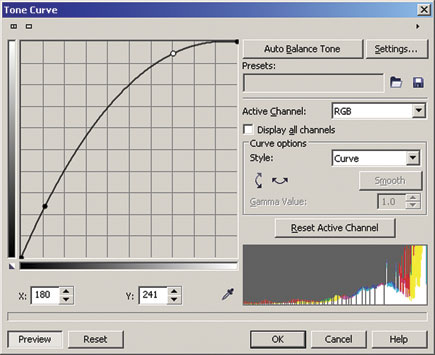
Another new PHOTO-PAINT X4 feature is added histograms in several adjustment filters. The histograms provide real-time feedback as you make changes and watch the results in the histogram display and/or on a preview image. In addition to a histogram, the Tone Curve filter also has an improved interface which makes it easy to select and manipulate nodes when making precise Tone Curve adjustments (#4).
 |
|
|
Other new features include improvements to the Camera Raw Lab, compatibility with the Photoshop CS3 format, and enhancements for Microsoft’s Vista.
 |
|
|
The Corel PHOTO-PAINT X4 Interface
The PHOTO-PAINT interface is somewhat similar to that of other Windows programs, giving it a familiar look and feel (#5). There’s a menu bar at the top of the screen, beneath that there’s a standard toolbar and then a properties toolbar, with controls that change according to the tools that you’re currently using. A toolbox is located on the far left side of the screen and an RGB color palette on the far right. Next to the color palette are “Dockers,” a concept unique to Corel products.
Dockers are a series of panels that display and control data such as Channels, Objects (similar to Layers), Undo/Redo, Macros (similar to Actions), and Brush Settings (#6). Personally, I find the Dockers system much better organized than the various informational panels in Photoshop. Also, all of the Dockers can be closed with a single click, making it much easier to move them out of the way when you’re working with photos that take up the entire work space.
 |
|
|
Further, just about everything, right down to each menu item and every toolbar button, can be customized to your liking. Menu items and toolbar buttons can be copied, moved, and even the toolbar buttons’ icons can be changed. If you like to take total control over your work space, with frequently used features just a single click away, this is a system you’ll appreciate.
 |
|
|
The only real flaw I see in the interface is in the status bar at the bottom of the screen. For years (I first remember this issue coming up in 2000, although it likely arose even earlier), many end users have asked Corel to add an informational display, with selection dimensions, to the status bar. To this day, Corel has ignored this request.
Working With Selections (Masks)
Corel’s PHOTO-PAINT X4 has a variety of tools for creating and editing selections (which it also referred to as masks and editable areas). The tools are similar to those found in Photoshop, but the process of modifying the edges of a mask, something that’s very often required when working with photos, is more straightforward in PHOTO-PAINT.
There’s no need to exit Mask mode as there is in Photoshop; simply open the Mask Outline Menu, which has nine options: Feather, Grow, Similar, Border, Remove Holes, Smooth, Threshold, Expand, and Reduce. Many of these options open an additional dialog box that enables even more control over the feature. Compare this to Photoshop CS3 and its Refine Edge dialog box, which has only five options, and no additional dialog boxes for fine-tuning your choices.
|
| |||||||||


![]()
Get the Latest Photo Tips, News & Reviews from Shutterbug!
| Camera Reviews Other Reviews | Mobile Reviews Photography Reviews Columns | News | Features | How-To | Resources |
 © 2026 Shutterbug
AVTech Media Americas Inc., USA
All rights reserved