- REVIEWS
Camera Reviews 
More Reviews Mobile Reviews Photography Reviews - GALLERIES
- VIDEOS
- BUYER'S GUIDES
YES! Lightroom Has a MIDTONE SLIDER if You Know Where to Look (VIDEO)
Photographers often wonder why Lightroom lacks a Midtone Slider for quickly and easily adjusting those specific tones. Well, as you’ll see in the tutorial below, it’s been there all along—you just didn’t know where to look.
If you edit images in Lightroom you’re undoubtedly familiar with the six common sliders for controlling exposure, contrast, highlights, shadows, whites and blacks. By using these six sliders you can usually get a pretty good edit.
But what if you have an image, like those in this episode from instructor Anthony Morganti, where this midtones really need some work? As Morganti says, “If I could specifically adjust the midtones, exclusive of highlights and shadows, I could really make this image POP!”
Morganti acknowledges that midtones can be adjusted with the Tone Curve, but he says this approach can be more difficult (yielding less precise results) than using the “hidden“ Midtone slider he reveals. In less than five minutes he demonstrates how to find this effective tool, and how quick and easy it is to use.
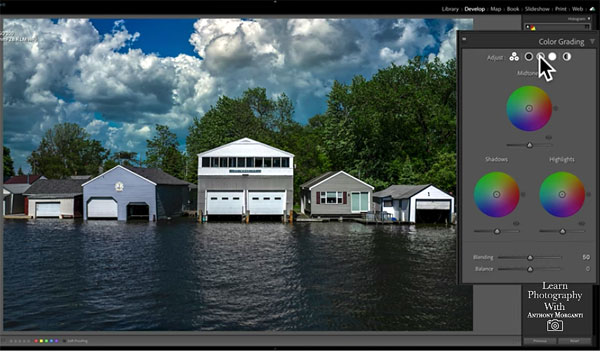
As you’ll see, Adobe gave the Midtone Slider a different name, and buried it within Lightroom’s Color Gradient Panel—a place where you typically go to add color to an image. But as Morganti explains, you can also use this slider to simply adjust tones without adding any color at all.
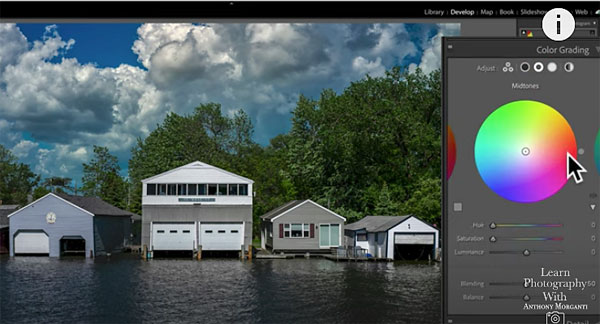
Morganti does this by clicking on an icon that brings up the Midtone Color Gradient Circle. But instead of clicking on a color to add to his image, he leaves the circle untouched. Instead he moves down to the Luminance Slider, which dramatically adjusts the brightness of the midtones as it’s moved back and forth.
In other words, just think of the Luminance option as a Midtone Slider, the next time you want to adjust tones without affecting colors!
You can find more easy tricks like this on Morganti’s YouTube channel and in an earlier tutorial we posted, explaining a simple way to sharpen photos.


![]()
Get the Latest Photo Tips, News & Reviews from Shutterbug!
| Camera Reviews Other Reviews | Mobile Reviews Photography Reviews Columns | News | Features | How-To | Resources |
 © 2026 Shutterbug
AVTech Media Americas Inc., USA
All rights reserved