- REVIEWS
Camera Reviews 
More Reviews Mobile Reviews Photography Reviews - GALLERIES
- VIDEOS
- BUYER'S GUIDES
The Soft Touch: The Best Software for Wedding, Portrait, and Boudoir Photos
The following is something people tell me when I suggest using a plug-in or specialized software for enhancing or retouching portraits: “But you can do that in Photoshop!” That’s because when it comes to software for wedding, portrait, and boudoir photographs, everyone has an opinion—sometimes a strong one—even if they’re wrong.
When Photoshop introduced the Healing Brush tool in Version 7, a former colleague was aghast that Adobe was making retouching “too easy” and hated that “no skill was needed” for enhancing portraits using this tool. I think that using the right tool for enhancing and retouching portraits is no different than choosing the right lens to make that same photograph.
So, what’s my take of the best software for wedding, portrait, and boudoir photos? I’ve gathered some of my favorites for your approval, in hopes that you can use them to make your portraits and their subjects look better.
Bananas for the 800-Pound Gorilla
Although I don’t agree with Adobe’s approach to distributing Photoshop, any version shipped after 2002, if it runs on your computer, is suitable for retouching and enhancing portraits. No matter which version you use, Photoshop remains the 800-pound gorilla for portrait retouching and enhancing.
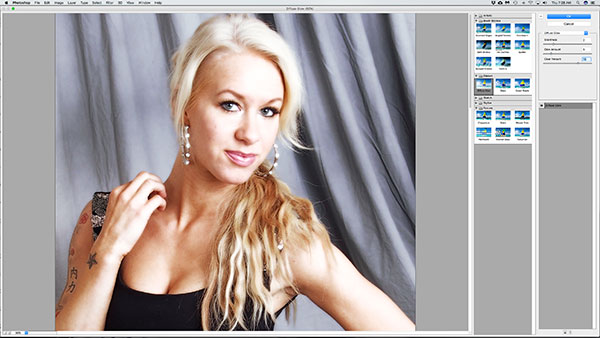
While the program’s Clone and Healing Brushes are my initial retouching go-to tools, Photoshop has so many options, including monochrome conversion and artistic filters. My friend Cliff Lawson, one of the finest high school senior photographers in the Rocky Mountain West, uses Adjustment Layers to create dramatic and award-winning images. I like using the Diffuse Glow filter in the Filter Gallery to render an image as though it were shot using a traditional soft focus or diffusion filter.
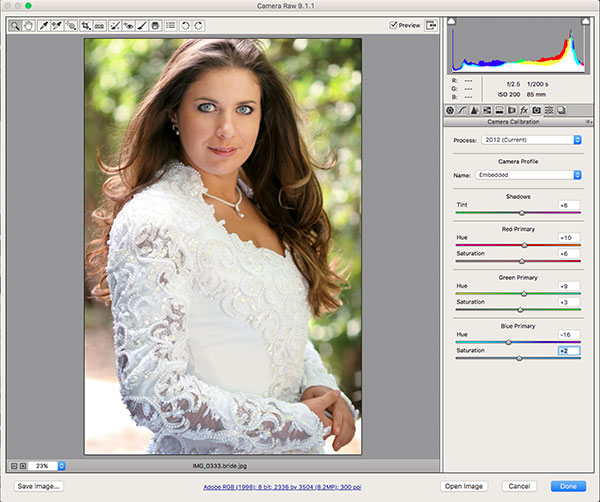
For mundane yet important retouching techniques, such as removing redness caused by sunburn, you can add a Hue/Saturation Layer to adjust and remove the color cast. Another way to accomplish a similar correction is to use the Camera Calibration controls found in Adobe Camera Raw. Of course, one of the most important aspects of Photoshop is its ability to accept compatible plug-ins, which I’ll beat to death later.
Lightroom is a 400-pound gorilla and has its own lease-for-life option along with legions of happy users. I’ve used Version 5 in the past, just not so much anymore, so saying it’s a favorite would be a lie.
Who’s It For: Any portrait photographer who’s not an Adobe hater (and the company gives you plenty of reasons to hate them) and wants to get the best out of their portrait image files.
Why I Like It: I’m happily using Photoshop CS6; it fits my needs without extracting more money out of a piggy bank that’s already too thin.

Useful Retouching Plug-ins
If you’re looking for easy-to-use retouching software, then take a look at Imagenomic’s Portraiture plug-in ($199). It smooths skin-removing blemishes while preserving details such as a subject’s hair, eyebrows, and eyelashes.
You can use the plug-in’s eight presets that are found in a pop-up menu in the upper left-hand corner of the dialog box or a set of sliders to achieve the look you want and then save these settings as custom presets, making them part of your workflow. No matter what approach you use, it’s easy to over retouch a portrait and produce plastic-looking skin.
Tip: Select the New Layer option from the Layers menu and after applying vary the plug-in layer’s opacity in Photoshop, allowing some skin texture to show through, to create a natural yet retouched look. The latest version, Portraiture 3, is twice as fast as the previous version and is optimized to handle the large image files made with high-megapixel cameras, like the 42.4MP Sony A7R III (see our review here.). This version also has a new user interface. You won’t see that here, because Portraiture 3 is only compatible with Photoshop CC. Ka-ching.

Who’s It For: While not inexpensive, Portraiture is useful for any photographer who shoots lots of portraits. Note: Portraiture 3 is a free upgrade to Portraiture 2 users.
Why I Like It: I use Portraiture (don’t miss my tip) on every portrait that I make because it’s incredibly competent at its job.
Another way to retouch a portrait is to use a Photoshop-compatible plug-in such as the Dynamic Skin Softener filter that’s part of the Color Efex Pro package of filters. Using the software’s built-in color picker, you can select a specific skin tone from your original image so softening is only applied to specific areas while preserving important details such as the subject’s hair. In addition to color selected by the skin color picker, a Color Reach slider lets you expand the range of colors affected by the filter.
Tip: The higher the value of this slider, the more colors similar to the selected color are affected. A Soften Strength slider is used to control the amount of overall softening that’s applied to the colors set by your other choices.
Who’s It For: Every portrait photographer who retouches their portraits, although I know not everybody does. If you use my previous tip and apply Skin Softener to a separate layer, you can apply Dynamic Skin Softener in small amounts to create a softened look that doesn’t look like it was softened.
Why I Like It: It’s easy to use and produces effects reminding me of the classic Zeiss Softar lens filters.
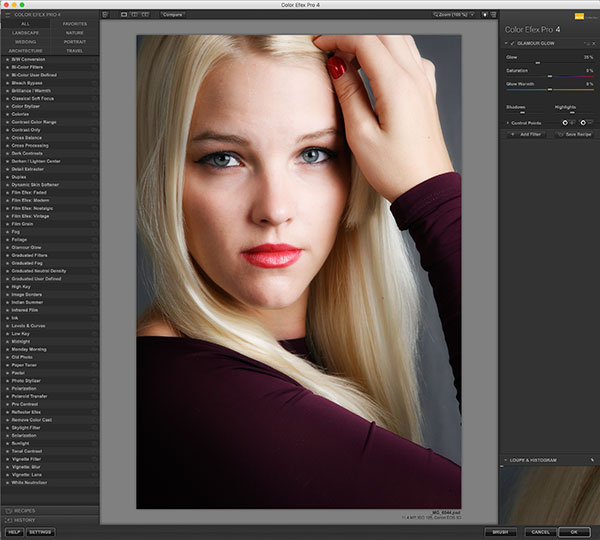
As an alternative to the Dynamic Skin Softener, I’ll often use the Glamour Glow filter that’s part of Color Efex Pro, varying the amount of Glow but also changing the effect layer’s opacity in Photoshop from 20 to 100%, depending on the image and its physical size.
Tip: Big files can take larger amounts of softness. Glamour Glow is more controllable than Photoshop’s Diffuse Glow filter and also has sliders for color saturation and glow warmth. DxO acquired the Nik Collection from Google and has promised to continue development. As we go to press, the software is available for free through DxO’s website (nikcollection.dxo.com) and includes seven wonderfully useful plug-ins for Photoshop and Lightroom.

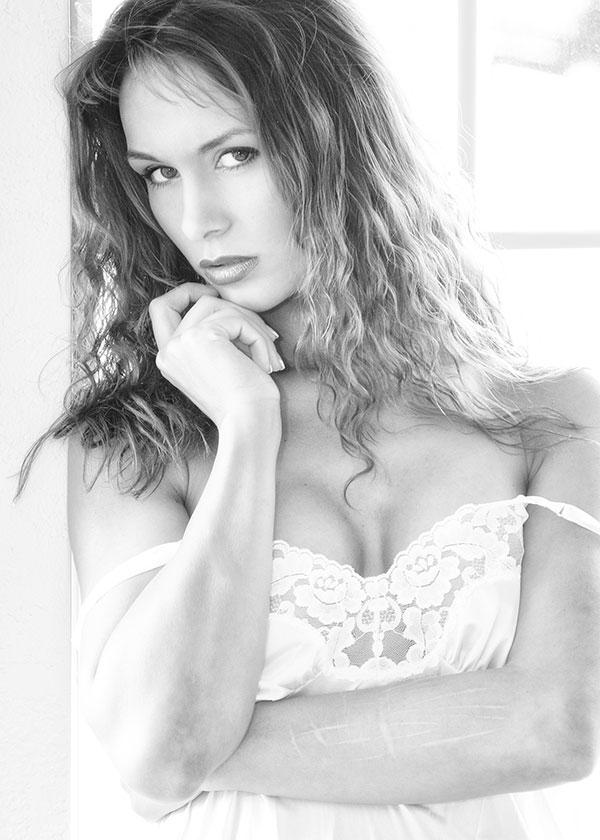
Who’s It For: Portrait photographers who photograph adults, especially those specialists in glamour and boudoir photography.
Why I Like It: The effect it produces is spectacular, especially for glamour and boudoir images. Let’s hope DxO makes it compatible with all recent versions of Photoshop, not just CC.
Retouching Tools and More
If you’re new to retouching portraits, Anthropics Technology’s PortraitPro ($79, online discounts may apply) is more than just a retouching application. It uses what amounts to a built-in tutorial that allows you to select specific parts of a subject’s face, telling the software the face’s shape and orientation before doing overall retouching and dropping you onto a screen with sliders that let you adjust the final suggested retouching to suit your style.
New features with Version 17 include a Vignette tool and Bronzer makeup styles for sculpting or softening facial features. A new Snapshots feature emulates Photoshop’s History menu and lets you save your progress so you can try something different and revert back to a previous enhancement if you change your mind. The latest version also lets you edit your subject and the background without leaving the program. You can choose from four different styles, including a New Image option for inserting your own backdrop. PortraitPro 17 runs on Windows 10, 8, 7, Vista, XP, or Mac OS X 10.7 or later.

Who’s It For: Retouching newbies or high-volume studios that want to train an associate to handle all of the operation’s portraits.
Why I Like It: It’s fun to use and you can create custom presets using your favorite tools, allowing you to edit images with a few clicks.
Wild Cards
Topaz Labs makes all kinds of photography software but two Photoshop-compatible plug-ins—Adjust and Clarity—stand out as special tools for working with portraits. Cliff Lawson uses Adjust ($49) to bring out details in a subject’s clothing but clearly it does more than that. For example, Adjust’s Adaptive Exposure lets you balance your image’s tonal values, enhancing local contrast and dynamic range. And you can control whether Adjust processes detail and exposure together or separately.
Clarity has been renamed to Clarity in Studio ($49) and photographers I know who use it tend to apply it to portraits of men. Clarity enhances contrast using technology to eliminate artifacts and halos while letting you manipulate the image’s micro, midrange, and overall contrast without noise, while maintaining natural-looking tonality. There’s also an HSL tool for Hue, Saturation, and Luminosity adjustments.

Tip: It’s easy to overdo either of these tools, so apply any effects to a new layer, then use Photoshop’s layer opacity level and Eraser tools to moderate to taste. As a final tip, even if you plan on converting the portrait to monochrome, no matter what software you use, do all of your retouching to the color file before conversion. I always start with a Raw file.
Who’s It For: Professionals who shoot portraits and want to make their images stand out from the crowd. If you like adding textures to your portraits, don’t miss Topaz’s Texture Effects ($69).
Why I Like It: I like Topaz’s entire collection of plug-ins because they’re relatively affordable, work great, and have intuitive interfaces.
While neither Joe nor Mary Farace has photographed an actual wedding in a long while, Joe continues to shoot portraits along with boudoir photography. To do this he uses cameras and lenses from his Canon EOS system as well as Micro Four Thirds system mirrorless camera bodies and lenses from both Olympus and Panasonic. You can view some images and learn more about the specific gear he uses on portraits via his blogs, joefaraceblogs.com and mirrorlessphototips.com.


![]()
Get the Latest Photo Tips, News & Reviews from Shutterbug!
| Camera Reviews Other Reviews | Mobile Reviews Photography Reviews Columns | News | Features | How-To | Resources |
 © 2026 Shutterbug
AVTech Media Americas Inc., USA
All rights reserved