- REVIEWS
Camera Reviews 
More Reviews Mobile Reviews Photography Reviews - GALLERIES
- VIDEOS
- BUYER'S GUIDES
Sharpening Simplified; The High Pass Technique
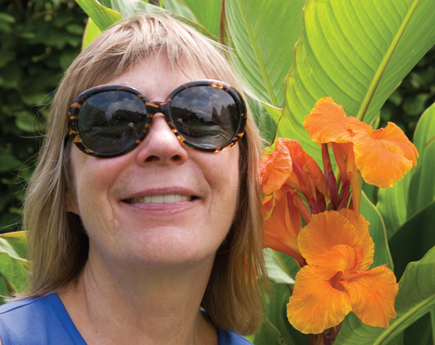
No matter how careful you are, soft happens. Your subject, whether a femme
fatale or a flower, may move. The light level may be low so you have to shoot
at a slow shutter speed, and camera movement blurs the photo slightly. Or you
may be photographing under bright overcast conditions outdoors--plenty
of light for most situations--but you're shooting soccer, skating,
baseball, or some other fast paced sport. With a long lens, you set a high shutter
speed to stop the action and prevent lens blur, but sometimes the best frame
is slightly unsharp.
Unsharpness isn't limited to shooting scenarios. You can get it on your
digital desktop, as well. Whenever you scan film or a print, some softness is
introduced. In Photoshop or Elements, if you use the Transform tool to correct
perspective or otherwise alter your photo, some softening is likely to appear
in the transformed areas. What remedies do you have?
While Adobe Photoshop has a plethora of sharpening choices under the Filter>Sharpen
menu, there are only two that most pros rely on--Unsharp Mask and (in CS2
and above) Smart Sharpen. Both of these can require some experimentation, time,
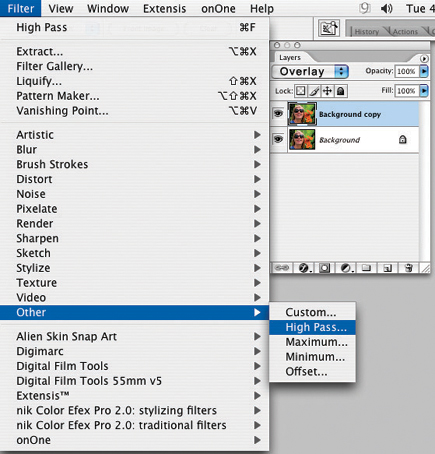
expertise, and patience. High Pass sharpening, on the other hand, is available
in earlier versions of Photoshop as well, and can be accomplished fairly quickly
and easily. It is a "secret" technique used by professional retouchers
to accomplish fine sharpening and is especially effective with images that contain
large areas of smooth tones such as skin, sky and building surfaces. It can
work well with images that have lots of edges, such as architecture or automobiles.
Two features distinguish High Pass sharpening. First, it does not create as
many artifacts as other sharpening methods. These manifest themselves as an
overall grittiness, especially visible in large areas of smooth tones. This
grainy effect is common when Unsharp Mask sharpening is cranked up. Secondly,
the High Pass approach is totally non-destructive and doesn't change an
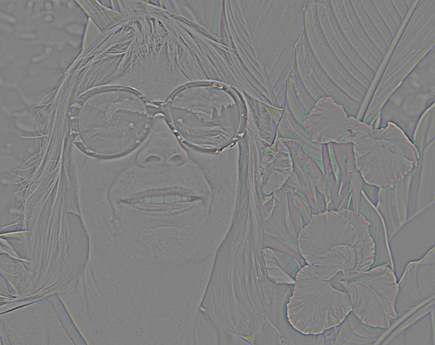
iota of your original image pixels. It works by identifying edges within your
photo and then increasing the contrast between the sides of the edge. More pronounced
edges translate into greater perceived sharpness.
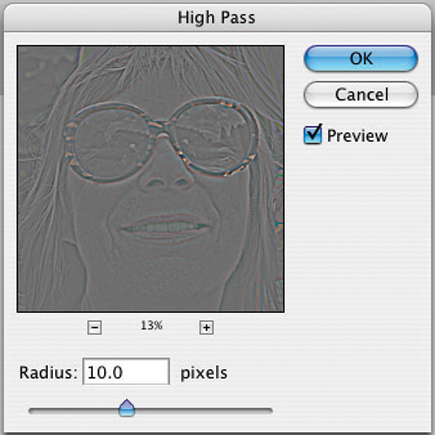
Fine Tuning Controls
You have several options to fine-tune the sharpening effect. First, you can
see how choosing a different radius setting in the High Pass dialog box affects
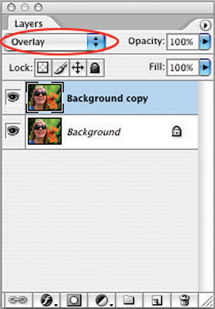
your image. Second, you can change the Blend mode. Soft light yields a subtle
effect. The sharpening (and contrast) become progressively more pronounced when
you shift to these Blend modes: Overlay, then Hard Light, then Vivid Light.
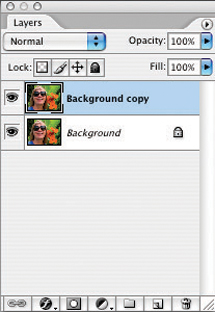
To toggle between before and after views, simply click on the eye icon of the
copy layer in the Layers palette.
A third way to vary the sharpening effect is to lessen it by lowering the opacity
slider amount for the duplicate layer. You'll find the opacity slider
at the upper right of the Layers palette. Finally, a trick some professional
retouchers use is to apply a small amount of High Pass sharpening--say,
a radius of 3 or less--and then duplicate the High Pass layer one or more
times.
High Pass Sharpening, Step By Step |
|
 |
|
|
|
 |
|
|
|
 |
|
|
|
 |
|
|
|
 |
|
|
|
 |
|
|
|
 |
|
|
|
 |
|
|


![]()
Get the Latest Photo Tips, News & Reviews from Shutterbug!
| Camera Reviews Other Reviews | Mobile Reviews Photography Reviews Columns | News | Features | How-To | Resources |
 © 2026 Shutterbug
AVTech Media Americas Inc., USA
All rights reserved