- REVIEWS
Camera Reviews 
More Reviews Mobile Reviews Photography Reviews - GALLERIES
- VIDEOS
- BUYER'S GUIDES
Sea Shells: Translucent Wonders
All Photos © Jim Zuckerman
The best light source is a flash, although you could do it with only a photoflood or a regular household light bulb or even daylight on a glass top table. The advantage of the flash is that it puts out a great deal of light that’s sometimes needed to fully illuminate the shell. In this section I’ll cover the shoot using flash, but don’t think you always need to do it that way.
The Set Up
All of the pictures in this section were done with a portable flash, in my case the Canon 580 EX (www.usa.canon.com). Because the flash had to be placed behind the shell such that it was invisible to the lens, I had to use a wireless trigger that works on a radio signal rather than an infrared line-of-sight type system. The PocketWizard (www.pocketwizard.com) was the best tool for the job because, in spite of the fact that the shell blocked the transceiver (attached to the camera’s hotshoe) from “seeing” the flash, the flash fired without any problems.
I placed the flash just a few inches behind the shell. I wanted complete depth of field, so all of the images here were taken between f/20 and f/32. I set the camera to Manual Exposure mode and the flash to ETTL. I chose the shutter speed to be the sync speed, i.e. 1/250 or slower. The exposure was tricky; the easiest way to determine the correct amount of light was to study the LCD monitor after the flash fired and then make any necessary adjustments. This is akin to using a Polaroid test print like studio photographers did in the past, and it works beautifully.
In order to vary the exposure to get what I wanted, I changed the distance from the flash to the shell. By simply moving the flash further away—perhaps 2 or 3”—the light intensity decreased. If the pictures were too dark, I moved the flash a few inches closer. In this way, it was easy to obtain a perfect exposure.
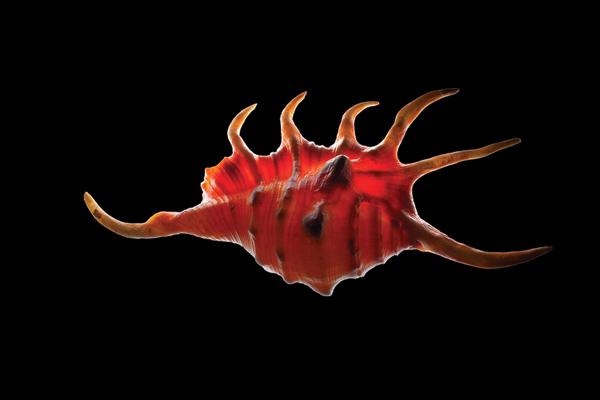
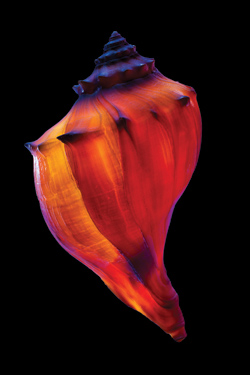
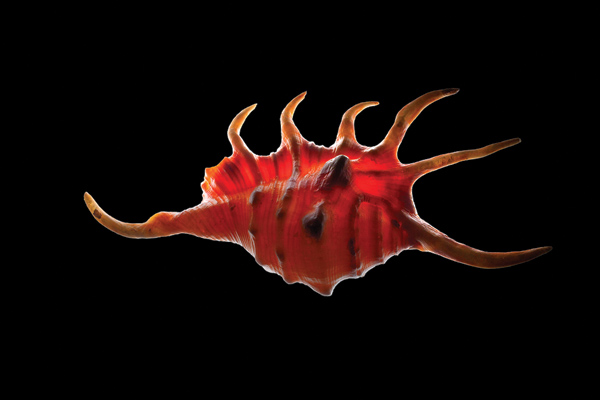
Make sure the shell blocks the flash head (or main light source) or else you may get unwanted flare or a distracting hot spot. Having said that, sometimes an edge highlight is very attractive. For example, in (#2) the light edge of the shell provides a nice separation from the background (notice that the flash head itself is not visible). In (#3) the edge lighting is much more subtle. By moving the flash head in tiny amounts with respect to the shell, you can create these lighting effects.

Black As A Background
To dramatize the glowing shell, I wanted a black background. There are two ways to do this. You can use Photoshop or other image-editing programs to select the background once you’ve taken the picture, and then with Edit>Fill you can simply drop in solid black. Alternatively, you can use black fabric as the background. I prefer velvet because it absorbs light very well. You don’t want a dark gray color as the backdrop, and you certainly don’t want to see wrinkles in the fabric. Velvet is the best way to go.
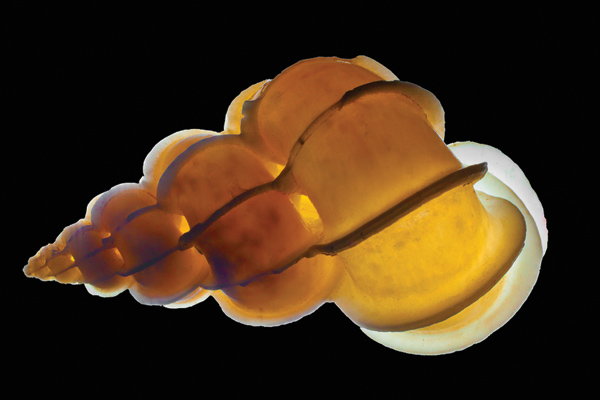
Put the velvet on a piece of glass and cut a small hole in the fabric. Place the shell over the hole, and then the flash should be positioned beneath the hole. When you shoot down on the shell, the flash provides the strong backlighting and the surrounding area adjacent to the shell remains black. You will have to experiment with the size of the hole, but this method works very well. The shells in (#4) and (#5) were photographed using this technique.


![]()
Get the Latest Photo Tips, News & Reviews from Shutterbug!
| Camera Reviews Other Reviews | Mobile Reviews Photography Reviews Columns | News | Features | How-To | Resources |
 © 2025 Shutterbug
AVTech Media Americas Inc., USA
All rights reserved