- REVIEWS
Camera Reviews 
More Reviews Mobile Reviews Photography Reviews - GALLERIES
- VIDEOS
- BUYER'S GUIDES
Samsung NX500 Mirrorless Camera Review
I didn’t realize how much I could appreciate a mirrorless CSC (Compact System Camera) till, after working with the Samsung NX500 for several days, I picked up my Nikon D610 DSLR and realized I was carrying a brick in my hands. Don’t get me wrong, though. I still love my D610 and wouldn’t trade it in for anything (not just yet), but the new NX500 felt like a feather around my neck and in my hands. Even when I added the relatively heavy 50-150mm S-series lens, the combo still left me feeling as if I were working with a lyre, not a harp. Admittedly, like the lyre, it’s not as full-bodied an instrument, but the NX500 still plays a sweet tune.
Features & Build
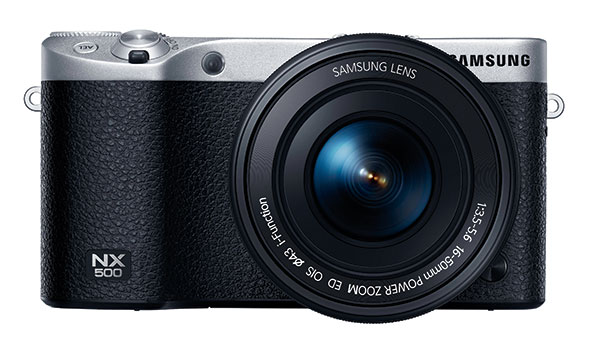
The 28MP BSI APS-C (cropped) CMOS sensor NX500 is essentially a scaled-down NX1, but not by much. Except when it comes to price. The NX500 comes in at about half the price of Samsung’s flagship NX1, under $800, including the 16-50mm f/3.5-5.6 Power Zoom ED OIS kit lens. That price also includes a tiny clip-on flash (there’s no built-in flash).
The only tangible difference I felt in the NX500, other than size and heft, was the lack of the electronic viewfinder (EVF) that I favored on the NX1. As someone who normally eschews LCD viewfinders, this was almost a deal-breaker from the get-go, but I made do when first introduced to the NX1’s little sibling and eventually not only got the hang of it, but actually found the monitor advantageous on occasion and found myself taking to it more and more. The Super AMOLED (Active Matrix Organic Light-Emitting Diode) display provided a bright, contrasty screen that only met its match when confronted by a harsh sun over open water, when whale watching off the Hawaiian coast.

The camera was easy to handhold and work with, even with the 50-150mm f/2.8 S-series lens attached (with tripod mount removed)—a beautiful lens, by the way. Given that I’m more used to manual zooming lenses, I also found the 16-50mm f/2-2.8 S-series offered a distinct advantage over the much slower kit lens. You can’t really home in on a focal length setting with the kit lens, since power zooming seems to jump from point to point—and good luck returning to the exact focal length as before, unless it’s at either end of the zoom range. And when you shut down the camera, or it goes to sleep, the lens returns to its default 16mm position, which for me proves counterproductive.
Still, the kit lens does offer OIS (Optical Image Stabilization), which also applies to the S-series. OIS on the power zoom worked fairly reliably down to 2 stops from the optimum handheld shutter speed (as defined by the reciprocal focal length rule: 1/Focal Length). You could stretch it to 3 stops if you’re really careful. Keep in mind: by viewing/focusing on the monitor, you’re not holding the camera in a way that promotes steady shooting—you’d need an optical or electronic viewfinder for that. OIS works fairly well with videos shot handheld, but you still get that jittery feeling of someone stalking you in the woods when shooting while walking with the camera.
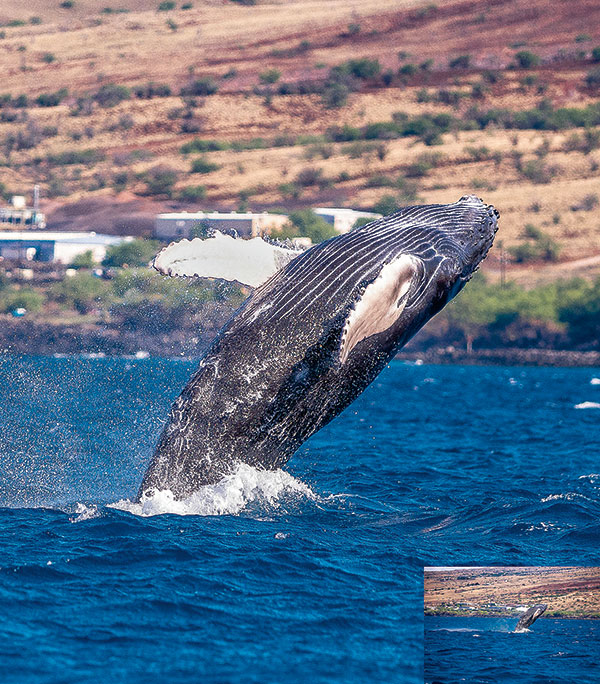
You never know when a whale will breach, so you try different tactics, hoping that one will work. Given that we were constantly running from starboard to port and bow to stern for each whale sighting, I didn’t realize till hours later that I had this shot. The inset shows the uncropped image. Technical info: 50-150mm S-series lens at 150mm (= 225mm, 35mm equivalent), shutter priority, ISO 400, f/2.8, 1/3200 second (cropped).
All Photos © Jack Neubart
Tools & Functions
The multi-angle, three-inch, capacitive touchscreen Super AMOLED display on the back of the NX500 is the main conduit for doing practically anything. Many of the camera’s primary functions are accessible here. In fact, tapping Fn on the display is the same as hitting the Fn (Function) button, providing access to numerous settings. Some of these same key settings, namely ISO, shutter speed, f/stop, exposure override, and white balance, are also accessible directly by hitting the iFn button on the lens. It may be redundant, but it does offer a convenient methodology for working with the camera. There is also a Menu screen icon, or use the Menu button to the right of the display for numerous other settings.
Other buttons to the right of the screen give you access to: drive functions (single, continuous normal, continuous high to 9 fps, burst—defaults to JPEG for up to 30 fps, variable self-timer, and various auto-bracketing functions); ISO (Auto, 100 to 25,600); and AF (choice of single AF, continuous AF, active AF—automatically detects movement and shifts from single to continuous, or manual focus). Additional controls found on the rear or on top include video record, exposure override (+/-), playback, mobile (for wireless operation with a compatible device with Samsung Camera Manager installed), and delete. The delete button doubles as a custom function, which, among other things, can be used as a depth-of-field (DOF) preview.

To capture the rich color of the sunset, I set exposure override on the NX500 to -1 EV, and then made further adjustments in Adobe Lightroom. OIS came in handy, given that I was shooting with the 50-150mm S-series maxed out (= 225mm, 35mm equivalent) at 1/100 second. Technical info: ISO 400, f/8.

I saw this Pacific golden plover (kolea, in Hawaiian) in the garden at the Hawaiian resort where we were staying just as I was about to have lunch, so I grabbed the NX500 with the 50-150mm S-series lens attached. The pond provided a buffer zone, so the bird was not frightened away. Even at 150mm, the focal length was not enough to isolate the bird, but with a 28MP capture, I had plenty of real estate for cropping in Lightroom. Technical info: ISO 100, f/4.5, 1/400 second.
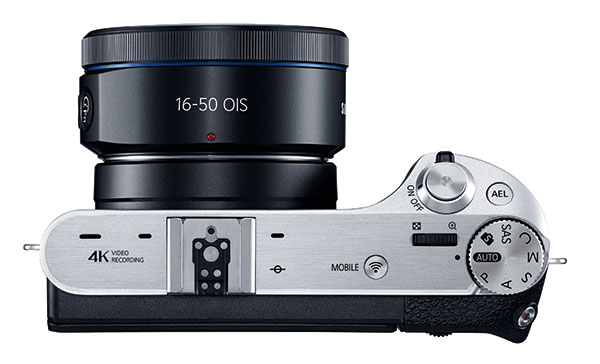
You’ll also find two rotary dials on the camera to scroll through values and settings and the big daddy of them all, the shooting mode dial. In addition to the standard modes, the mode dial offers Smart (scene) modes, which include panorama (scene modes are captured as JPEGs), and Samsung Auto Shot, which is used to help you capture fast-breaking action (also as JPEGs).
And speaking of the flip side, when Auto Self Shot (selfie) is activated in the Menu and with the display flipped up, the camera employs face detection (but does not always succeed in this endeavor) and a two-second self-timer to capture a JPEG self-portrait. (Caution: Do not flip the display up all the way when using a flash seated in the hot shoe—even the tiny flash that comes with the camera. This may damage the screen and the camera. In other words, you can’t use fill flash for selfies.)


Thankfully the helicopter had a small open port so I could photograph these magnificent views of Hawaii unimpeded by the surrounding glass windows. With the 16-50mm S-series lens attached, I set the NX500 in shutter priority mode so I could set a 1/2000 second shutter speed and counter vibrations and movement of the helicopter.
Touchscreen Autofocus
I found the user interface more inviting on this camera than on the NX1. Largely that’s because the NX500 forced me to rely entirely on the AMOLED monitor’s touchscreen, which also limited the array of buttons I needed to work with. Not that the NX1 had that many more buttons. It’s just that the AF functionality on the NX1 was somewhat confusing, with buttons governing various AF settings being positioned all over the place. The NX500 has these settings more centralized for faster access.
When it came to focusing on the NX500, I found myself using touchscreen AF operations almost exclusively, something I’d mostly neglected on the NX1 because I had the EVF available to me. To access touchscreen AF, tap the icon on the left, just above the Menu icon. Touch AF automatically focuses on a single point (almost anywhere in the frame) that you select when tapping on the screen, without first requiring you to use the shutter button.
AF Point, however, is a two-step process: tap the screen to select but not focus on a point; hit the shutter button to focus and shoot. One Touch Shot does it all—focuses and shoots when and where you tap the screen. I found the first two modes the most useful. Smartphone camera enthusiasts will likely default to One Touch Shot out of convenience and familiarity.
This is where it may get a bit confusing. If you’ve selected Multi AF (under AF Area in the Menu), the camera defaults to this AF Area mode after the initial Touch AF/AF Point exposure or if you take your finger off the shutter button and hit the shutter button a second time. So be sure to set AF Area to Selection AF to maintain your selected focusing point. And to further mystify you, Touch AF essentially converts to AF Point when you press the shutter button a second time.
Tracking AF is especially inviting with moving subjects. Tap on a spot in the frame and the camera follows the movement, keeping the subject in focus. If the subject moves out of frame, the focusing point defaults to the center of the screen (single selection point or multi-point, as specified under AF Area).
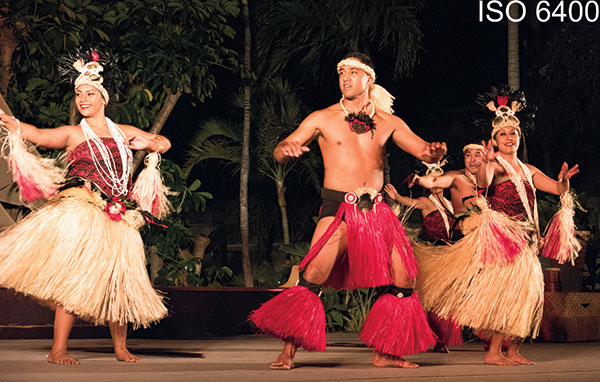

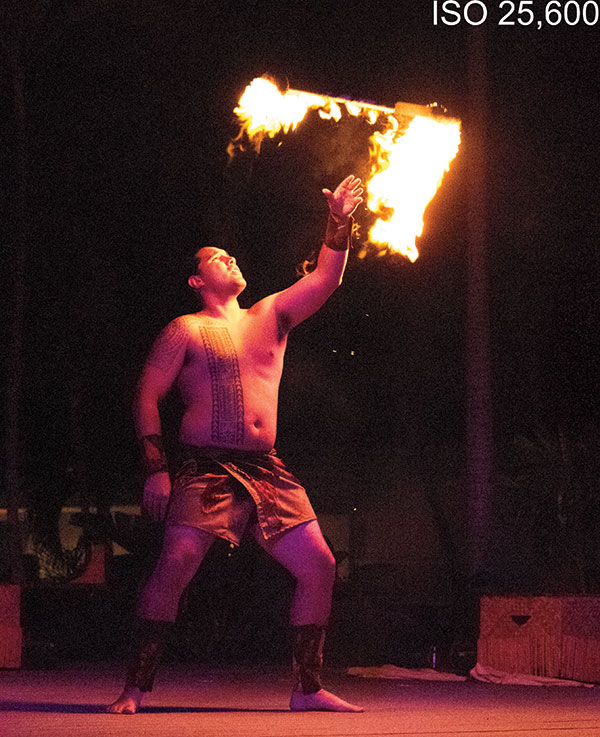

Following the movements of these talented luau performers at The Fairmont Orchid, Hawaii, resort after dark was not a major obstacle, thanks to Tracking AF on the NX500 (with the 50-150mm S-series zoom attached), which did a very competent job of holding focus (unprocessed images, except for cropping). High ISO levels allowed me to control motion. The cropped details in these Raw captures reveal an acceptable level of digital noise at ISO 6400, but considerably more noise at ISO 25,600.
Conclusion
My initial exposure to the Samsung NX500, on a press tour to Hawaii, left me with a very good feeling about the camera. It practically made me a convert to the mirrorless genre. I hadn’t expected the NX500 to deliver a fraction of what it succeeded in capturing, constantly keeping pace and successfully recording moment after moment.
I loved using the touchscreen and found that Tracking AF was a decided asset. I did, however, find myself tapping the screen multiple times on occasion to lock in a focusing point. That said, AF operation was surprisingly fast, no doubt thanks to hybrid AF (a combination of phase-detection and contrast AF) and its plethora of sensors covering practically the entire frame. AF also came to the fore when shooting video with this camera, which was fun and engaging. (I have posted a couple of NX500 videos on YouTube.)
In my hands, the camera felt solid and ergonomic, with a firm grip. What’s more, the brushed aluminum top plate impressed me as a nice touch. Handling the NX500, however, was not without its stumbling blocks.
I occasionally found myself inadvertently hitting buttons on back of the camera, including the video record button, but this no doubt was due to my unfamiliarity with the camera (still, it was annoying).
Color balance when using AWB consistently fell somewhat on the cool side, but was easily corrected. Noise levels were commendable up through ISO 3200, still got a passing grade at ISO 6400, but were somewhat noisy beyond that, although still usable.
All in all, I feel the camera has much to offer photo enthusiasts who want to get away from their cell phone cameras or simple point-and-shoots and move up to something with a bit more bite. I demanded as much of this compact system camera as I would have of my go-to DSLR, and the NX500 delivered almost unfailingly. The price combined with its proven performance make the Samsung NX500 a great value.
NX1 vs. NX500
Trying to decide between the Samsung NX1 and the NX500, which share very similar features but different camera builds? When it comes down to it, it’s more about the feel of the camera in your hands and your mindset when working with it. I would use the NX1 as my main camera on assignment and the NX500 as backup. On the other hand, for tooling around town or on vacation, the NX500 would be my first choice.


![]()
Get the Latest Photo Tips, News & Reviews from Shutterbug!
| Camera Reviews Other Reviews | Mobile Reviews Photography Reviews Columns | News | Features | How-To | Resources |
 © 2025 Shutterbug
AVTech Media Americas Inc., USA
All rights reserved