- REVIEWS
Camera Reviews 
More Reviews Mobile Reviews Photography Reviews - GALLERIES
- VIDEOS
- BUYER'S GUIDES
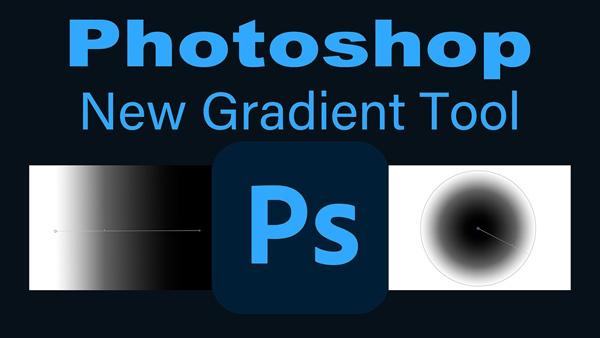
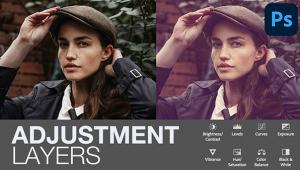
Photoshop's New Gradient Tool: Real-Time Visual Feedback & More (VIDEO)
Adobe created quite a buzz with the recent update to Photoshop, much of it with regard to new Generative Fill capabilities. But there's another significant improvement that hasn't received quite the attention it deserves.
Photoshop's Gradient tool received a big bump in productivity, as you'll see in the tutorial below from the Joy of editing YouTube channel. Among other enhancements, this helpful tool now provides real-time visual feedback.
According to instructor Dave Kelly, this headline feature now enables you to "effortlessly preview and enhance your photography with precision gradient adjustments." Kelly demonstrates how this works, in barely 14 minutes, while explaining other improvements to the Gradient tool.
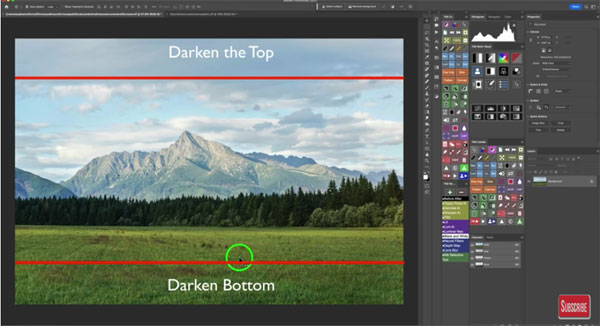
Kelley says "this is a really great addition to Photoshop," and he uses two images to walk you through the process. His first example is a landscape scene when a mountain looming in the distance. His simple goal here is to darken both the sky and the foreground.
The first step is to grab a Curves adjustment layer. Then Kelly changes the Blend mode from Normal to Multiply to initially darken the entire image. He inverts his white mask (to make the darkening adjustment invisible) and gets to work with the Gradient tool's hot new features.
Kelly illustrates the types of gradients available and provides keyboard shortcuts to speed up the step-by-step process. The enhancements work really well, and they happen in a hurry. There's also an option to use the old and familiar "classic" Gradient tool, but by the end of this lesson it's unlikely you'll want to do that.

The second demonstration image is a tight wildlife shot of an imposing big cat in the very foreground with a soft-focus background that is pretty effective. For this shot Kelly wants to add some extra impact with a warm golden glow in the upper right corner of the scene.
For this straightforward edit Kelly says a Radial gradient is the best way to go because it enables him to give the glow a realistic contour. As you'll see, this requires barely more that placing your cursor in the corner of the image and dragging the gradient down and toward the middle of the frame.
He then opens the color picker, chooses the perfect tone, and changes the blend mode from Normal to Screen. A few quick minor tweaks and the transformation is complete.
After watching the video head over to Kelly's YouTube channel where you'll find more straightforward lessons like this. And don't miss a recent tutorial we posted, explaining why "local adjustments" are the key to the best photo edits possible.


![]()
Get the Latest Photo Tips, News & Reviews from Shutterbug!
| Camera Reviews Other Reviews | Mobile Reviews Photography Reviews Columns | News | Features | How-To | Resources |
 © 2025 Shutterbug
AVTech Media Americas Inc., USA
All rights reserved