- REVIEWS
Camera Reviews 
More Reviews Mobile Reviews Photography Reviews - GALLERIES
- VIDEOS
- BUYER'S GUIDES
Photoshop Tips: Here’s How to Add Clouds & Enhance Colors for More Dramatic Landscape Photos (VIDEO)

One lesson all outdoor photographers learn is that there’s a big difference between a beautiful location and a great landscape photograph. That’s because no matter how gorgeous the setting, if you arrive on a cloudless day with poor light and drab colors, there’s not much you can do to capture a stunning shot.
Another lesson we’ve all learned is to make the most of the cards we are dealt, because with a bit of editing skill it’s often possible to turn a boring image into a great one. That’s what you’ll learn how to do in the video below, as image-editing expert Unmesh Dinda provides an in-depth Photoshop tutorial on rehabilitating ho-hum landscape photos.
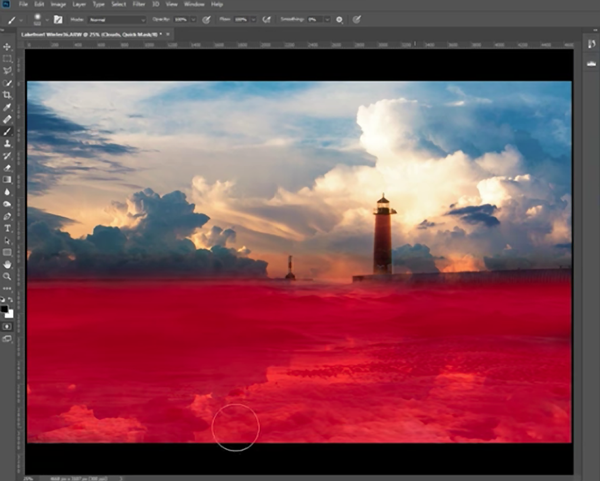
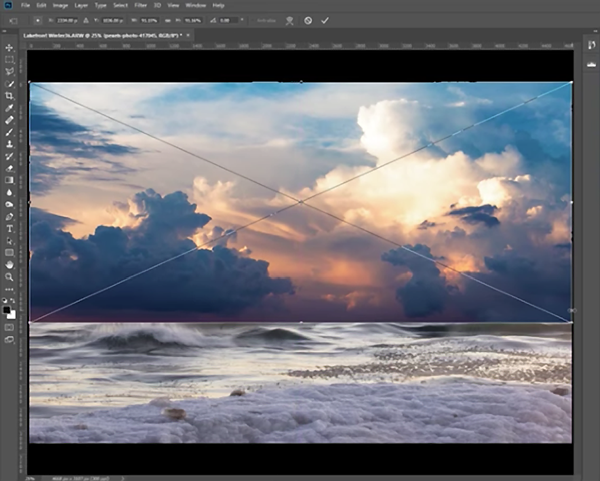
Dinda explains a number of powerful techniques to achieve two primary goals. He demonstrates how to replace a drab sky and add dramatic clouds, and then render the colors of the photo in a way that creates a vibrant mood with a natural look.

While Dinda’s approach is remarkable in the way it transforms his photo, he explains the process in a step-by-step fashion that’s both simple to execute and easy to remember, so that you can use it in the future whenever necessary. You’ll learn a how to use Curves, adjustment layers, and a combination of filters to make colors really pop.

But the real key to this tutorial is a simple technique for using blend modes to add clouds to a lifeless sky. Once you master the techniques in this 34-minute video, you’ll be far less likely to move boring landscape photos to the trash.
You can find more helpful editing advice on Dinda’s YouTube channel. And since we all prefer to get the shot in the camera, be sure to look at yesterday’s story with several great tips for using a telephoto lens when shooting landscapes.


![]()
Get the Latest Photo Tips, News & Reviews from Shutterbug!
| Camera Reviews Other Reviews | Mobile Reviews Photography Reviews Columns | News | Features | How-To | Resources |
 © 2026 Shutterbug
AVTech Media Americas Inc., USA
All rights reserved